Want to add fun, flawless dots to your manicure? Whether you’re going for classic polka dots, tiny flowers or trendy minimalist designs, a dotting tool is your new best friend.
In this guide, we’ll show you exactly how to use one, what size to choose, and how to get clean, even dots every time no pro skills needed.
What is a dotting tool and why it’s a nail art essential
A dotting tool is a small, pen-like stick with a rounded metal tip used to create perfect dots on your nails. It might look simple, but it’s seriously versatile.
You can use it for polka dots, flowers, animal prints, hearts, or even abstract patterns. If you love doing your own nails and want to add some personality to your mani without needing pro-level skills, this little tool is a total game-changer.
Different dotting tool sizes and what they’re for
Dotting tools usually come with two tips, one on each end, and vary in size from teeny-tiny to quite chunky. Smaller tips are great for fine details like flower petals, freckles or delicate dotted lines.
Bigger ones are perfect for bolder dots, eyes on cartoon designs, or to build up rounded 3D accents using gel.
Having a few different sizes gives you more creative freedom and lets you layer or fade your dots for cool effects.
How to prep your nails before using a dotting tool
Before you dive in with the dotting tool, you need a clean, smooth canvas. Start by filing and shaping your nails, then push back your cuticles and remove any oils with a nail cleanser or rubbing alcohol.
Apply a base coat and your chosen base colour. This could be a nude, pastel, or dark shade, depending on your design. Make sure the base layer is fully dry before dotting, or your dots might smudge or drag.
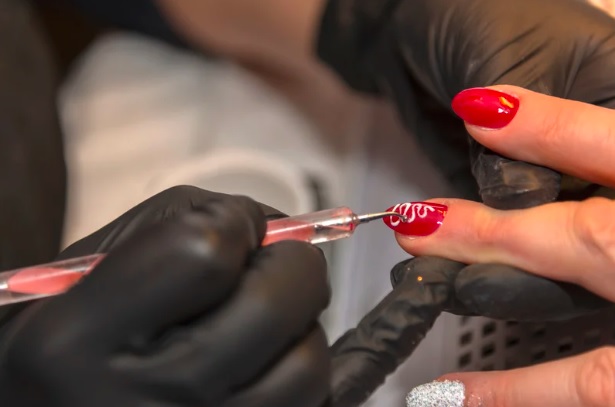
Easy dotting techniques for beginners
Start simple! Dip your dotting tool into a small blob of polish (you can place it on foil or a palette) and gently press it onto your nail. Don’t drag it, just press and lift.
Try doing a few dots in a straight line or a little flower with five dots around one in the centre. Space your dots evenly and use a light hand. For a dotted French tip, use the tool along the edge of your nail instead of painting a solid line. It’s cute and easy.


Nail polish or gel? What works best with a dotting tool
You can use both, but it depends on your setup. Nail polish works well for beginners and dries quickly, which is handy but that also means you need to work fast before it gets tacky.
Gel polish gives you more time to play and fix mistakes, as it only cures under a lamp. It also allows for 3D dots and more detailed layering.
If you’re new to nail art, start with regular polish to get the hang of it, then try gels when you’re ready for longer-lasting looks.
Some cute and creative looks you can try right now
Looking for inspiration? Try pastel polka dots over a white base, great for spring. Or go monochrome with black dots on nude nails for something more minimal.
Flowers are easy too: just dot five petals in a circle and add a contrasting colour in the middle. You can also try leopard print: make uneven dots with a larger tool and outline them with a fine brush for that wild effect. Feeling festive? Red and white dots give you a fun, Christmassy vibe.


How to clean your dotting tool properly
Keeping your dotting tool clean is key for crisp dots. Wipe off excess polish right after use with a cotton pad soaked in nail polish remover or alcohol.
Don’t let polish dry on the tip, it’ll make future dots messy. If you use gel, wipe the tip before curing to avoid hardening product onto the tool. Store it dry and keep the tips covered (some come with caps) so they stay in perfect shape.
Common mistakes to avoid when using a dotting tool
One of the biggest mistakes is using too much polish…it causes messy, blobby dots. Another is pressing too hard or dragging the tool, which ruins the shape.
Also, dipping the tool into thick polish doesn’t work well; use fresh, smooth polish or gel. Make sure your base is dry before dotting, and try not to overload your design with too many dots…it’s easy to go overboard!
Combine your dotting tool with brushes, tape or glitter for layered, next-level designs
Once you’re confident with basic dots, start mixing it up! Add lines with a thin brush, or use striping tape to create sections and dot within the borders.
Try glitter dots for a bit of sparkle, or layer dots over gradient backgrounds for more depth. Want to get fancy? Use a dotting tool to apply tiny rhinestones or caviar beads. It gives a luxe, textured finish without needing tweezers.


How to store your dotting tools and keep them in top shape
Dotting tools are low-maintenance, but a little care goes a long way. Keep them in a pouch or a small container to avoid bending or dulling the tips.
Make sure they’re completely dry before putting them away, especially if you’ve used remover or alcohol.
Avoid letting them roll around loose with other tools, and if your set includes different sizes, label or group them so you can grab the right one quickly.
Ready to dot like a pro? Your nail art journey starts here
Mastering how to use a dotting tool can seriously level up your nail game, whether you’re going for small dots, a perfect circle, or experimenting with various shapes.
It all comes down to practice, patience and the right angle. Think of your dotting tool like a tiny pencil: how you hold it and the pressure you apply makes all the difference.
Try holding it at a 90-degree angle for even, rounded dots, or tilt slightly if you’re aiming for an oval effect. Don’t forget to protect your finished design with a top coat, this locks in your art and helps everything last longer.
Want to go from hobby to profession?
Become a certified nail technician with Beautylearn’s online nail courses. Learn at your own pace, get expert tips and start building your dream career. Join the Beautylearn community today!