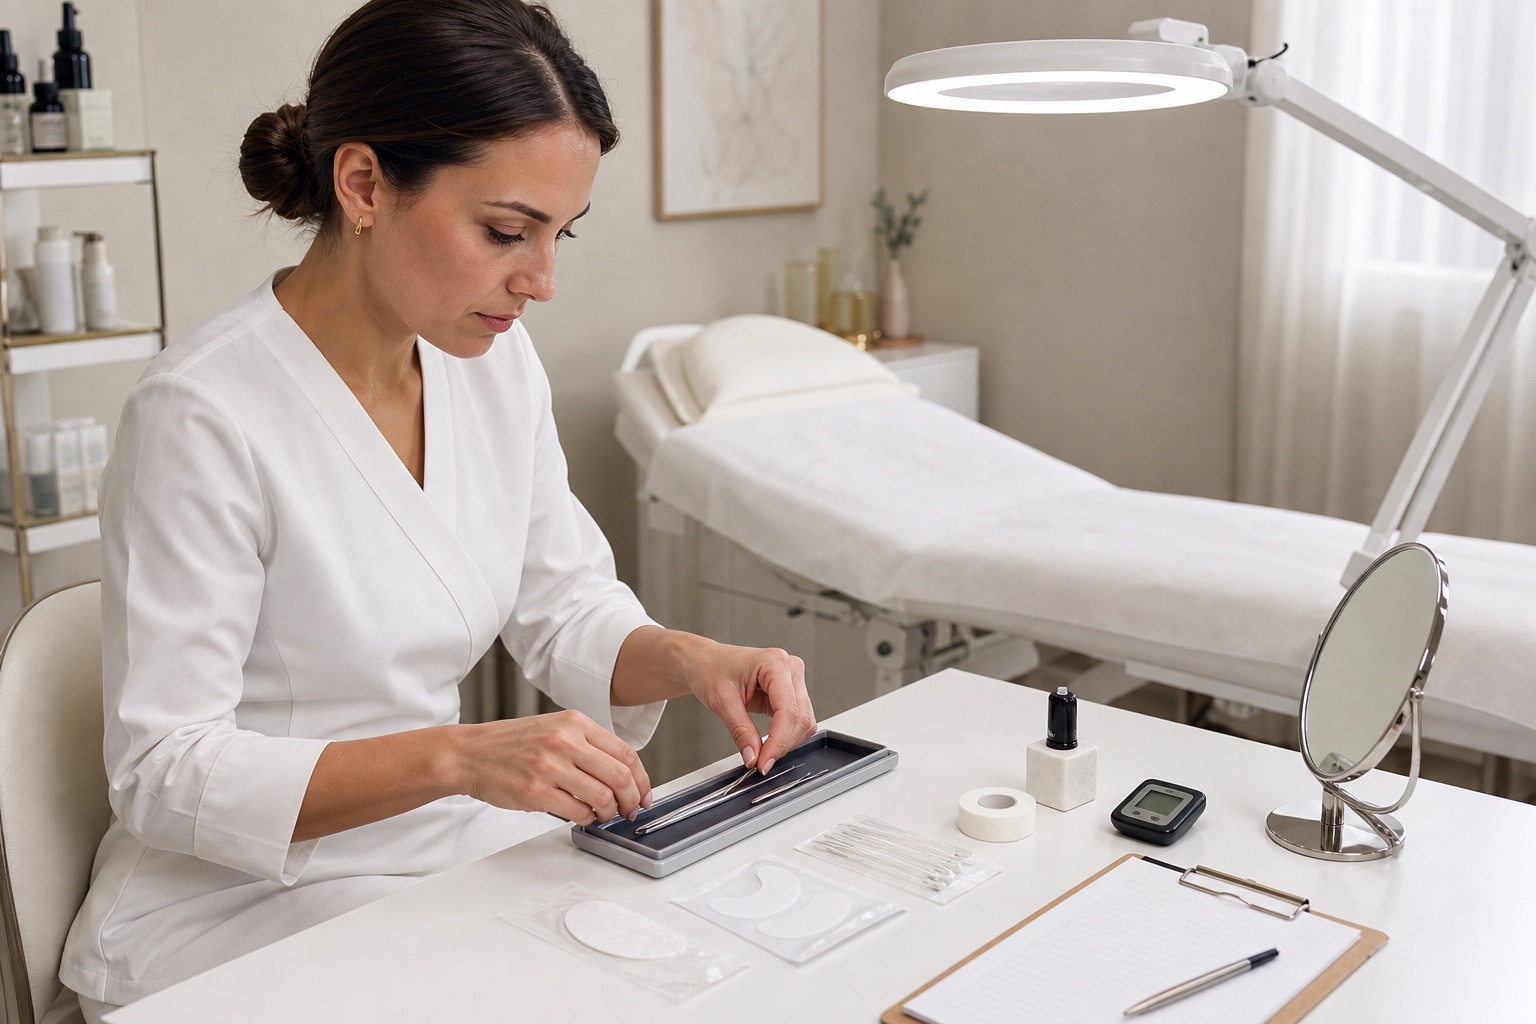
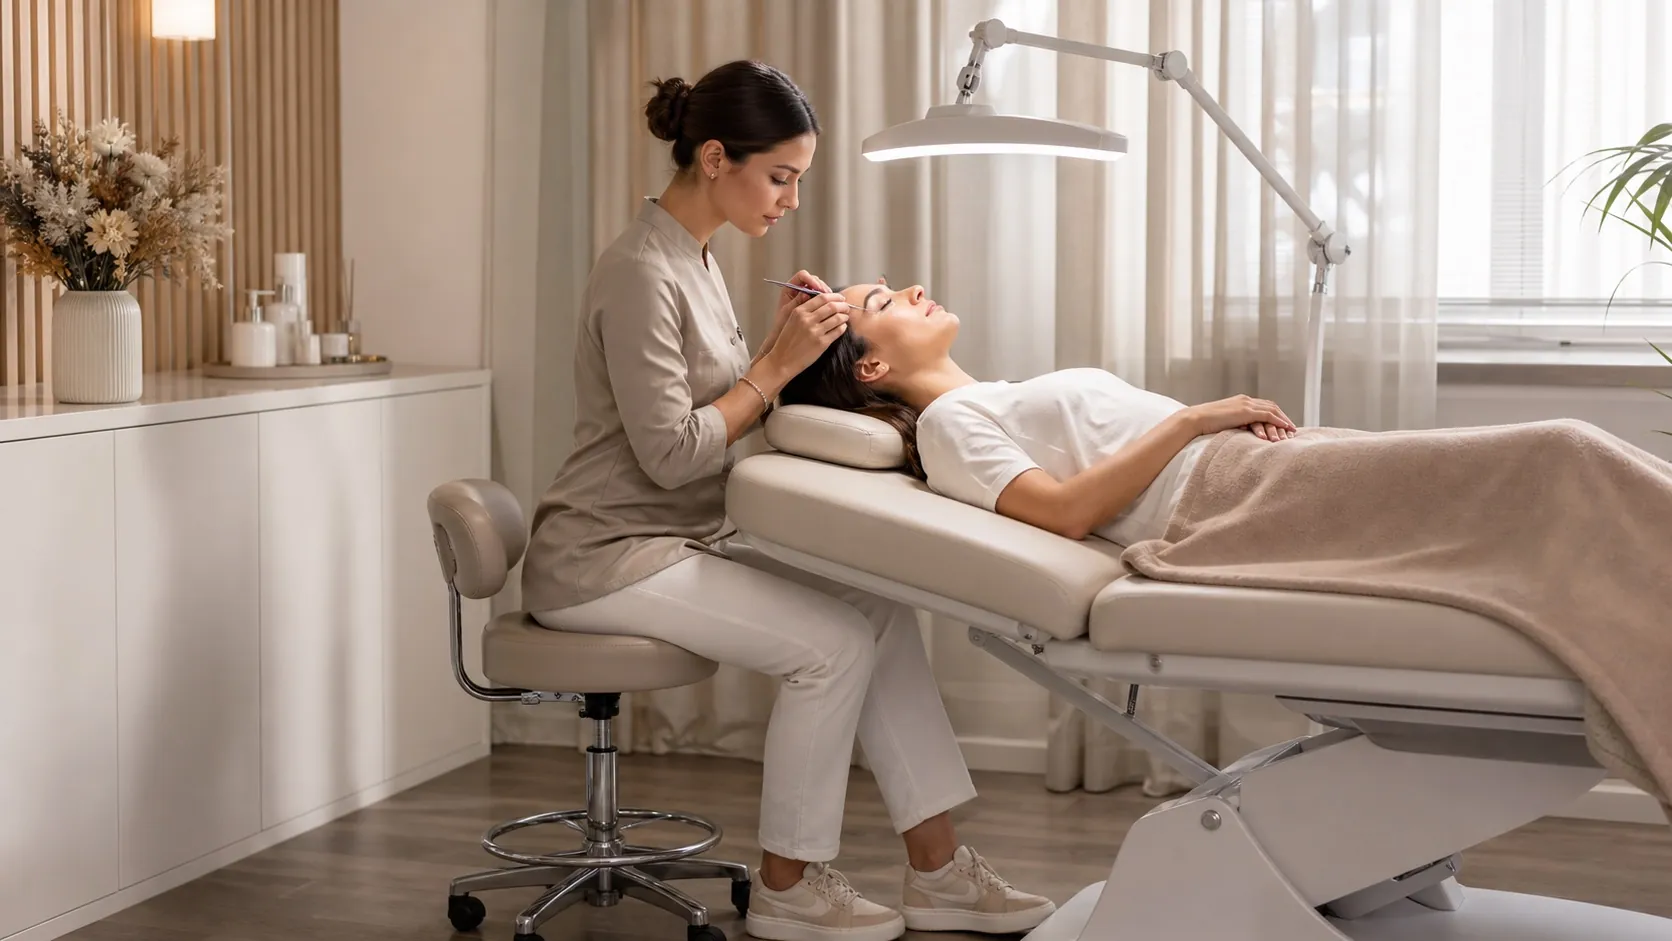
If you lean forward, lift a shoulder or bend your wrist to see the lashes, start with your workstation: bring the working field towards you, clear space for the stool and check the light and tools. The four practical cases below show what to observe, which adjustment to try and how to check it.
There are no universal measurements: height, distance, lighting and breaks depend on the practitioner, client, service and equipment. This guide is educational and does not replace an individual workplace risk or health assessment. See the stop signals for when to pause and seek help.
Last substantive update: 23 September 2026.
Quick setup order for a lash workstation
Position the client and support the head; adjust the working field before the lamp.
Bring the stool closer without hitting the frame and provide stable foot support.
Keep frequently used tools and materials within reach, preserving the clean-to-used flow.
Aim the light and rehearse with both tweezers: check shadows, grip and supports.
Plan position changes during safe phases and actual recovery time in the diary.
Ergonomics is a system, not a perfect posture
Ergonomics considers the whole task, equipment and environment. NIOSH guidance on risk factors identifies force, repetition, awkward posture and static work as interacting conditions. If the bed is too low, the lamp casts shadows and the trolley is distant, telling yourself to sit upright will not resolve the setup.
An adjustment is useful if you can see, reach and control the movement with fewer compensations while remaining free to move. For cleaning, use the lash workstation hygiene guide; for equipment selection, see the professional lash artist kit.
Audit one complete service before buying equipment
Observe a complete sequence: preparation, isolation, application and checks. If you use photos or video, obtain the necessary permission and avoid unnecessary client identifiers. Note the phase in which you lean, raise a shoulder, grip harder or twist towards the trolley.
Record duration, side, tools and perceived discomfort without diagnosing its cause. Change one main variable at a time and compare similar services: the weekly worksheet makes that comparison easier to follow.
Adjust in order: client, bed, stool, light and tools
Start with the client's head, comfortably supported and stable; then adjust the bed, stool and foot support. Only then position the trolley, supports and lamp. Ask whether the client finds the position and light comfortable, and rehearse the movement before starting.
Treatment bed: height, head access and mechanical stability
Check working height and space beneath the frame together. You should be able to bring the stool and forearms closer without hitting your knees. Use compatible headrests and accessories and follow the manufacturer's load, stability and adjustment instructions.
Check the controls before covering the bed, lock castors where provided and keep access clear. Adjustment mechanisms must not trap cables or interfere with the trolley. After changing the height, confirm that the bed does not move unexpectedly. A comfortable position is unusable if the base is unstable.
Stool and foot support: stability with room to move
Try the stool in the actual workstation: check height, stability, close access and foot support on the floor or a purpose-designed footrest. Saddle seats and backrests are options to test during your work. Avoid improvised risers, cables between castors and settings that shift under load.
Working distance and visual demand
When detail is hard to see, moving your face towards the lashes can become an automatic response. First bring the field closer, adjust the client's supported head and review illumination. Have individual vision needs assessed by an appropriate professional. Magnification has its own focal distance and will not automatically correct poor light or working distance.
Clear vision also supports one-to-one isolation and volume work. Workstation adjustments help you perform the checks with fewer compensations; they do not shorten or replace the final control.
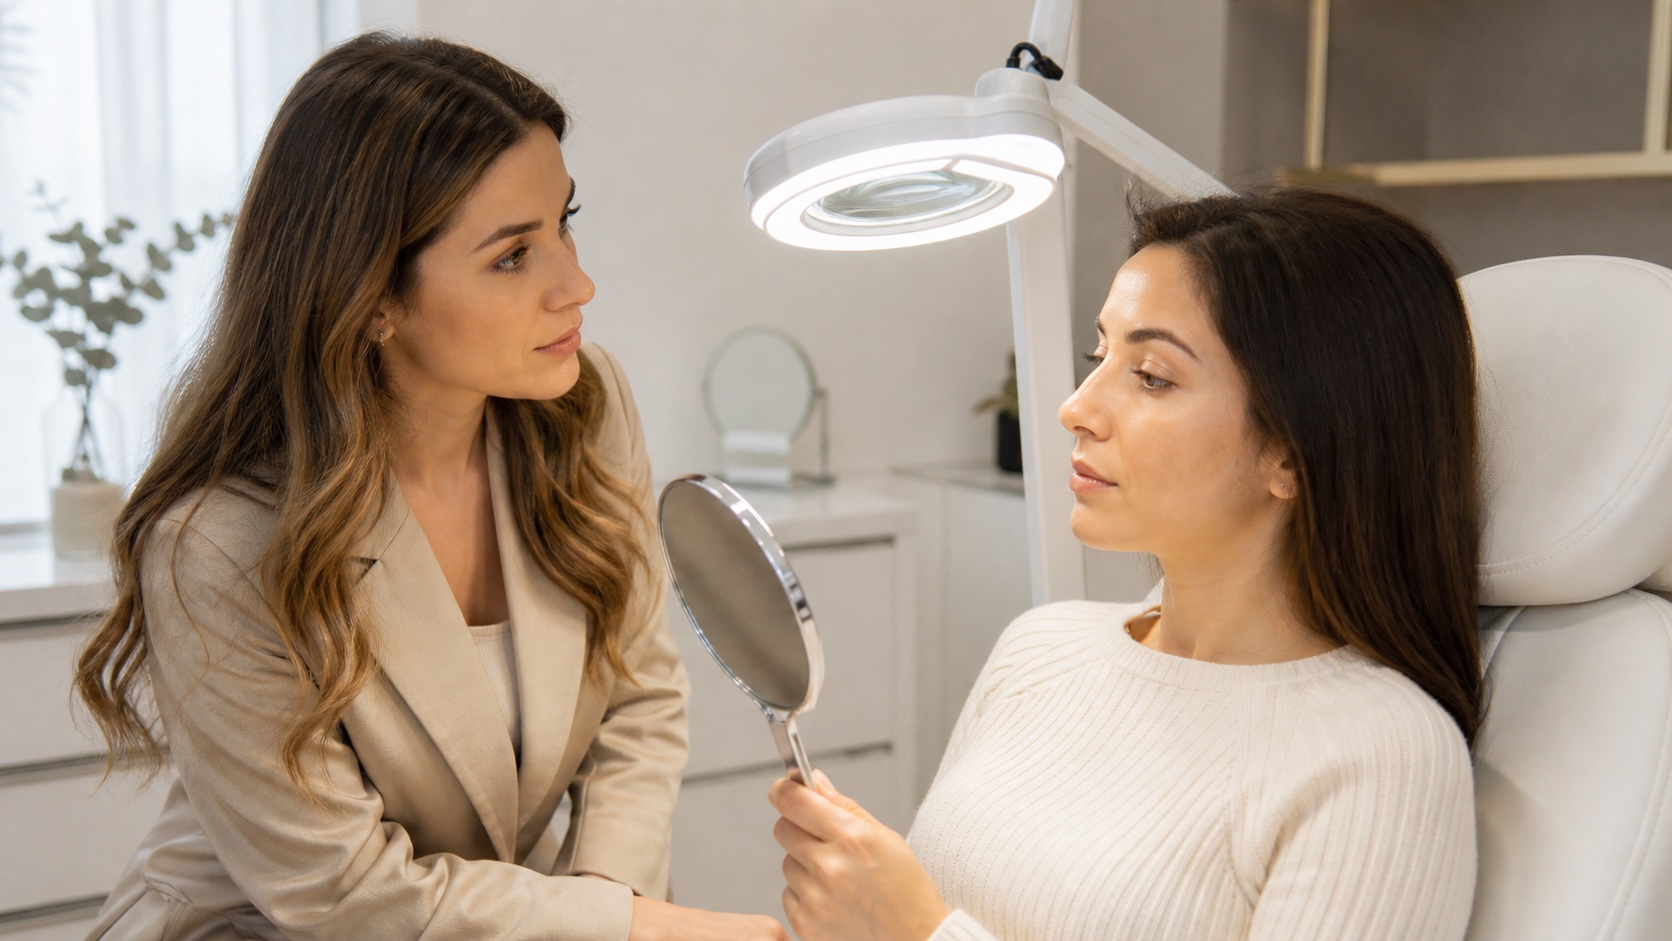
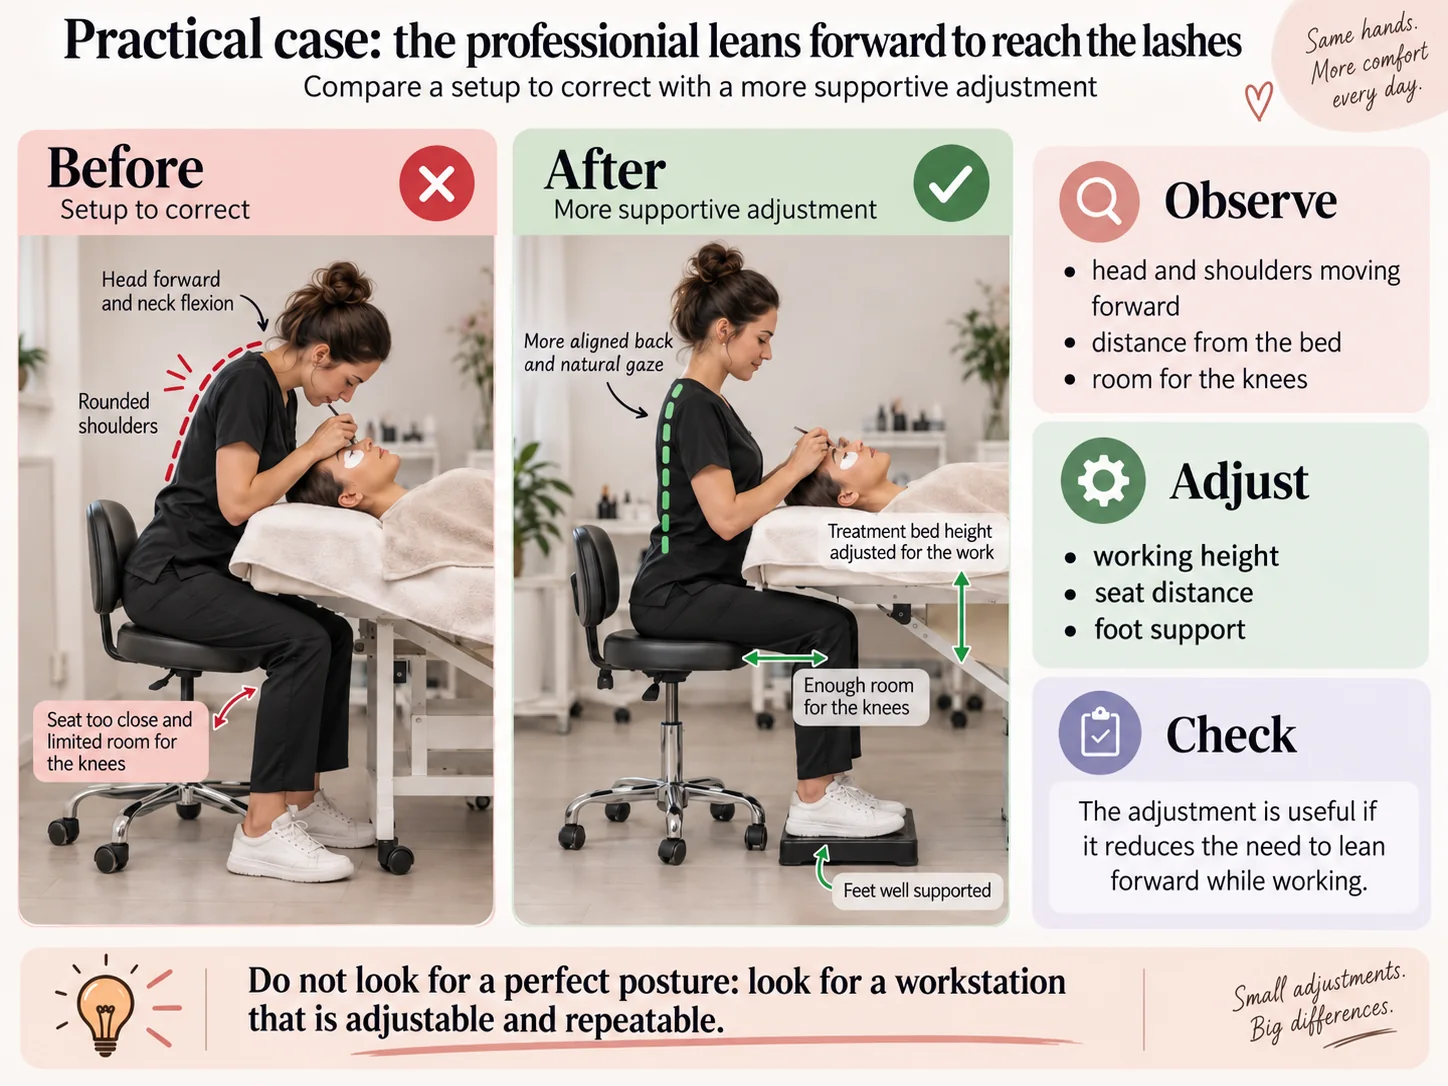
Practical case 1: you lean forward to reach the lashes
 Open the full-size image (new tab)
Observe: the head and shoulders move forward, the trunk bends and knee space is limited.
Try: adjust bed height and stool distance, then check foot support. Sitting too close can obstruct your knees, just as sitting too far away can make you reach forward.
Check: rehearse on both eyes. Keep the adjustment if you reach the field with less forward leaning and can change position without compromising the client's comfort.
Task light: detail, shadow, reflection and glare
Close, accurate work needs lighting suited to the detail. HSE guidance on vision and lighting recommends making the task visible without squinting or changing posture, while controlling shadows, reflections, flicker and glare.
Test both eyes with the hands and tools in position. Keep the source, cable and arm stable and out of the stool's path. The HSE guide Lighting at work relates lighting to the task and the person; this guide does not prescribe a universal lux value.
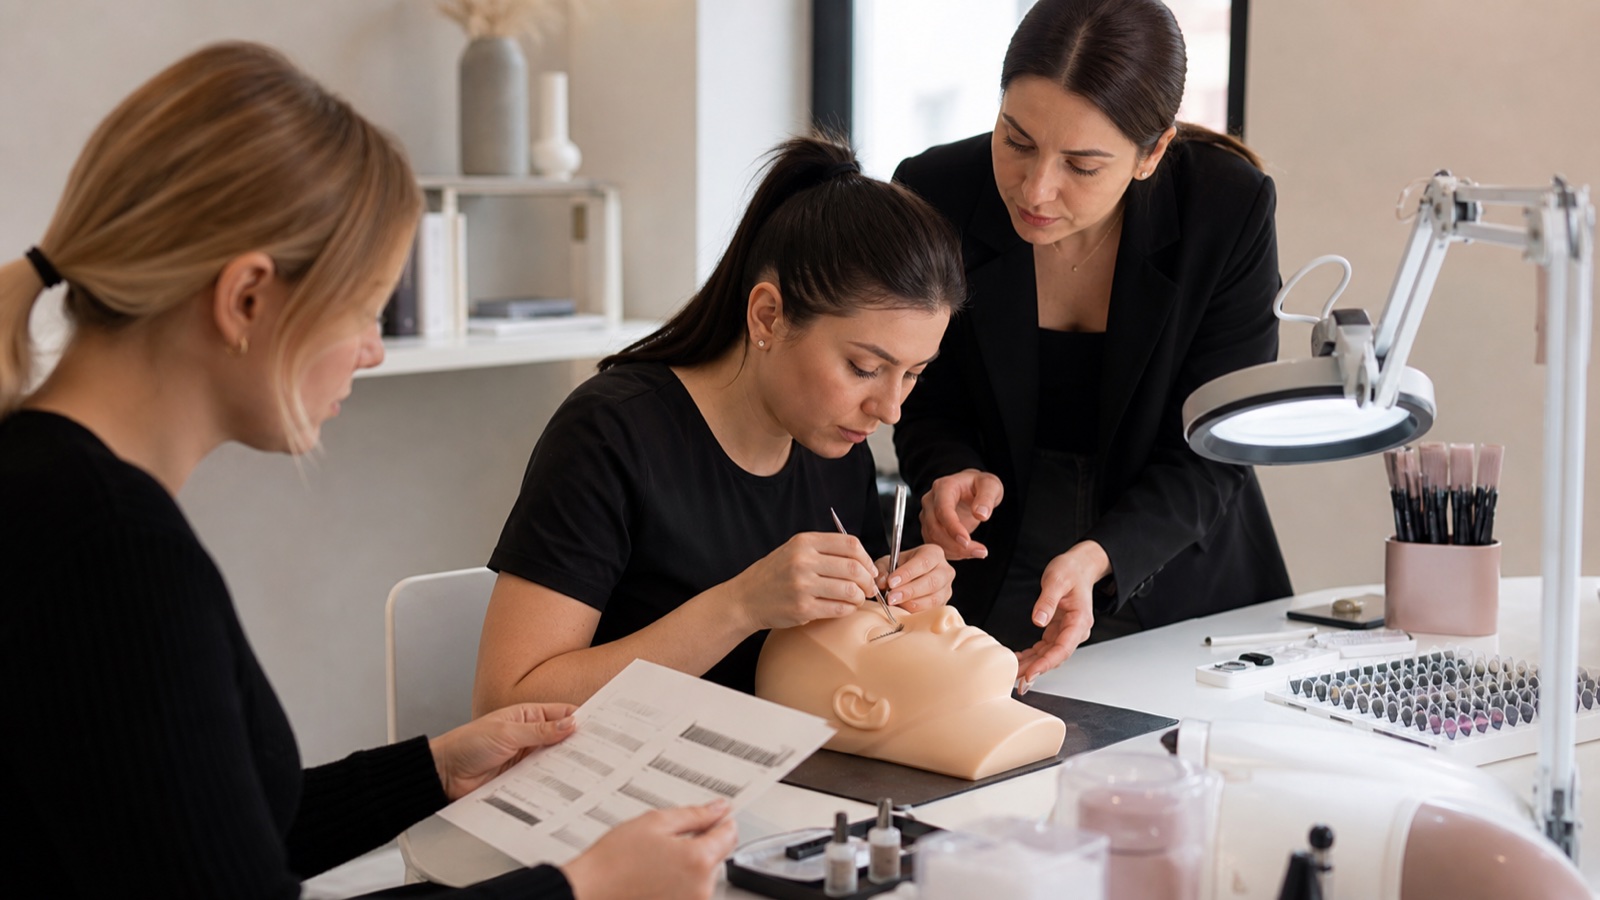
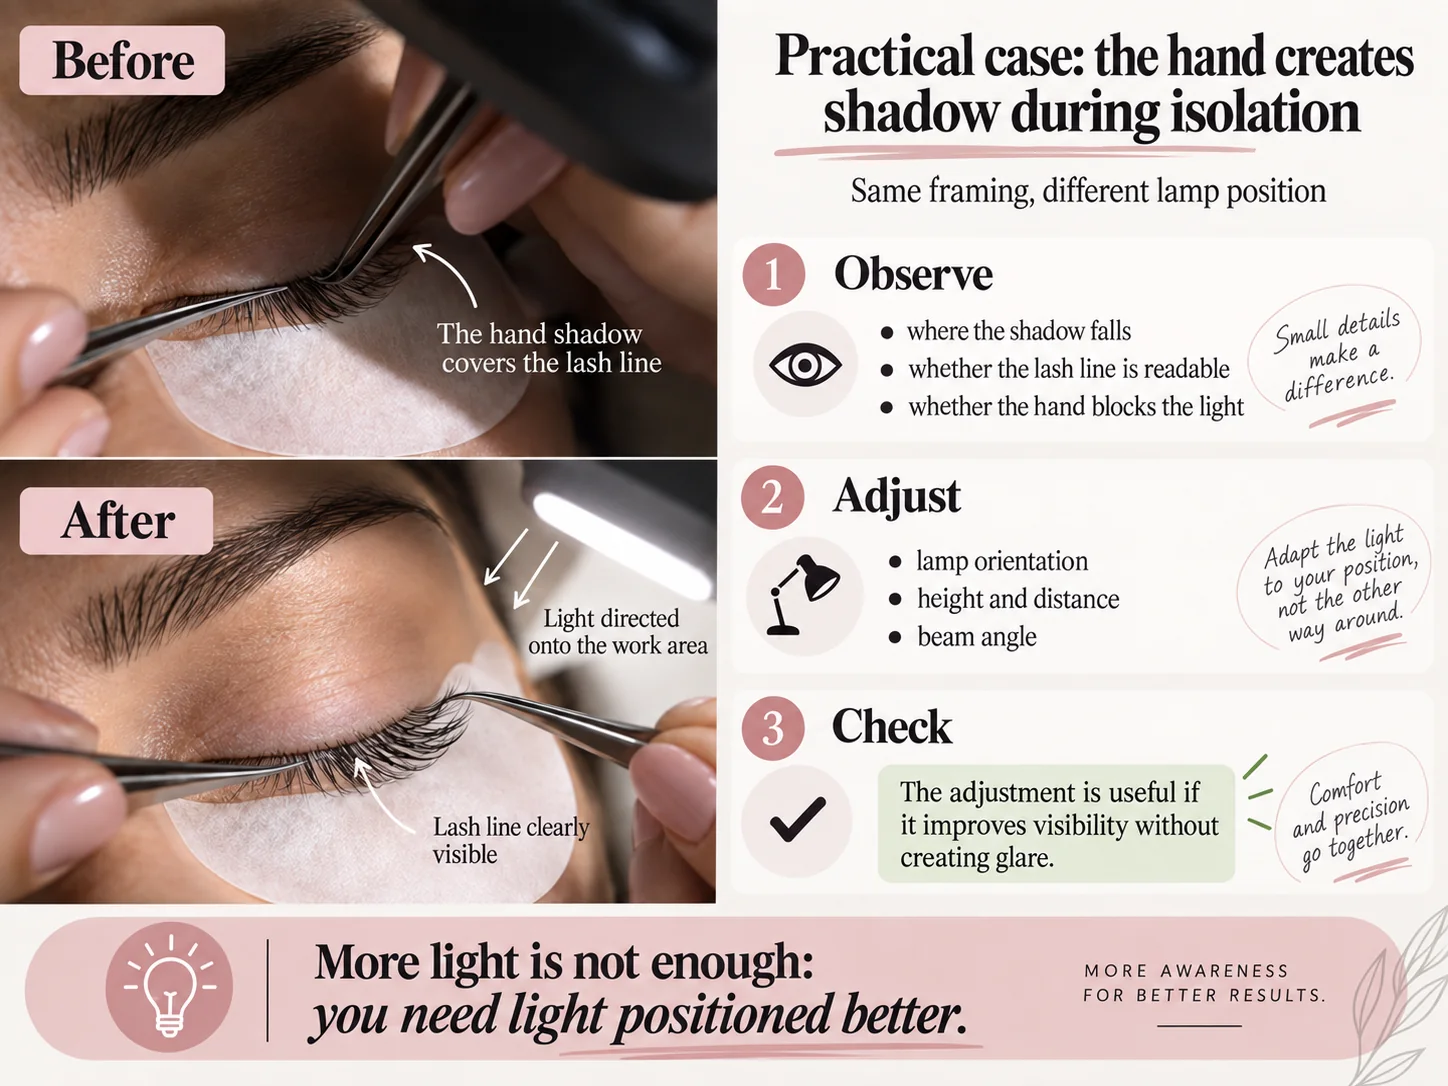
Practical case 2: your hand casts a shadow during isolation
 Open the full-size image (new tab)
Observe: in the first panel, the hand obscures the lash line. Reproduce the working movement: a lamp that looks well aimed with your hands still may cast a shadow once you start.
Try: change lamp orientation, height or distance and check the field again. Increasing brightness alone can leave the same shadow and add reflections.
Check: the lash line should remain visible with both hands in position and without glare. Assess the actual task; a difference between two pictures alone does not measure lighting quality.
To document a trial with comparable images, follow the guide to photographing extensions and lash lifts.
Tweezer ergonomics: grip force, balance and wrist
The CCOHS guide to hand-tool design considers tool choice alongside the workstation, task and schedule. It recommends avoiding wrist deviation and unnecessary grip demands. For lash work, assess whether spring resistance, grip edges or the working position force you to squeeze continuously or hold the wrist bent.
Choose tweezers for the task and your hand: test closure, tip alignment, balance and the force required. If precision drops, check the tool, lighting and support before squeezing harder. Remove damaged or unreliable tweezers from use.
Hand and forearm support without losing control
Where the setup and service protocol allow, use a stable, cleanable support for part of the forearm or hand without pressing on the eyeball or eye area. The support must preserve hygiene and the client's comfort. Do not transfer your body weight onto the client to obtain precision.
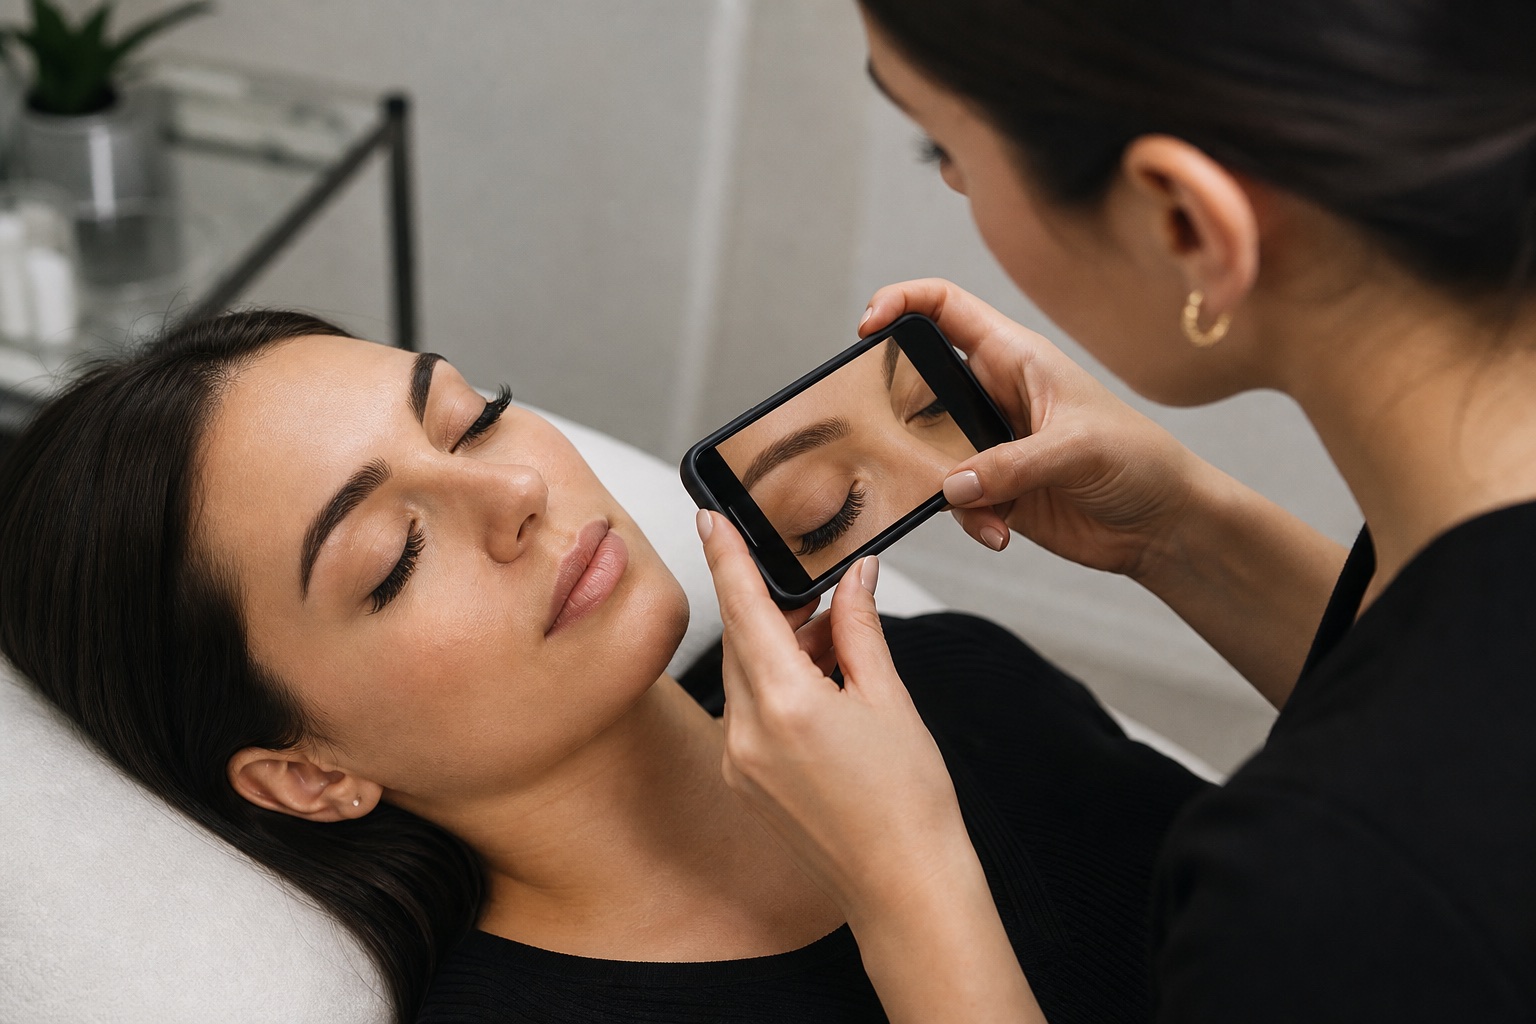
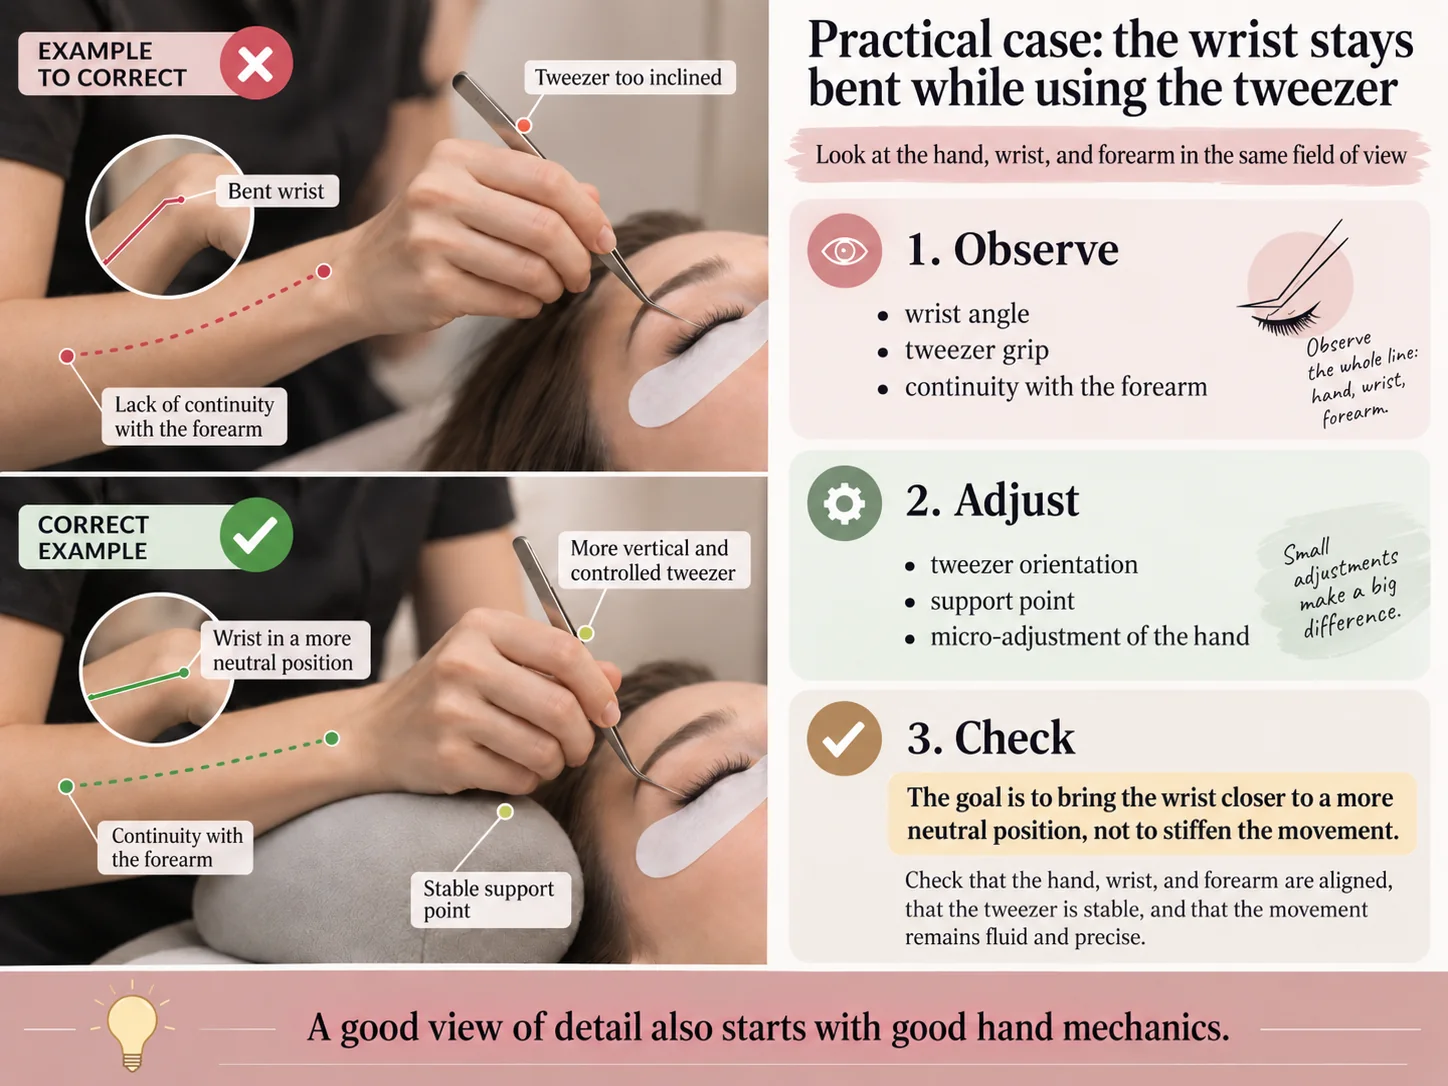
Practical case 3: your wrist stays bent while using tweezers
 Open the full-size image (new tab)
Observe: look at the hand, wrist and forearm together, not only the tweezer tips. Notice whether the support edge makes the wrist bend.
Try: adjust grip, tool orientation and a stable, cleanable support without transferring weight onto the eye or client. The more upright tweezers in the image show one configuration, not a rule for every technique.
Check: aim for a wrist close to neutral and controlled grip with the lowest sufficient force. Reconsider the adjustment if it reduces precision or increases effort.
Tray reach zones and clean-to-used flow
Divide the station into reach zones. Keep continuously used items in the primary zone, accessible without lifting the shoulder or twisting the trunk. Put occasional supplies in a secondary zone and stock away from the working area. An overloaded trolley adds searching, reaching and opportunities to disrupt the hygiene flow.
Accessibility must preserve the clean-to-used flow. Do not move contaminated items into the clean zone for convenience or rest instruments on surfaces that cannot be processed safely. Use the workstation hygiene protocol to define those steps, then organise their position.
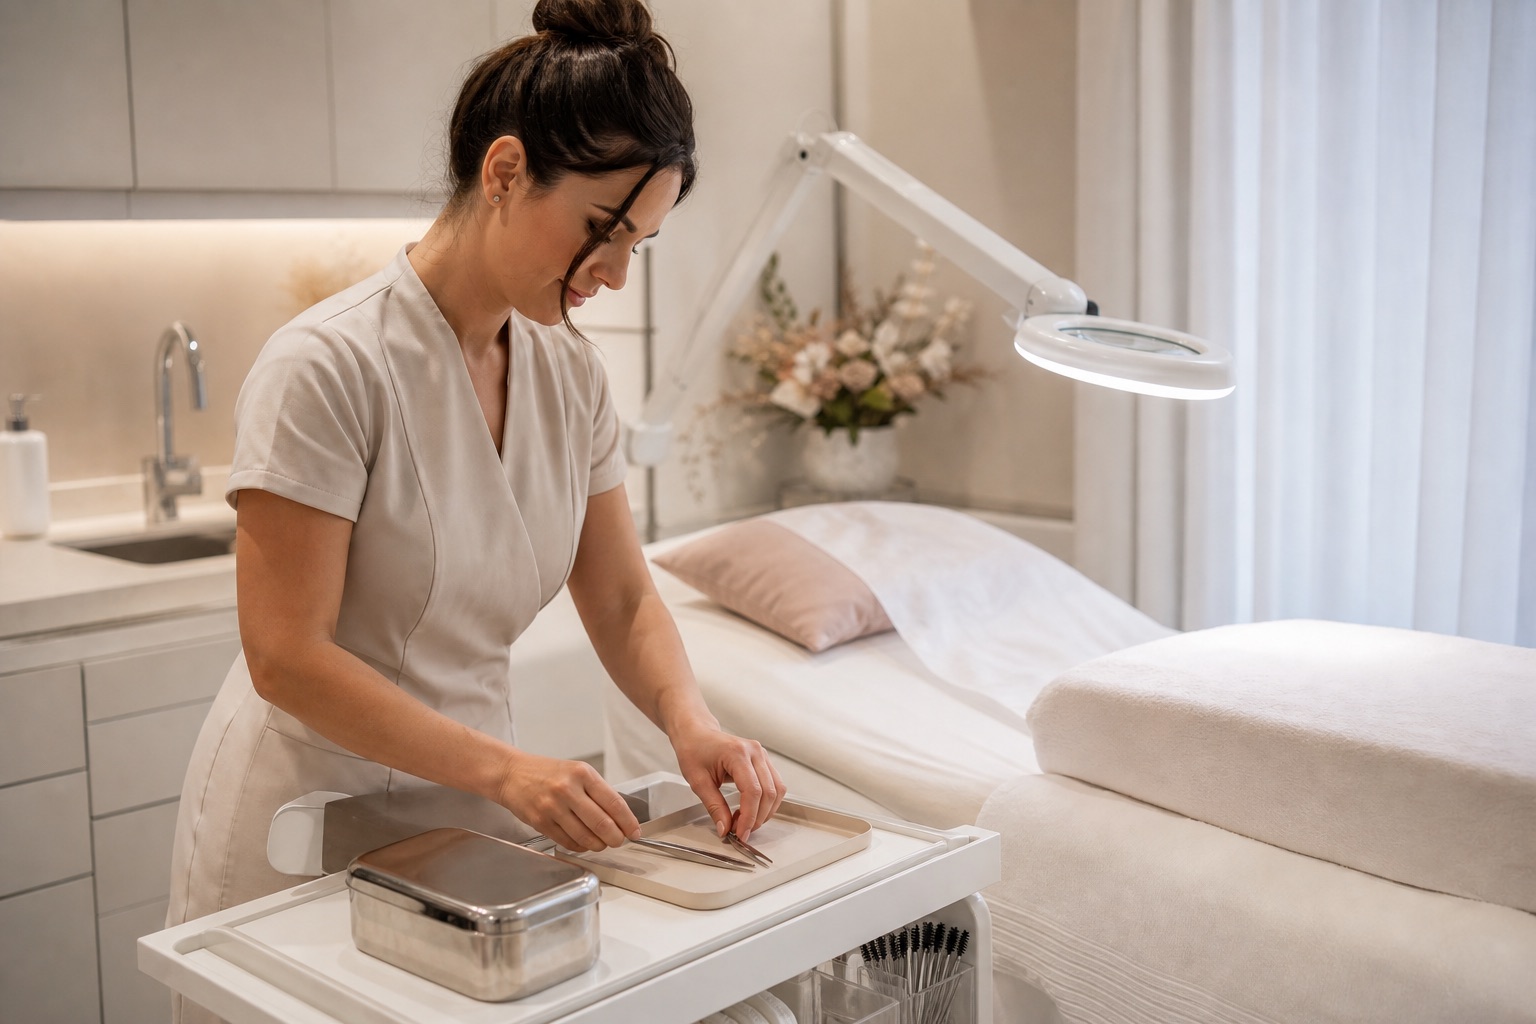
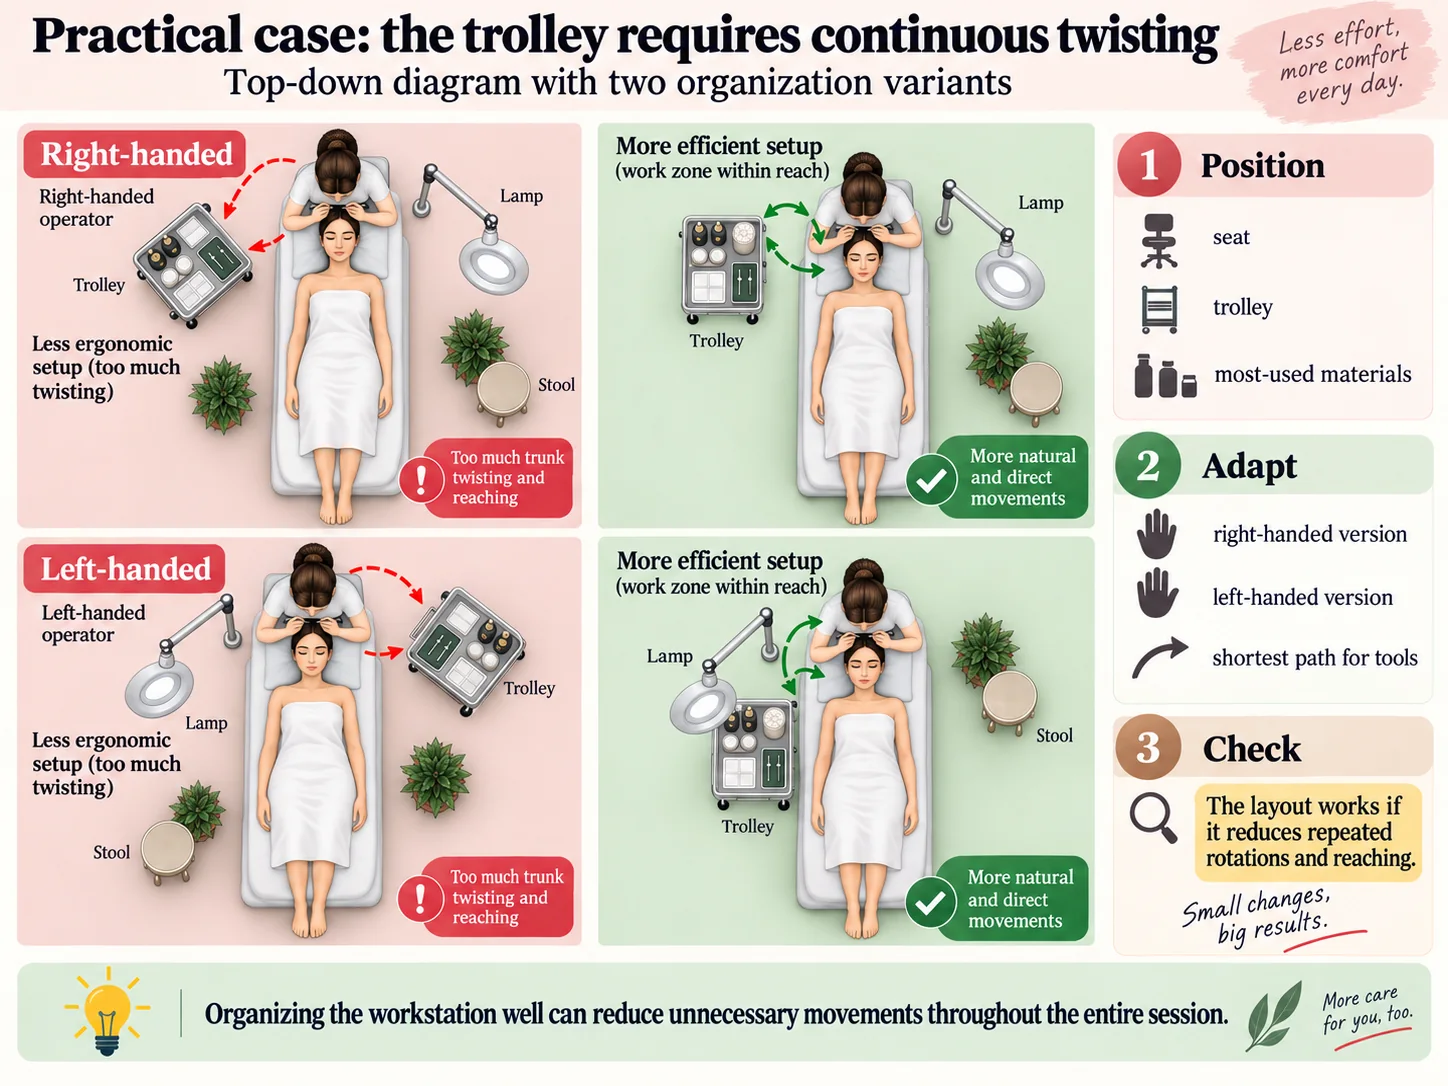
Practical case 4: the trolley requires repeated twisting
 Open the full-size image (new tab)
Observe: follow both hands as they reach for tweezers, adhesive and supports. Count the repeated trunk turns or reaches for frequently used items.
Try: bring those materials closer and clear the primary reach zone. The diagram offers layouts to compare; verify left and right from the seated practitioner's position.
Check: repeat the same sequence and assess whether twisting and reaching decrease without moving materials across the client's face or obstructing the lamp, cables or clean-to-used flow.
Right-handed, left-handed and adaptable stations
If you are left-handed, test both hands' routes instead of automatically copying a right-handed layout. The trolley and lamp should be movable; check controls and clear space. The diagram is a starting point: the actual movement determines the useful side.
Pregnancy, disability, recovery from injury and individual conditions need personalised workplace and health input. Do not apply a generic adaptation from this guide. Inclusive ergonomics means the system can be adjusted and limitations documented, not that one configuration suits everyone.
Static load, micro-pauses and task variation
Separate a change of task from actual recovery: cleaning, messages and record keeping remain work, even when they interrupt tweezer use. Plan task variation and recovery around the complete service rather than filling every available booking slot.
Use safe transitions to release your grip, change position and look briefly away from close detail. Secure sharp tools before pausing, do not interrupt a delicate step, and do not force painful movements. If the setup prevents position changes, clear the space first.
Example schedule: treatment, ancillary tasks and recovery
This is an example of organisation, not a prescribed service length or a break interval for everyone. Adapt timings and buffers to the treatment, client and workplace assessment. Safe micro-pauses can also occur during treatment: the table does not prescribe 90 minutes of uninterrupted work.
Example time | Duration | Time category | What it includes |
|---|---|---|---|
09:00–09:15 | 15 min | Ancillary tasks | Consultation, preparation and workstation adjustment. |
09:15–10:45 | 90 min | Treatment | Service and checks; position changes during safe transitions. |
10:45–11:00 | 15 min | Ancillary tasks | Aftercare, payment, records, turnover and hygiene. |
11:00–11:15 | 15 min | Actual recovery | Time free from treatment, cleaning and work messages. |
11:15–11:30 | 15 min | Scheduling buffer | Room for overruns or next-client preparation; not counted in advance as recovery. |
Example total: 150 minutes, including 90 for treatment, 30 for ancillary tasks, 15 reserved for recovery and 15 as a buffer. If turnover overruns, update the diary: time spent working must not be recorded as recovery.
Use the lash service pricing guide to calculate the complete service cycle, and the guide to revenue, costs and bookings for sustainable capacity. Pre-treatment consultation helps identify uncertainty and services that need to be postponed.
Stop signals and professional referral
Pause and reassess immediately when vision, grip or control is no longer sufficient for safe precision work. Persistent pain, numbness, tingling, weakness, swelling, repeated night symptoms, reduced range or visual disturbance should not be normalised as the price of the career. Follow workplace reporting and obtain qualified healthcare assessment.
Do not diagnose the cause from which side hurts or prescribe exercises, braces or medication to yourself or colleagues. Reduce exposure safely, document task and timing, and take the record to a professional. Emergency or sudden severe symptoms require the locally appropriate urgent pathway.
Buying checklist for bed, stool, light and tweezers
Equipment | Trial in your workstation | Selection criteria |
|---|---|---|
Treatment bed | Adjust height, inclination and head support; bring the stool closer. | Stability, access, load rating, reachable controls and knee clearance. |
Stool | Rehearse moving closer, working on both eyes and changing position. | Supported feet, stable base, suitable castors and freedom to move. |
Lamp | Perform the movement with hands and tools in the working field. | Visible detail, controlled shadow and reflection, stable adjustable arm. |
Tweezers | Test grip and release with the fibres used in the service. | Tip control and sufficient force without unnecessary squeezing. |
Also check cleanability, maintenance, instructions, spare parts and support. Try the equipment together before buying: an adjustment that works on its own may be unusable beside your bed.
A seven-day workstation improvement protocol
Completed weekly worksheet: the entries below demonstrate how to use the tool; they are not measured results from a person. Spread the trials across your shifts rather than working seven consecutive days just to complete the sheet.
Day | Adjustment tried | Observation | Decision |
|---|---|---|---|
Monday | Observe the starting setup and rehearse the work sequence. | I lean forward to see the farther eye. | Next time, test the working height first. |
Tuesday | Adjust bed height with the client and head supported. | I can reach the field, but the frame limits knee space. | Keep this height as a trial and check stool access. |
Wednesday | Try stool distance and stable foot support. | I can move closer without hitting the frame; my feet stay supported. | Record this setup to try during a comparable service. |
Thursday | Aim the lamp and rehearse isolation on both eyes. | The hand shadow is reduced, but a reflection remains on the pad. | Adjust the angle and check again before increasing brightness. |
Friday | Bring frequently used materials closer and organise the trolley. | I reach the adhesive with less trunk rotation. | Keep this route while checking the clean-to-used flow. |
Saturday | Try grip and support with tweezers suited to the task. | My wrist stays less bent without losing control. | Repeat the trial; reject the setup if it needs more force or reduces precision. |
Sunday | Review the notes and compare planned and actual booking times. | Turnover used the time I had labelled as a break. | Separate ancillary tasks from recovery in next week's calendar. |
Download the blank weekly worksheet as an A4 landscape PDF. It contains the same four columns, seven rows to complete and space for your final decision.
Change one main variable at a time and keep task and duration comparable. At the end of the week, decide what to keep, retry or discard. One useful trial does not show that a setup prevents every problem; follow the stop criteria if symptoms develop.
Checklist before every client
Tick each item after checking it. The selections are for use while viewing this page and are not saved.
Common workstation mistakes
Avoid compensating for poor lighting by bending your neck, unsuitable tweezers by squeezing harder or a full diary by removing recovery. Do not judge the workstation from a photograph alone: rehearse the complete movement and record what happens.
Official sources and next steps
The occupational sources linked above inform observation of the task, light and hand tools. They do not establish lash-specific angles, lux values or universal break schedules, endorse a product or replace an individual assessment.
Develop practical observation and adjustment skills through choosing a lash course, BeautyLearn lash courses and the lash guides.
Frequently asked questions
What is the correct treatment-bed height for a lash artist?
There is no single measurement. Adjust the client and field high and close enough for clear vision and reach without sustained deep trunk bending, while preserving knee, stool and base clearance. Test with the actual client support, mattress, lamp and tools, then simulate isolation on both sides. Follow manufacturer stability and load instructions. A useful height is the result of the full geometry, not a number copied from another artist.
Is a saddle stool better than a stool with a backrest?
Neither design is universally better. Fit depends on body, mobility, bed geometry, service duration and opportunities to move. A backrest helps only when the artist can reach it during relevant phases; a saddle can suit some people and not others. Compare height range, stability, foot support, close access and position changes through realistic work. An ergonomic label cannot replace a trial inside the actual station.
Should a lash artist's feet always touch the floor?
Feet should have stable support from the floor or a suitable footrest rather than hanging. Do not lower the seat in isolation if that makes the bed and lash line too high. Adjust client, bed, stool and support together. Check that the support does not obstruct safe movement, controls or clean-to-used workflow and that the seat remains stable on the room's floor surface.
How many lux does an eyelash extension station need?
This guide does not give one universal lux value. Required lighting depends on detail size, contrast, ambient conditions, source position, glare, accuracy and the individual worker, and local workplace standards may apply. Assess whether both eyes and fine attachment work remain readable without squinting, shadow chasing or postural compensation. A competent local workplace assessment can measure the actual task and environment.
Will a brighter lamp fix lash artist neck pain?
Not necessarily. More intensity can add glare or reflection while the client remains too far away, the stool cannot approach or personal vision needs are unaddressed. Review complete geometry, light direction, uniformity, shadow and working distance. Persistent or worsening neck pain requires qualified assessment. A lamp is a task-visibility tool, not a diagnosis or treatment for a musculoskeletal symptom.
Where should the lash lamp be positioned?
Position a stable broad source to illuminate both eyes without entering the direct gaze or letting the working hand cast a critical shadow. Simulate dominant and opposite sides, inspect reflections from pads and tweezers and move the source when head position changes. Keep cable, base and arm out of stool and trolley paths. Follow mounting, electrical and cleaning instructions rather than copying one photograph.
Which tweezer is most ergonomic for lash work?
The one that performs the defined task accurately with the lowest sufficient force for that user's hand and station. Compare shape, tip contact, closure point, spring resistance, weight and balance during actual isolation, pickup and fan release. No brand or curve is best for everyone. If a tool is misaligned, damaged or difficult to process safely, remove it rather than compensating with more grip.
How can I stop gripping lash tweezers too hard?
First check tip alignment, cleanliness, spring resistance, grip point and compatibility with the fibre or fan method. Then review light, bed height, hand support and visual clarity. Practise releasing unnecessary force at safe transitions. Increasing grip may briefly feel controlled but cannot repair an unsuitable tool or workstation. Persistent hand pain, weakness, numbness or tingling needs professional assessment.
Can I rest my hands on the lash client?
Do not transfer body weight onto the eye or delicate tissue. Any light support must be taught, stable, hygienically compatible and comfortable, and it must not interfere with pads, lids or the service. Design field height and appropriate external support so the client is not used as furniture. If precision depends on pressure over the face, stop and correct the workstation or seek competent practical instruction.
How often should a lash artist take a break?
No single interval fits every service, schedule, worker and local rule. The useful principle is to interrupt prolonged static posture and precision grip regularly through safe micro-pauses, position changes, task variation and adequate recovery between clients. Observe when quality or comfort begins to fall and design the booking cycle before that point. Individual restrictions or symptoms require occupational or healthcare advice.
What can I do during a lash micro-pause?
At a safe phase, secure both tweezers, change seated position, let the hands and shoulders relax, stand where practical and focus the eyes at another distance. Movement should be gentle and comfortable, not a forced exercise prescription. A short pause does not replace realistic buffers, recovery between long appointments or medical assessment when symptoms persist. Never pause with an unsecured sharp tool near the client.
Does stretching prevent every lash work injury?
No. No routine can automatically offset prolonged static load, repeated force, poor equipment, inadequate recovery or symptoms that are ignored. Comfortable movement may be part of a broader system, but individual exercises are not prescribed here. Reduce avoidable exposure through task, station and schedule design first, and ask a qualified professional for personalised advice when pain, altered sensation or weakness exists.
How should a left-handed lash artist arrange the trolley?
Place the primary clean zone, adhesive support and frequently used items on the side that avoids crossing the client and sustained trunk rotation, while keeping the lamp and used-item pathway safe. Test both eyes because the useful side may change between phases. Move the trolley when needed rather than preserving a mirrored layout that blocks knee space, cables or the hygiene flow.
Does a magnifying lamp always improve lash ergonomics?
No. Magnification has a focal distance, field, optical quality and positioning demand of its own. It may help in a suitable configuration or increase fixed neck posture when poorly matched. Correct basic light geometry and verify personal vision needs first, then test magnification during real tasks without compromising client comfort or hygiene. Do not use it as a substitute for an eye examination.
Why does only my dominant shoulder hurt during lashes?
A one-sided pattern may relate to grip, tray position, an unsupported arm or the geometry used on one eye, but symptom location cannot diagnose the cause. Record when it appears, task, tool, side and duration, make safe reversible changes and reduce exposure where necessary. Persistent, worsening, night-time or neurologic symptoms need assessment by a qualified health professional rather than online diagnosis.
Is pain at the end of a lash day normal?
It should not be treated as an inevitable price of the profession. Use it as a reason to review client position, working distance, light, tools, duration, task order and recovery. Recurrent, intense, worsening or night-time pain, or pain with tingling, numbness, weakness, swelling or reduced precision, requires timely professional assessment and any relevant workplace reporting process.
How do I know whether my lash trolley is too far away?
The primary zone is probably too distant when frequent items require full arm extension, shoulder lift, trunk rotation or loss of the stable tweezer position. Move the trolley closer without obstructing stool, cables, bed controls or the clean-to-used route. Remove unused stock from the working tray. Film or observe the reach pattern through both eyes and more than one service phase before fixing its location.
Can a lash artist perform two full sets in a row?
No universal answer is safe. It depends on complete cycle, technique, worker, station, recovery, client variation and local workplace requirements. Measure precision, overruns, symptoms and recovery rather than copying another artist's capacity. Include turnover and breaks. If clear vision, grip control, comfort or final-check quality deteriorates, the schedule must change even when two slots technically fit.
Should ergonomics be taught in a lash course?
A strong course should demonstrate client, bed, stool, light, tray, tools, reach zones and work-rest organisation, then observe the learner during real practice. A posture slide is insufficient. The guide to choosing an online lash course explains how to inspect demonstration, feedback and practical progression rather than relying on a module title.
When should tweezers be replaced for ergonomic reasons?
Remove a tweezer when damage, misalignment, closure or resistance requires extra force, reduces control or prevents the required processing. Follow manufacturer inspection and maintenance information and compare with a known suitable tool. Do not continue compensating through grip. Replacement timing depends on the tool and use, not one universal number, and retired sharp tools need safe handling.
Does an ergonomic lash station make services faster?
It may reduce unnecessary reaching, searching and repeated correction, but speed is not the primary outcome. The aim is to support visibility, precision, comfort, control and recovery. Do not use an ergonomic change as permission to shorten consultation, manufacturer timing, hygiene or final checks, or to add appointments beyond sustainable capacity. Measure quality and complete cycle together.
Where do I start if I cannot replace the studio equipment?
Begin with reversible low-cost changes: bring the working field closer, stabilise foot support, reposition the lamp and trolley, remove unused objects, compare grip on available suitable tweezers and restore realistic buffers. Change one main variable and record the effect. Then invest in the remaining documented constraint, checking that a new item fits the complete bed, client, room and hygiene system.
For cosmetic lash care, see fragile or thinning eyelashes: care, serums and when to seek medical advice.