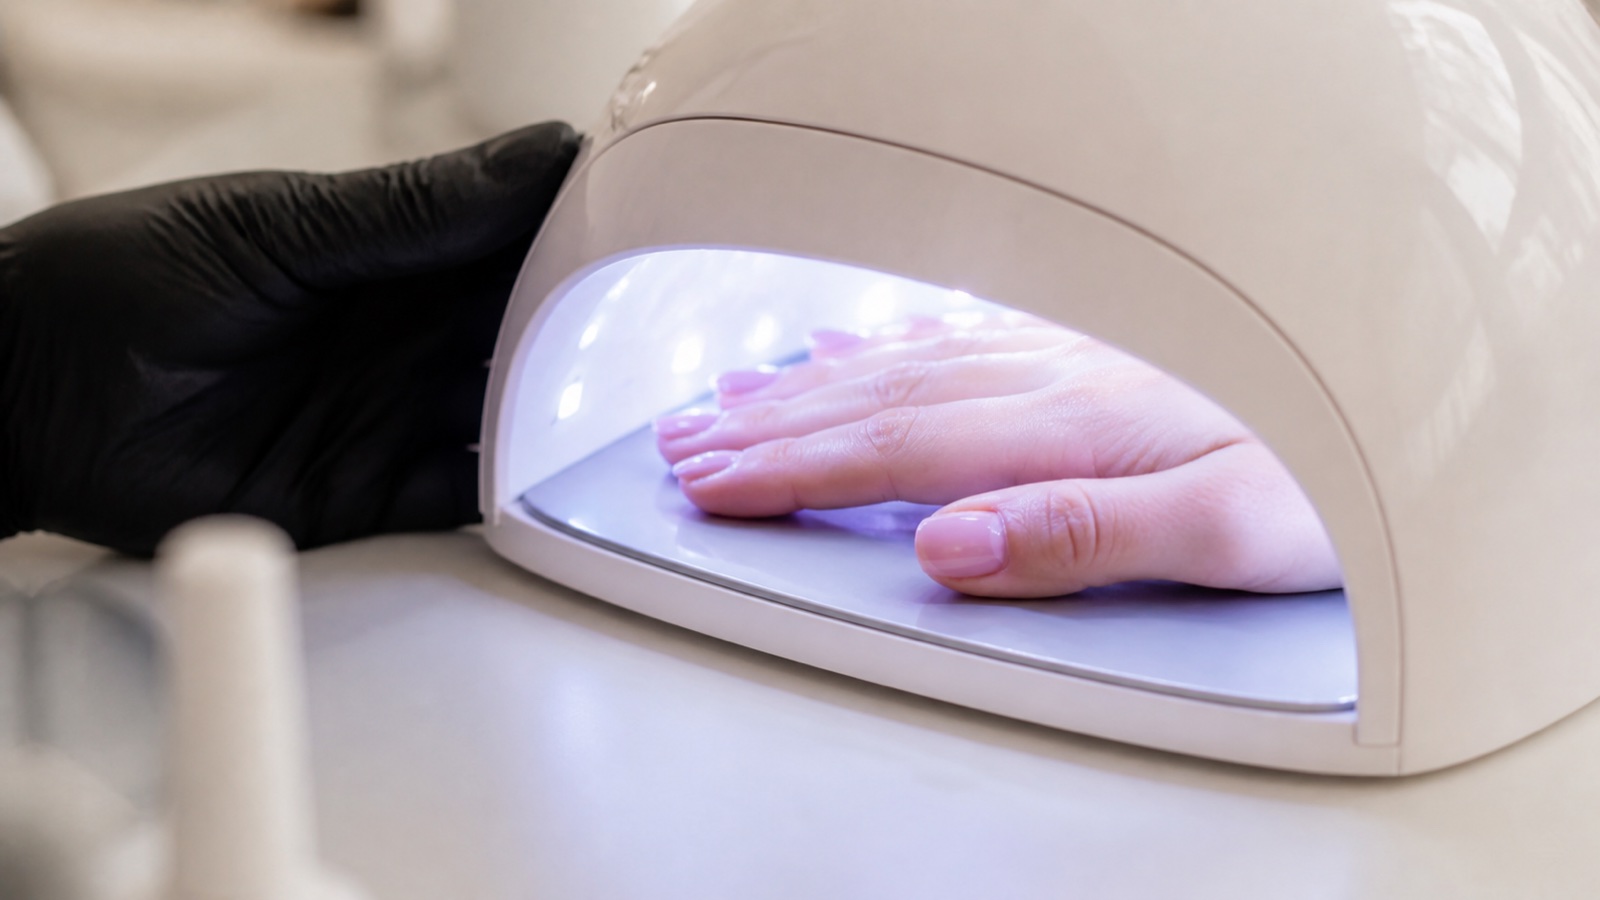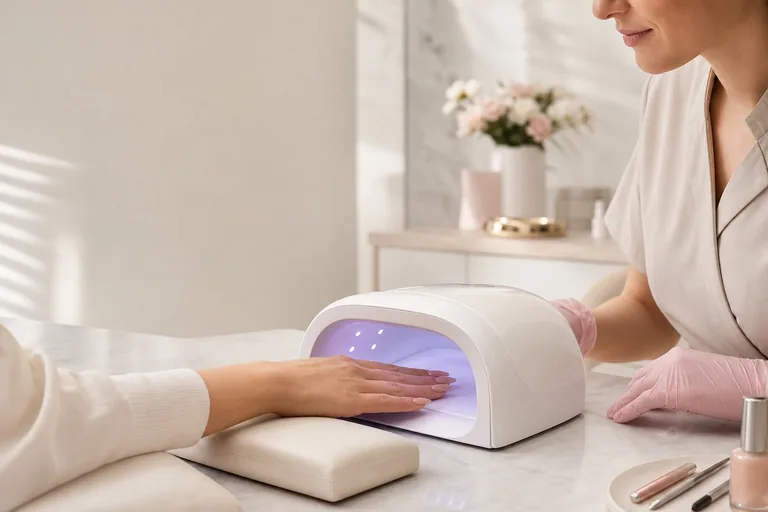
Gel can feel hot in a nail lamp because photopolymerisation is exothermic. Light activates the photoinitiating system and reactive molecules form a crosslinked coating; part of the energy is released as heat. If a substantial volume reacts quickly, the temperature can rise over a short interval and create a sharp heat spike. Burning is not proof of better curing, stronger adhesion or a premium product, and a client should never be told to endure pain.
Short answer: if heat becomes painful, the client removes the hand and the sensation should settle. Reassess product volume, nail condition, hand position, lamp and the manufacturer’s curing protocol. Resume only through a documented complete cycle. Persistent pain, a visibly compromised nail or repeated severe heat means stop the service rather than improvise shorter exposure.
This page owns the heat-spike intent. Use the separate guide to curing gel nails correctly for cure-depth controls and the UV/LED lamp guide for wavelength, output, geometry and maintenance. Substantively reviewed on 5 September 2026, this guide is technical education rather than medical advice. There is no universal safe temperature, wattage, lamp or exposure time for every formulation.
What a gel heat spike actually is
Heat rises when reaction outruns dispersion
The spike is a short phase, not proof of a complete cure
Activate
Photoinitiator absorbs compatible light
React
Chains form and crosslink
Peak
Heat generation briefly rises
Complete
Finish the documented cure
UV- and LED-curable nail gels contain reactive monomers or oligomers plus a photoinitiating system. Compatible light generates reactive species that start chain formation and crosslinking. The material changes from a liquid or viscous gel into a solid network. Polymerisation does not merely dry a solvent; it creates new chemical bonds, and that reaction releases heat.
The heat spike is the period in which heat generation outpaces heat dispersal through the product, nail plate and surrounding air. It may arrive several seconds after exposure begins rather than at the first moment. Formula, photoinitiator, light intensity, product amount and nail condition influence the curve, so two gels at the same apparent thickness can feel different.
A sensation is subjective and cannot measure cure. One client may notice mild warmth while another finds the same rise painful. A technician cannot use ‘nobody else complained’ to invalidate a report. Record the nail, product, layer and timing so the event can improve the process.
Observation | Possible pattern | Prudent action |
|---|---|---|
Mild warmth without pain | Expected reaction felt comfortably | Monitor and complete the documented cure |
Rapid sting or rising burn | Short exothermic peak or a sensitive nail | Remove hand, let it settle and reassess |
Pain continues outside lamp | Not a routine transient heat report | Stop; consider appropriate healthcare advice |
Lamp smells, overheats or behaves irregularly | Possible equipment fault | Switch off and remove from service |
Why builder gel can feel hotter than a colour layer
A builder gel is often placed in a larger bead than base or colour. More reactive material in one area can generate more total heat while the coating is crosslinking. An apex built in one uncontrolled mass is therefore more likely to produce a noticeable spike than a thin layer—although the outcome still depends on the particular formula and lamp.
This does not mean every builder burns or every thin base remains cool. Pigment can influence light penetration; clear materials can respond differently; photoinitiator type and concentration affect rate; lamp irradiance and distance affect activation. The correct response is not automatically to make every structure flat and weak, but to use only the product volume and staged sequence the system authorises.
The guide to builder-gel families and behaviour distinguishes viscosity and structure from cure. The guide to rubber base, bottle builder and fibre base explains why a marketing family cannot supply one universal heat protocol.
Seven factors that can intensify a heat spike
Heat belongs to a product–nail–lamp system
No single wattage, second count or gel family predicts the experience
Gel
Formula, shade and mass
Lamp
Spectrum, output and geometry
Nail
Plate thickness and condition
Process
Position, mixing and protocol
Product mass. A large bead, thick repair or one-step apex concentrates reactive material and heat.
Formula kinetics. Monomer, oligomer and photoinitiator systems differ in reaction rate and conversion behaviour.
Lamp conditions. Emission wavelengths, irradiance, diode geometry, distance, programme and ageing affect activation.
A thin or over-filed nail plate. Less intact plate can make heat and pressure more noticeable over the sensitive nail bed.
Hand position. Tilted fingers, a thumb outside the intended zone or an apex unusually close to a diode can change exposure.
Undocumented product mixing. Combining brands and a convenient lamp makes the rate and cure less predictable.
Individual condition and perception. Recent trauma, removal damage and personal pain sensitivity change the experience.
Do not change all seven variables after one complaint. Identify which nail heated, when the sensation began, how much product was present and how the finger sat in the lamp. A structured record can reveal whether the event follows a particular product, layer, hand position or nail condition. If brands have been combined, audit them with the guide to base, primer, builder and top compatibility instead of assuming the lamp is the only variable.
Prevent the spike before the hand enters the lamp
Prevention begins with assessment, not the lamp button. Do not cover a nail that is painful, visibly over-filed, newly traumatised, separated or altered in a way the salon cannot explain. A stronger coating does not restore lost nail plate. Use the natural-nail preparation guide to preserve the plate, and modify or postpone the service when the natural nail cannot support the plan comfortably.
Prepare the plate without grooves, heat or aggressive thinning.
Confirm the exact gel, shade, compatible lamp, mode and time in the current instructions.
Build the necessary architecture with a controlled bead rather than accidental bulk.
Use separate structural stages only when the product protocol permits them.
Position fingers and thumb in the lamp zone prescribed by the device manufacturer.
Tell the client before curing to report rising heat immediately and remove the hand if it becomes painful.
Record product, batch, lamp, programme and any unusual response for investigation.
What to do when a client says the gel is burning
Pain triggers a stop-and-reassess sequence
Comfort and full curing must both be protected
Remove
Hand leaves when heat is painful
Settle
Confirm the sensation decreases
Inspect
Nail, mass, position and lamp
Decide
Supported cure or stop
Do not minimise the report and do not hold the hand in place. The client removes it from the lamp and waits for the sensation to fall. Ask which nail hurts and inspect product volume, plate condition, position and contact with surrounding skin. Do not press the fingertip hard against the table or apply ice directly as a technical cure strategy.
A cured coating still needs its complete documented exposure. If the manufacturer supplies a heat-management or low-heat cycle for the exact gel, follow that complete sequence. If no supported sequence exists, do not invent repeated flashes, halve the time or alternate random lamp modes. Contact the manufacturer’s technical support or discontinue the combination.
Stop the service if severe heat returns, the pain continues outside the lamp, the plate was already highly sensitive or another concerning sign appears. Document the event. If pain is persistent or accompanied by redness, swelling, blistering, separation or a colour change, recommend appropriate healthcare evaluation rather than re-coating.
Professional rule: pain is not a curing timer. Client endurance cannot validate a product–lamp combination or replace control of layer depth.
Low-heat mode changes the curve, not the chemistry
A lamp’s low-heat programme commonly starts with reduced or modulated output and increases it over time. Slowing the initial reaction may spread heat generation across a longer interval and reduce the sharp peak. It does not cool the nail, repair an over-filed plate or make an incompatible light source suitable.
The programme needs to be documented for the product. Lower output for an invented duration can leave more residual reactive material; an arbitrarily longer time cannot compensate reliably for an unsuitable emission spectrum or excessive layer. The words ‘low heat’ on a button are not evidence that every builder should use it.
Treat low-heat mode as one component in a validated system: formula, shade, layer, lamp, hand position and full cycle. If the manufacturer specifies a conventional cure instead, changing it for comfort without technical support is not a safe optimisation.
Why shortening the cure at random creates a different problem
A gel may feel solid at the surface before conversion is adequate through the layer. Surface hardness, shine or a wiped inhibition layer cannot prove the condition below. Ending exposure as soon as the heat stops can reduce mechanical performance and leave more unreacted material without creating a visible warning.
Undercured gel can contribute to lifting, breakage and avoidable exposure to reactive ingredients during filing or wear. Reducing a heat spike therefore means managing reaction rate and product mass while still completing the cure—not trading immediate comfort for incomplete polymerisation. The gel-curing checklist explains why top-surface appearance is insufficient.
Thin, damaged or recently over-filed nails need a different decision
A thinned nail plate can make heat, pressure and filing more noticeable. If the client reports intense heat mainly after aggressive removal or repeated preparation, do not respond by applying a thicker ‘protective’ builder. Evaluate whether the service should be shortened, postponed or replaced with non-coating care while the affected section grows forward.
A product described as gentle, flexible or HEMA-free cannot replace missing nail plate. The guide to weak, thin or damaged nails after gel separates apparent dryness from mechanical damage and stop criteria. Spontaneous pain, separation, inflammation or unexplained colour should remain visible for healthcare assessment.
Heat spike, allergy and equipment fault are different patterns
Timing helps separate three different investigations
A salon observation supports triage, never diagnosis
Heat spike
During cure, felt under product
Skin reaction
Itch, redness or blisters may be delayed
Lamp fault
Odour, flicker or casing heat
Boundary
Stop and refer persistent symptoms
Pattern | Typical timing | Main observation | Boundary |
|---|---|---|---|
Heat spike | During curing | Rising heat or sting under the product | Remove hand and reassess system |
Possible skin reaction | May appear later | Itching, redness, swelling, blisters or scaling | Stop exposure; healthcare assessment |
Possible lamp fault | Across clients or without normal product pattern | Odour, casing heat, flicker or irregular operation | Switch off and inspect professionally |
This table supports triage, not diagnosis. A client can experience more than one issue and persistent nail pain may have another cause. Use the gel-allergy and methacrylate guide for delayed skin-reaction boundaries and do not conduct a salon re-exposure test.
Audit the lamp as well as the gel
Confirm the device is the model expected by the product protocol, its interior is clean and reflective surfaces or diodes are not blocked. Check cable, controls, timer and casing before use. Keep service and replacement records, and remove the lamp from use when it emits an unusual smell, becomes abnormally hot, flickers or delivers inconsistent programmes.
Do not compare lamps only by electrical wattage. Wattage is not the same as the irradiance at every nail and says nothing by itself about emission wavelengths, hand geometry or cure depth. A higher number cannot prove faster complete curing and a lower number cannot prove a gentler heat curve.
A troubleshooting record prevents guesswork
For each notable heat event, record date, finger, natural-nail condition, previous removal, product brand and line, shade, batch, approximate layer, lamp model, programme, hand position, time to heat, whether it stopped outside the lamp and the final decision. Do not store a medical diagnosis; document observable service facts and the client’s own words.
Review several events together. A pattern on one finger may point to position or local nail condition; one batch or shade may need manufacturer clarification; every client feeling abnormal heat may suggest technique or equipment. Change one supported variable at a time and never use clients as test subjects for an undocumented product–lamp combination.
Common myths and unsafe responses
‘If it burns, the gel is bonding better.’ Heat does not prove adhesion or complete cure.
‘Hold on until the timer ends.’ Pain requires immediate response, not endurance.
‘Low heat works with every gel.’ The programme must belong to a supported cure.
‘A harder surface means it is cured.’ Surface feel cannot prove depth conversion.
‘More wattage always causes more heat.’ Lamp performance cannot be reduced to one number.
‘A thicker gel protects a thin nail.’ Extra reactive mass can increase heat and does not restore plate.
‘Burning proves an allergy.’ Timing and symptoms require clinical evaluation, not salon diagnosis.
A professional heat-spike checklist
The nail plate is intact, comfortable and suitable for the proposed structure.
The exact gel, shade and lamp have a current documented curing protocol.
Product mass, apex and free-edge length are controlled rather than excessive.
Low-heat mode, if selected, is authorised for that gel and completed in full.
The client knows to report rising heat immediately and can remove the hand freely.
The technician knows the documented restart or stop procedure before curing begins.
Product, batch, lamp and unusual responses can be traced in the client record.
For guided technique, compare the Beginner Gel Nails Course — Level 1, the Gel Nails Course — Level 2 and the Complete Nail Technician Course. English course records and availability are separate from Italian ones; a closed English enrolment page is an informational preview rather than permission to use another market’s programme.
Frequently asked questions about gel heat spikes
Is it normal for gel to feel warm in the lamp?
A mild comfortable warmth can accompany exothermic polymerisation. A sharp, rising or painful burn should not be normalised. The client removes the hand, lets the feeling settle and the technician reassesses product mass, nail condition, position, lamp and the documented curing cycle.
Why does builder gel burn more than base coat?
Builder is often applied in a larger volume, so more reactive material can generate heat in the same interval. Formula kinetics, photoinitiators, shade, lamp and nail condition also matter. It is a common pattern rather than a rule that applies to every builder and base.
Does burning mean the gel is curing properly?
No. Heat shows that a reaction is occurring but cannot prove uniform or complete conversion. An incompatible lamp or excessive layer may still leave undercured material. Use product-specific cure instructions and quality controls rather than the client’s sensation as a chemical test.
Can a client take their hand out of the lamp?
Yes, when heat becomes painful. After it settles, resume only through the manufacturer’s supported complete process. Do not turn repeated random flashes into a universal method or simply subtract the seconds spent outside; contact technical support when the correct restart is unclear.
Does low-heat mode always prevent burning?
No. It may spread the early reaction over more time, but it cannot correct excessive mass, a damaged nail or an incompatible lamp. The exact gel must support the programme, and the complete stated cycle must still be followed rather than stopped when the client feels comfortable.
Do higher-wattage nail lamps cause stronger heat spikes?
Wattage alone cannot answer that question. It does not directly state the irradiance at each nail, wavelengths, diode layout or programme curve. Heat also depends on formula and layer. Compare compatible systems and technical data rather than choosing a lamp by the largest printed number.
Should I use less gel to prevent heat?
Remove accidental bulk, but do not flatten a structure that requires an apex. Use the quantity and staged application the system supports for the length and shape. If the needed architecture cannot be cured comfortably through the documented method, stop and reassess product and service.
Is a gel heat spike an allergic reaction?
They are different patterns. A heat spike is experienced during polymerisation; allergic contact dermatitis may cause delayed itching, redness, swelling, blisters or scaling. They can coexist, and neither should be diagnosed from a salon test. Stop exposure and recommend healthcare evaluation for concerning symptoms.
Why does only one nail burn in the lamp?
That nail may carry more product, sit closer to a diode, have a thinner or recently damaged plate, or occupy a different angle. Stop and compare those facts. Do not assume the client imagined it or repeat the same exposure merely to confirm the report.
When does pain need medical assessment?
Recommend appropriate healthcare advice when pain is severe, persists outside the lamp, appears spontaneously or occurs with redness, swelling, blisters, separation or unexplained colour change. Stop the cosmetic service and do not cover the nail again to see whether the symptoms improve.
Can extra lamp time compensate for the wrong lamp?
Not reliably. An unsuitable emission spectrum, geometry or layer cannot be corrected by guessing a longer duration. Excess time also does not create a validated heat curve. Use the lamp and programme documented for the product, or obtain technical confirmation from the responsible manufacturer.
Should a heat-spike incident be recorded?
Yes. Record the finger, natural-nail condition, product, shade, batch, approximate layer, lamp, programme, position, time to sensation and outcome. Factual records help identify a repeated process pattern without turning the technician’s observations into a medical diagnosis.
Scientific and clinical sources
Polymers — The Chemistry Behind the UV-Curable Nail Polishes
American Academy of Dermatology — Gel manicures: tips for healthy nails
The research supports exothermic photopolymerisation, formulation-dependent cure and conservative nail care; it does not establish one salon temperature, layer or low-heat programme for every product. No competing academy or commercial salon is linked. Verify the current manufacturer instructions and explore the complete English nail guide library for adjacent technical controls.