A UV/LED nail lamp is not a generic accessory that becomes suitable because it is powerful or fast. It is one component of a light-curing system. Product chemistry, photoinitiators, emitted spectrum, irradiance, exposure time, layer thickness and hand position must work together. A glossy or hard surface cannot prove on its own that the complete depth received the exposure specified for that formula.
Before buying a lamp, ask the product manufacturer which exact lamp model, mode and exposure were tested for that line. ‘At least 48 W’, ‘dual wavelength’ or ‘universal UV/LED’ is incomplete information: electrical wattage does not describe the spectrum, irradiance or distribution that reaches every nail.
This guide owns lamp selection, geometry, routine checks and maintenance. The separate guide to curing gel nails explains the service variables and polymerisation controls in more depth. Neither page replaces the current instructions for the exact product–lamp system or an electrical technician’s assessment of damaged equipment.
UV, LED and UV/LED: what the labels actually mean
A lamp label contains different kinds of information
Source technology is not the same as emitted spectrum
LED
Technology of the light source
UV
Region of the spectrum
Watts
Electrical input—not dose
Time
One part of a validated system
Ultraviolet describes a region of the electromagnetic spectrum. LED describes light-emitting-diode technology, not a separate category of radiation. An LED source can emit UVA and, depending on its design, violet light near the visible boundary. This is why the shop-floor contrast between an ‘UV lamp’ and an ‘LED lamp’ is imprecise: the useful question is what wavelengths the device emits and whether the product system was designed and tested for them.
Older fluorescent nail lamps and newer diode arrays may have different spectral profiles, warm-up behaviour, geometry and maintenance needs. A hybrid or UV/LED label may indicate more than one emission region, but it does not disclose the amount of radiant power, uniformity within the chamber or performance with every photoinitiator. Read the manual and the gel instructions as a matched pair.
Specification | What it can describe | What it cannot prove alone |
|---|---|---|
Watts (W) | Nominal electrical input or consumption | Useful irradiance, uniformity or product compatibility |
Nanometres (nm) | Position in the emitted spectrum | Intensity or coverage throughout the chamber |
Irradiance | Radiant power reaching a defined area | Equal exposure at every nail and angle |
Timer | Programmed exposure duration or profile | Correct cure with an incompatible lamp or layer |
Why higher wattage does not automatically mean better curing
The wattage printed on a lamp describes an electrical characteristic, not the dose delivered to a nail. Diode efficiency, optical design, electronics, distance, chamber size, reflective surfaces and power management all affect the output. Two lamps with the same declared wattage can distribute light differently; a higher number may offer no evidence about wavelengths or uniformity.
Measured studies support this caution. A 2018 study of 28 nail dryers found device-specific spectral distributions and maximum intensities, with marked differences among fluorescent, LED and combined devices. The result does not create a universal shopping threshold. It shows why a product manufacturer’s validated combination and a repeatable hand position are more informative than ranking lamps by the largest figure on the box.
Do not compensate for uncertain compatibility by adding random exposure time. More time cannot supply a missing wavelength, fix shadowing, correct excess thickness or verify internal conversion. It can add heat or UV exposure without answering the technical question. Stop and obtain the product specification when the required lamp is unclear.
Wavelengths: how to interpret 365 nm, 405 nm and dual wavelength
Many current lamps advertise output around 365 nm and 405 nm. The first sits within UVA; 405 nm is at the violet edge of visible light. A dual-wavelength label says that two spectral regions are present, not how much irradiance exists in each, how it changes across the chamber or whether the exact product responds adequately through its intended thickness.
Photoinitiators absorb over particular wavelength ranges and a formula can combine more than one. Pigment load, opacity, fillers, layer thickness, temperature and the complete formulation affect performance. Reading one ingredient on an INCI list is not enough to reverse-engineer a cure schedule. Use the manufacturer’s current product instructions, tested lamp and permitted layer dimensions.
The TPO nail-products guide explains the separate EU regulatory check for that ingredient. A reformulation marketed as TPO-free may require updated application and exposure instructions; absence of one photoinitiator is not evidence that the old lamp programme remains interchangeable.
Product–lamp compatibility: questions to ask before purchase
Compatibility is a matrix, not a wattage threshold
Link every formula to its exact exposure method
Formula
Base, colour, builder, top or adhesive
Device
Exact model and hardware version
Application
Thickness, opacity and position
Exposure
Mode and full programme
Which exact lamp model and hardware version are recommended or validated for this product line?
Which mode and full exposure apply to base, colour, builder, top and adhesive products?
What maximum layer thickness, bead size or opacity assumptions were used?
Must thumbs be positioned or exposed separately, and where should fingertips sit?
Is a flash cure allowed, and what complete cure must follow it?
How should the lamp be cleaned, inspected, calibrated, serviced or replaced?
Do reformulated batches or very opaque shades have revised instructions?
Keep written instructions with the product and lamp records, including the date retrieved. A distributor’s verbal assurance that ‘all LED lamps work’ is not the same as model-specific evidence. If products from several brands are used, each combination needs its own documented answer; successful surface hardening on a sample tip is not a validation method.
The guide to gel, acrylic and acrygel systems separates materials by working and setting behaviour. Only light-cured stages belong in the nail lamp, and each formula keeps its own instructions. Do not place monomer-and-powder acrylic under a lamp merely because other services use one.
Translate those specifications into a written service card rather than relying on memory: product and batch, permitted quantity, chosen mode, full time, hand position and any separate thumb step. The acrygel application guide shows how dense material and a mould can alter thickness and access, while the gel-polish safety guide connects thin colour layers with preparation and removal. Neither technique creates its own generic lamp rule. When the manufacturer changes formula, instructions or supported device, revise the service card before using the new batch. This prevents a technician from carrying forward a familiar timer simply because the bottle name looks unchanged.
Chamber geometry: diodes, thumbs, distance and reflective bases
A hand is not a flat measurement surface
Distance and angle change across the chamber
Roof
Central diode coverage
Sides
Curves and lateral exposure
Thumb
Often needs its own controlled angle
Base
Keep the designed reflective surface clean
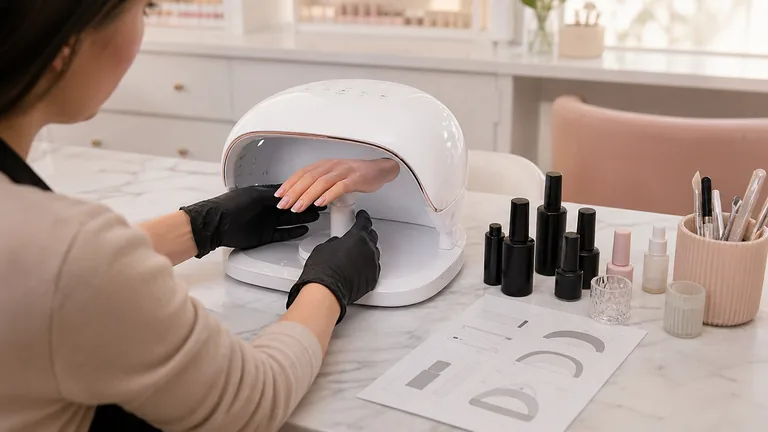
A hand is not a flat test card. Thumbs rotate outward, nail plates curve and fingers of different lengths occupy different zones. Diodes on the roof and sidewalls, the distance from each nail, optical angles and a reflective base influence distribution. A professional lamp should support a repeatable hand position without pressing fingers together or forcing the thumb against wet material.
Recent measurement research continues to report position-dependent output inside commercial chambers. That does not allow a technician to calculate a personal cure time from a phone light meter. It reinforces the need to use the tested geometry, keep surfaces in their designed condition and stop when components fail.
Place the hand on the intended marks with fingers extended and separated.
Follow a separate-thumb step when the product or lamp procedure requires it.
Keep wet nails away from walls, the base and other fingers.
Do not cover diodes or reflectors with improvised opaque liners.
Do not make layers thicker because the lamp is advertised as powerful.
Mini lamps and flash curing do not replace a complete cure
A mini lamp or gooseneck source may be designed to hold a full-cover tip or dual form in position while the hand is moved safely. Its illuminated area, distance and geometry differ from a full-hand chamber. When the system permits a flash cure, follow it with the complete exposure in the specified lamp. Initial fixation only proves that movement has reduced; it does not establish full cure throughout the product.
The same distinction applies to 10-second buttons, motion-sensor starts and 99-second or low-heat modes. These are exposure programmes, not universal certificates. Low heat may ramp output for compatible systems and can help manage the rate of heat release, but it does not justify extra thickness, shortened total exposure or a formula the lamp was never specified to cure.
For practical support choices, the nail tips, gel tips, forms and dual forms comparison explains which stages need holding and where shadows or movement may occur. A support method never overrides the light-cure instructions of the bonding or building product.
UV/LED nail lamp maintenance: daily checks and scheduled care
Maintenance keeps compatibility traceable over time
Inspect, clean, record and act before complete failure
Before service
Cable, chamber, timer and sensor
End of day
Approved cleaning and spill record
Scheduled
Diodes, reflectors, vents and base
Stop
Damage, failure, overheating or inconsistency
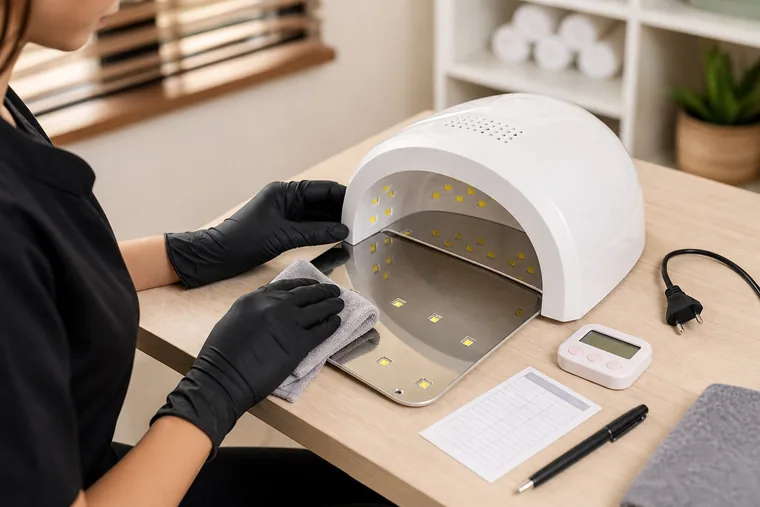
Before cleaning, switch off and unplug the lamp, allow it to cool and follow its manual. Never spray liquid directly onto diodes, sensors, fans, switches or connectors. Avoid solvents and abrasives that can cloud optical surfaces, damage plastics or change reflectivity. Prevent gel deposits; remove them only by the method approved for that device.
Interval | Check | Response |
|---|---|---|
Before each service | Clear chamber, intact cable, normal timer and sensor | Do not use damaged or abnormal equipment. |
End of day | Accessible surfaces and removable base cleaned as instructed | Record spills, impact, residue or operating changes. |
Scheduled review | Diodes, reflectors, fan openings, timer, base and cable | Compare with the manual and maintenance log. |
Manufacturer interval | Specified service, output check or replacement | Act before complete failure rather than extending use by guesswork. |
Cleaning between clients must fit the wider workstation hygiene plan without harming the lamp. Use the device-compatible route and the guide to cleaning and disinfecting manicure tools and surfaces to keep equipment categories distinct. Electrical lamps are not immersed, sterilised or treated like metal implements.
When to stop using or replace a nail lamp
Take the lamp out of service when the cable, plug, housing, base, sensor or timer is damaged; diodes flicker or fail; the unit overheats, smells abnormal or behaves inconsistently; a spill enters inaccessible electrical areas; or the manufacturer’s service or replacement criterion is reached. Do not keep using it while adding arbitrary seconds to compensate.
Wrinkling, soft material, lifting or changing heat sensation requires investigation, but it does not identify the lamp as the only cause. Check product and batch, storage, application quantity, pigment, thickness, hand position, timer, temperature and current instructions. The guide to bubbles, cracks, breakage and cuticle flooding helps separate visible defects from competing causes without treating a technician’s observation as a conversion test.
UV exposure: communicate evidence without exaggeration
Studied gel nail lamps emit predominantly UVA, but output, dose and geometry vary. Laboratory and cell studies can identify radiation and biological mechanisms; they do not by themselves quantify an individual client’s lifetime clinical risk. Reviews describe a limited and heterogeneous evidence base, so avoid both ‘completely harmless’ and deterministic cancer claims.
The American Academy of Dermatology advises applying a broad-spectrum, water-resistant SPF 30 or higher sunscreen to the hands before a gel manicure or wearing dark, opaque, fingerless gloves, while leaving the nails exposed. Follow the sunscreen label and remember that skin protection does not change the product’s required cure. A person with photosensitivity, a history of skin cancer, relevant medication or clinical concern should seek individual healthcare advice.
Avoid staring into an operating device, keep eyes outside the chamber and do not bypass covers or sensors. Stop using damaged equipment. Preventing uncured product from reaching skin remains a separate priority; the methacrylate allergy guide explains why correct cure and no-touch application belong to one exposure-control system.
Professional nail lamp buying checklist
Identify the product lines before choosing the lamp.
Obtain exact model compatibility and current exposure instructions in writing.
Check spectrum, modes and timing without reducing the decision to watts.
Choose a chamber that supports stable fingers and the specified thumb position.
Confirm surfaces can be cleaned through the salon protocol without damage.
Check instructions, warranty, parts, technical support and end-of-life route.
Create an asset record for purchase date, model, serial number, faults and maintenance.
Use the English-market online nail courses to develop controlled application, positioning and troubleshooting with practical feedback. Training supports the method; the lamp manual and product manufacturer still determine the exact compatible system used at the workstation.
Frequently asked questions about UV/LED nail lamps
How many watts should a nail lamp have?
There is no wattage that makes one lamp suitable for every gel. Watts describe electrical input, not spectral fit, uniform irradiance or validated cure. Choose the exact lamp and exposure specified for the product.
Will a 365 + 405 nm lamp cure every gel?
No. Two stated wavelength regions do not prove intensity, uniformity, geometry or compatibility with every formula, pigment and permitted layer thickness.
Can I cure one brand of gel in another brand’s lamp?
Only use a combination supported by current product instructions or documented manufacturer guidance. Do not infer compatibility from an UV/LED label, matching wattage or a hard surface.
Are UV and LED two different types of radiation?
UV names part of the spectrum; LED names the source technology. LEDs can emit UVA or violet visible light. What matters is the device output and the product requirement.
Does low-heat mode cure gel better?
Not universally. It changes the exposure profile in systems designed for it. Follow the specified total programme and layer rather than using low heat to justify extra thickness.
Is a mini lamp enough for full-cover gel tips?
A mini lamp commonly provides initial fixation when the system permits it. Complete curing must then follow in the exact full lamp and programme specified for the bonding product.
How can I tell whether gel is fully cured?
Touch, gloss, hardness and a sample tip cannot verify conversion through the whole layer. Control product, thickness, compatible lamp, hand position and exposure exactly as instructed.
How often should an LED nail lamp be replaced?
There is no universal interval. Follow the manufacturer’s service life and checks, and stop earlier for component damage, failed diodes, abnormal timing, overheating or inconsistent behaviour.
How should a nail lamp be cleaned?
Unplug and cool it, then use only the method permitted by its manual. Do not spray inside, immerse it or scrape optical and reflective surfaces with unapproved tools.
Should thumbs be cured separately?
Follow the system geometry and instructions. A separate step may be required when the thumb cannot remain in the validated position or receive even exposure beside the fingers.
Can UV/LED nail lamps affect skin?
They can expose hands to UVA. Evidence varies by device and cannot determine one person’s risk from a FAQ. Follow use instructions and dermatology guidance on protection, and seek medical advice for individual concerns.
Can I keep using a lamp with several diodes off?
No. The distribution may no longer match the validated device. Take it out of service and obtain authorised assessment, repair or replacement instead of increasing exposure at random.
Does sunscreen interfere with gel curing?
Hand skin protection and nail-product curing are different tasks. Keep the nail plate prepared according to the product procedure, keep cosmetic product off skin and use any sunscreen as its label and medical guidance direct.
Can I measure my lamp with a phone app?
A phone sensor is not a calibrated spectral radiometer and cannot validate cure. Use manufacturer specifications, authorised servicing and the tested product–lamp combination.
Research and medical sources
Device spectra and irradiance: Baeza and colleagues’ measured review of 28 nail dryers and the later scoping review of UV/LED nail-lamp health evidence. These sources document variability and uncertainty rather than defining a universal salon wattage.
UV definitions and health context: the US Food and Drug Administration’s Ultraviolet Radiation overview. Practical dermatology advice for gel manicures: the American Academy of Dermatology’s gel manicure recommendations.
This educational guide was substantively reviewed on 5 September 2026. It does not certify a lamp, diagnose photosensitivity or calculate individual medical risk. Product and equipment instructions take precedence; damaged electrical equipment needs authorised assessment, and personal health questions belong with a qualified clinician.