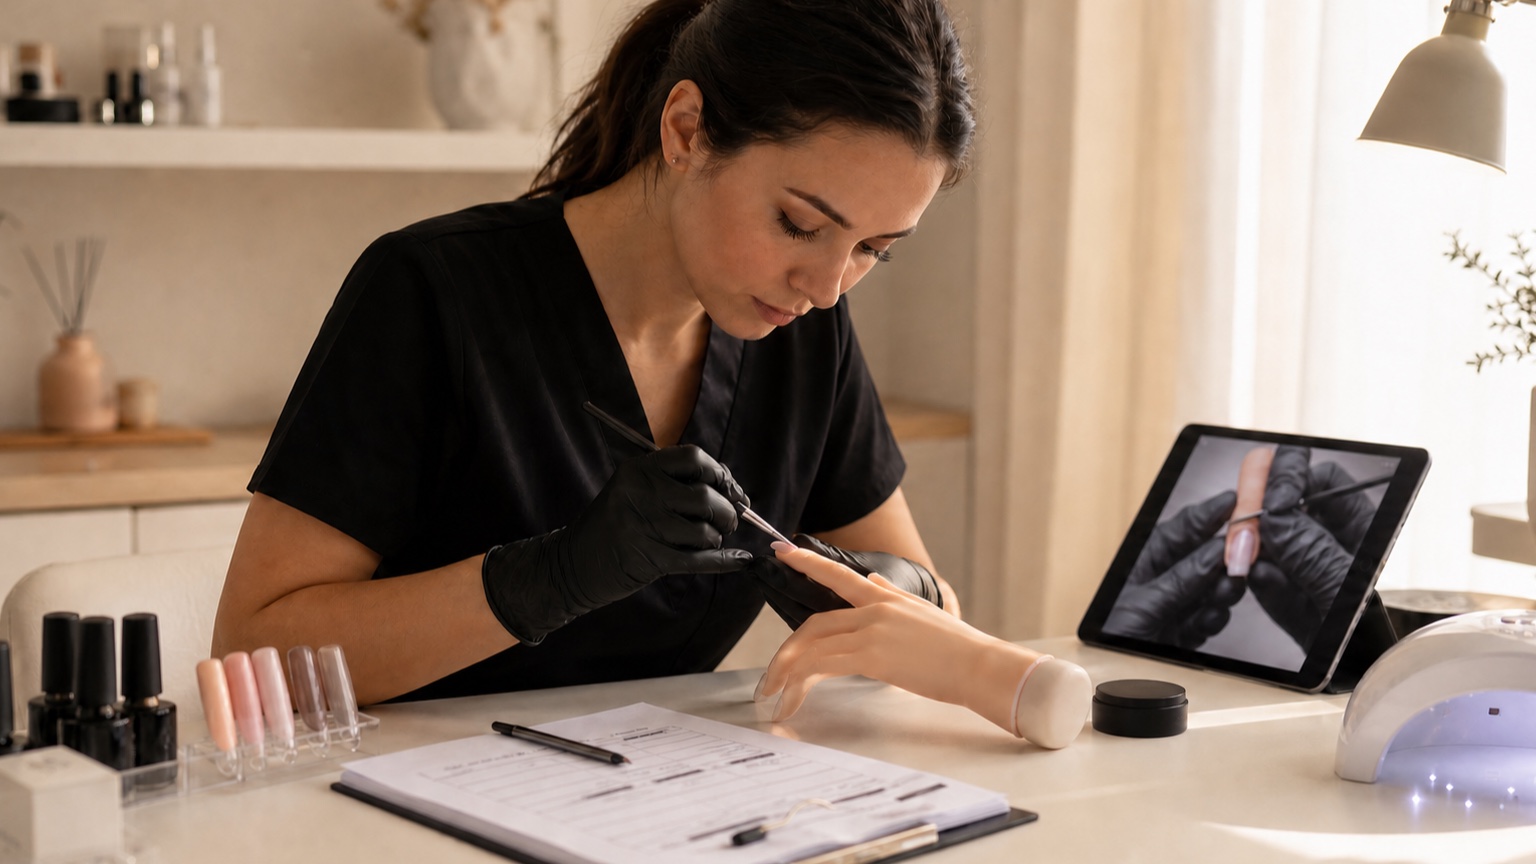
Finishing a nail course means you have seen and understood a sequence; it does not mean every movement is already stable. Independent practice must turn observation into controlled action: recall the process, repeat a narrow task, recognise the error, apply one correction and produce a similar result again. A useful practice plan makes that change visible instead of relying on motivation, hours watched or one attractive set.
Short answer: choose one technique, schedule two or three sustainable sessions each week and give every session one measurable objective. Photograph the whole series from consistent views, score safety and technique before appearance, ask for specific feedback and repeat under comparable conditions. Advance when several results are controlled—not simply because another week has passed.
This guide owns post-course practice design. If you have not chosen your starting technique, use the beginner technique guide. If your question is how many months learning may take, use the nail-extension practice roadmap. A public nail technician portfolio has a different purpose: it presents selected work to clients, whereas a learning record keeps unsuccessful attempts, conditions and corrections.
From course completion to repeatable competence
Every attempt should inform the next one
Repetition without a criterion can repeat the same mistake
Recall
Purpose, order, checks and stop points
Perform
One measurable micro-objective
Evaluate
Whole series and standard views
Correct
One change under comparable conditions
Rewatching a demonstration can improve familiarity, but familiarity is not manual control. A practice task should generate observable evidence and one decision for the next attempt. Instead of repeatedly completing an entire extension, isolate one variable: preparation, bead or gel quantity, product perimeter, apex position, filing sequence, colour application or removal. Fewer moving parts make cause and effect easier to read.
Phase | Action | Concrete evidence | Keep |
|---|---|---|---|
Recall | Rebuild the sequence without copying every second of the lesson. | Write the order, purpose, product, check and stop point. | Your checklist, corrected against the course. |
Perform | Repeat one micro-objective under stable conditions. | Three or five matching tips, zones or movements. | The complete series, not only the best example. |
Evaluate | Compare with criteria defined before starting. | Consistent top, side and front views plus a score. | One observed fact and one probable cause. |
Correct | Change one controllable variable and repeat. | A second series at the same level of difficulty. | Before-and-after comparison and next action. |
There is no universal practice interval for every manual nail skill. Treat the schedule below as an organisational framework, not a scientific promise of mastery. Session quality, prior experience, technique complexity, feedback and rest all affect progress. The useful question is whether control transfers to another attempt—not whether a prescribed number of hours has been reached.
What to do in the first 48 hours after a course
Archive the syllabus, technical sheets, product instructions, assessment criteria and lesson links. Keep tutor instructions separate from your assumptions or social-media tips.
Rewrite the service in your own words. For each stage record its purpose, quantity, working area, tool, check and stop signal.
Set up repeatable lighting, seating, ventilation or local extraction, tool positions and a fixed camera angle. Inconsistent conditions make comparisons weak.
Complete a baseline attempt without chasing speed. Its job is to reveal the first priority, not to prove that you have already mastered the course.
Choose one micro-objective: clean perimeter, even layer, centred apex, parallel sidewalls, consistent file marks or removal without grooves.
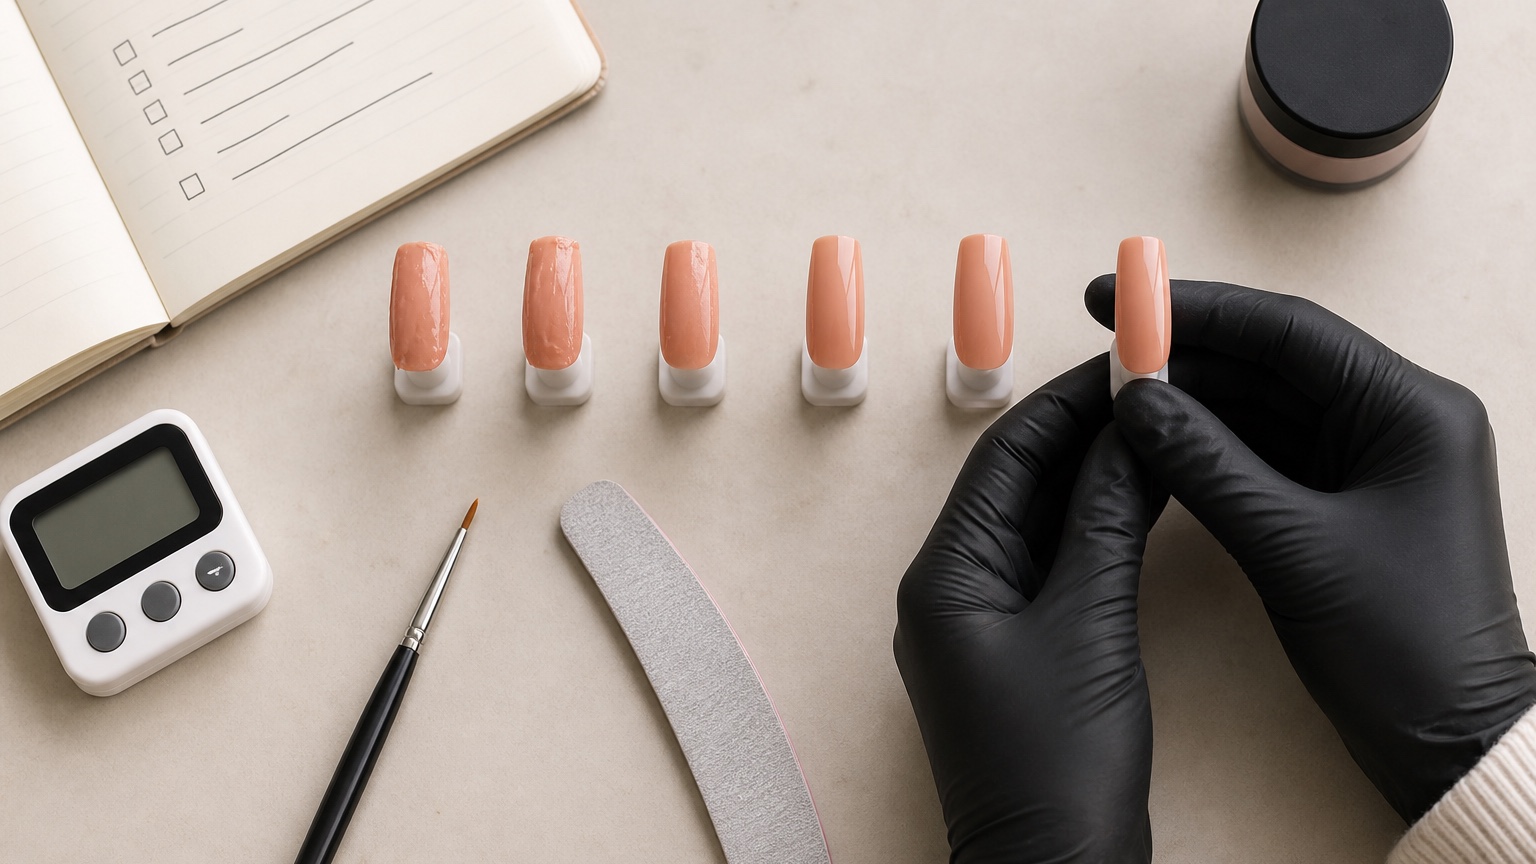
Do not discard weak attempts. A chronological line shows whether variation is shrinking or one result was simply fortunate. Use a neutral opaque colour when assessing structure because glitter, art and highly reflective effects can conceal unevenness, thickness and a broken light line. Label each sample with date, objective, system and correction.
The deliberate-practice loop for nail skills
Define success before the exercise—for example, five thin perimeters with no product on skin.
Reduce the task to a tip or training hand when real nail, skin or wear behaviour is not yet necessary.
Perform a short uninterrupted series, but stop immediately for pain, heat, abrasion, skin contact, breakage or any unsuitable condition.
Photograph and score the evidence. Separate the visible fact from the explanation you are testing.
Review the exact lesson segment or request competent feedback, then alter one variable in the next comparable series.
A focused 60-minute session
Use the first ten minutes for setup, objective and sequence recall. Spend about 25 minutes on the first controlled series, ten minutes photographing and scoring it, ten minutes applying one correction in a smaller second series and the final five minutes cleaning, filing the evidence and scheduling the next task. The numbers can flex; the sequence should remain. If setup or cleaning cannot fit, the exercise is too large for that session.
A six-week post-course nail practice plan
Six weeks organise practice; they do not guarantee mastery
Progress follows evidence, not the calendar
Weeks 1–2
Baseline, quantity and margins
Weeks 3–4
Structure, filing and maintenance
Week 5
Coordinated series or complete set
Week 6
Simulation, feedback and next gap
Week | Primary objective | Practice evidence | Progress criterion |
|---|---|---|---|
1 | Sequence, safety and baseline | Written procedure, setup checklist and an untimed first series. | You can explain each stage and identify when to stop. |
2 | Quantity, margins and product control | Matching-tip series with the same product and layer target. | Several attempts without skin contact, gaps or uncontrolled bulk. |
3 | Shape, axis, surface or architecture | One shape and length photographed from three standard views. | The structure reads coherently without corrective over-filing. |
4 | Filing, infill, maintenance or removal | Zoned filing or simulated maintenance using the taught system. | Material is reduced or rebalanced without heat or damage. |
5 | A coordinated series or complete set | Five matched tips or a training hand with full photographs. | Quality does not collapse when the task expands beyond one nail. |
6 | Simulation, feedback and next plan | Full setup-to-clean-down simulation without continuous tutorial use. | You identify errors, justify decisions and define the next gap. |
This schedule assumes your course has already taught anatomy, hygiene and the specific product-lamp or liquid-powder system. Repeat a week when a red safety issue or unstable technical pattern remains. Use the guides to nail preparation, nail architecture, professional filing and infill or removal as technical references for individual stages rather than trying to solve everything in one session.
Create a practice record that produces decisions
Safety is a gate, not an average score
A beautiful result cannot cancel a red criterion
Safety
Contact, pain, heat and stop decisions
Precision
Quantity, perimeter and surface
Structure
Axis, apex and thickness
Decision
One cause and one next change
For each session record date, technique, micro-objective, practice support or model, products and batch where relevant, lamp or equipment setting, complete time, deviations from instructions, photographs, score, feedback and next change. A useful note says ‘left sidewall flares in four of five tips; maintain the form axis before product placement’. ‘Bad shape’ gives the next session no precise action.
Score each criterion from zero to two: zero means unsafe or absent, one means inconsistent and two means controlled across the series. Safety is a gate, not one category that can be averaged away by appearance. Product on skin, pain, bleeding, excessive heat, visible abrasion, unsafe tool control or an unsuitable nail means stop and correct before progression.
How to photograph work for useful feedback
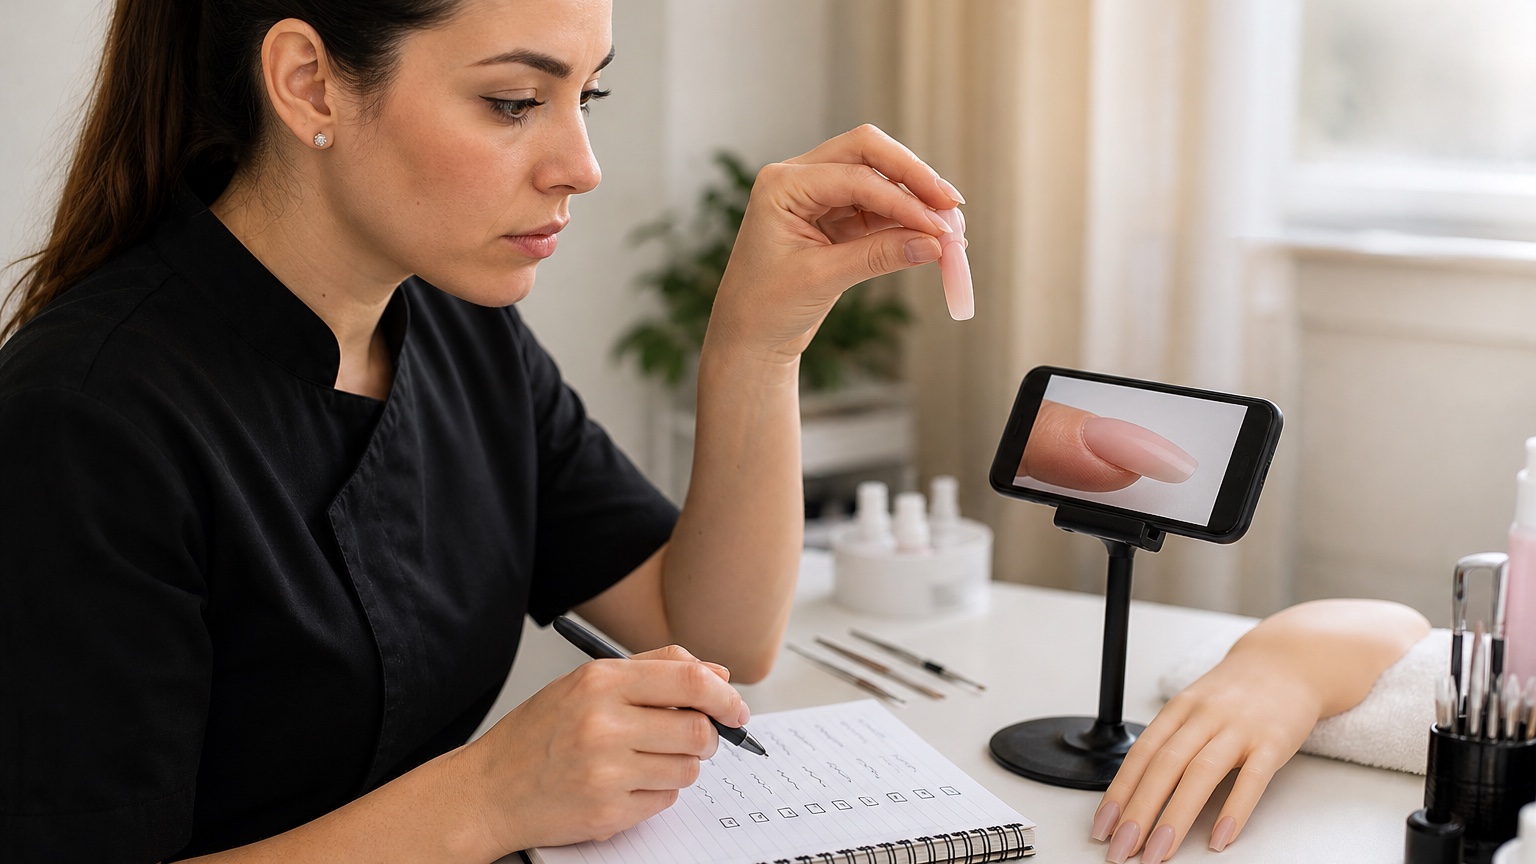
Use the same neutral background, camera distance, light direction and hand position. Capture a top view for axis and symmetry, a side view for apex and surface, a front view for free-edge thickness and C-curve, and a close view of the perimeter where relevant. Do not crop away the area you want assessed or use filters that smooth skin, alter colour or reshape edges.
A result photograph cannot show every process error. When permitted, add short video of preparation pressure, brush angle, product movement, form placement or e-file contact. Protect privacy: obtain permission before recording a person, store learning files securely and do not publish model images merely because they were submitted for tutor feedback.
How to request feedback that you can use
Send the complete series, the exact objective, materials, relevant instructions, three standard views and your own observation. Ask one bounded question such as ‘which stage most likely created the right sidewall flare?’ rather than ‘what do you think?’. Good feedback identifies an observable issue, suggests a likely process cause, sets one priority and asks you to repeat it.
Do not combine advice from many sources indiscriminately. The tutor may be working within a specific product system and sequence; a well-meant suggestion can be incompatible when the respondent cannot see the product, lamp or method. If the uncertainty involves skin, e-file contact, heat, removal or an unsuitable condition, seek qualified live supervision rather than continuing blind attempts.
When to move from tips to a training hand and model
Use each practice support for the evidence it can provide
A model is not where a risky movement should be discovered
Tips
Brush, product, line and shape drills
Training hand
Finger position and set consistency
Model
Skin, variation, wear and communication
Stop
Any red safety criterion
Tips isolate brush, product, filing and art. A training hand adds finger orientation and the coordination of a set. Neither reproduces natural-nail variability, surrounding skin, communication, wear, regrowth or removal on a person. Move in stages, and never use a model to discover a movement that can cause harm.
Green means the sequence is recalled, products remain off skin, tools and lamp are controlled, several attempts are similar and you can stop. Amber means quantity, filing or structure still varies and continuous tutorial prompts are needed. Red means pain, cuts, abrasion, abnormal heat, reaction, uncertain e-file use or inability to recognise unsuitable conditions. Red sends the learner back to theory, training support and competent feedback.
Tell a model that this is practice, explain the planned technique, approximate duration, right to stop and photography conditions, and obtain meaningful consent. Choose a simple service and short length. Do not introduce a new shape, material and tool in the same model session.
When practice is ready to become paid work
Six weeks, a finished course or a certificate cannot by themselves establish readiness. Paid work requires repeatable technique, controlled wear, maintenance and removal, hygienic operations, informed communication, records, the ability to refuse an unsuitable service and every licence or qualification required where you work. The career guide connects those areas; the guide to certificates and local requirements helps verify what a particular document does and does not prove.
How to recover from a practice plateau
Reduce the scale: from full set to one nail, from one nail to one zone, and from one zone to one movement.
Compare with your baseline; you may be improving while also becoming more accurate in your self-assessment.
Request a second view with the whole series and conditions, not one finished photograph.
Check posture, visibility and fatigue. Deterioration late in a session may call for a break, not another product.
Do not add a harder technique for motivation. Extra variables can hide the original cause.
Choose drills that match the technique you completed
A practice plan should preserve the logic of the course rather than forcing every system into identical exercises. After gel polish, useful drills include brush loading, a clean perimeter, even colour, documented cure and an intact removal. The guide to gel-polish safety and removal provides checkpoints, but your actual lamp, times, layer thickness and removal must come from the product system used in training.
After a builder-gel or extension course, separate product control from finished architecture. First repeat beads or gel portions on matching tips; then compare short structures from top, side and front; finally add form fitting, maintenance or a complete set. The detailed gel-extension sequence can help identify which stage created a defect. Do not rebuild an entire long set whenever the real gap is one sidewall, apex position or free-edge thickness.
After an e-file module, begin on material and supports specified by the tutor. Label the bit, direction, speed range, contact area and intended result before each drill. A smooth-looking surface does not prove controlled pressure; review heat, stability and the material left behind. Return to the e-file control guide whenever you cannot explain why that bit, direction or movement is appropriate. Never use a model merely to generate realistic resistance while control remains uncertain.
For nail art, define line width, curve, spacing, opacity or repeated motif before composing a full set. Ten comparable strokes reveal more than ten unrelated designs. Transfer the drill to one accent nail only after the movement is stable, then check that additional layers, pigments or decorations remain compatible with the system and do not compromise curing or maintenance. The learning record should show the progression from isolated mark to salon-scale composition.
Protect attention, posture and the workstation
More practice is not automatically better when visibility, posture or concentration deteriorates. NIOSH identifies repetitive motion, awkward posture and chemical exposure among nail-technician workplace hazards. Adjust chair, hand support and light before the timer starts; keep containers closed when not in use; use the ventilation or extraction appropriate to the products and dust; and build short recovery breaks into long sessions. A late-session decline may be fatigue evidence rather than a technical mystery.
End the session if you are rushing cleaning, forgetting product instructions or applying more pressure to recover lost time. Record the stopping point and restart later. Sustainable practice includes setup and close-down because those are part of the real service. A technically attractive tip created in an unsafe, disorganised or non-repeatable environment is not evidence of professional readiness.
Frequently asked questions
How often should I practise after a nail course?
Two or three focused sessions a week can be a sustainable starting pattern, but there is no universal prescription. Choose a frequency that preserves attention, safe setup, cleaning and documentation.
Is 30 minutes of nail practice enough?
Yes for a narrow drill such as five margins, one filing zone or three-view structure comparison. It is not enough to simulate a complete service, clean down and evaluate it properly.
Should I practise on tips or a training hand?
Use tips to isolate product and shape. Use a training hand to coordinate fingers and a set. Neither replaces later suitable model work for skin, natural-nail variation, communication, wear and removal.
When can I practise on a model?
When the sequence, product control, equipment and stop decisions are stable on training supports. Explain the practice status, obtain consent, choose a simple service and stop for any red safety criterion.
Should I repeat the same technique every time?
Repeat it long enough to create a comparable series. When safety and quality are stable, change one condition such as shape, length or task size—not product, tool and technique together.
How do I know whether I am improving?
Variation should shrink across whole series, quality should survive repetition and you should begin to anticipate errors. One excellent tip or a faster time is not enough evidence.
Which photographs should I submit for feedback?
Use consistent top, side and front views plus a perimeter detail when relevant. Include the whole series, unchanged colours and enough context to identify the technique and support.
What if my course does not include corrections?
Use its written criteria first, then seek a competent review that sees the process, complete series and product system. For uncertain skin, e-file or removal work, practical supervision is preferable to more blind repetition.
Should I change brand when a result fails?
Not as the first reaction. Check preparation, quantity, compatibility, equipment, timings and instructions. Changing brand adds another variable. Stop using any untraceable, incompatible or reaction-associated product.
When should I start timing my services?
Record time from the beginning but optimise it only after safety and quality are stable. Reduce searching, setup gaps and repeated corrections—not checks, curing time or controlled tool use.
Is a six-week plan enough to become a professional?
No. It organises early practice but does not guarantee competence, speed, case management or legal eligibility. Repeat stages and obtain further training or supervision whenever evidence requires it.
What should I do if I miss a week?
Restart from the last documented series, run a short recall test and repeat its objective if control has faded. Do not compress missed sessions into a distracted marathon.
Official sources and editorial boundary
Workplace safety overview: CDC/NIOSH, Nail Technicians: Workplace Safety and Health. Chemical-control guidance: NIOSH, Controlling Chemical Hazards During the Application of Artificial Fingernails and OSHA, Health Hazards in Nail Salons. These US workplace sources support ventilation, exposure and ergonomic context; they do not replace the law or professional requirements in another jurisdiction.
Editorial boundary: this is an educational planning framework, not a guarantee of competence after six weeks. It does not replace product instructions, practical supervision, workplace controls, healthcare assessment or verification of local training and licensing requirements.
To continue learning, compare the current English-market online nail courses by level, curriculum and tutor. Choose the next module from the gap documented in your practice record, not simply from the next item in a catalogue.