Gel that feels tacky, stays soft, wrinkles or pulls away from an edge does not present one universal fault. A thin uniform tack can be the expected oxygen-inhibition layer. A wrinkled colour can form a surface skin while material below remains mobile. Product that recedes before the lamp may reflect surface contamination, wetting or incompatible layers. Start from the observable defect and its timing—not from adding random minutes.
Short answer: never hide soft or wrinkled gel under top coat. Stop, prevent uncured product from touching skin, remove the unstable layer in a controlled way and check thickness, shade, product, lamp, hand position and compatibility. Expected surface tack is not by itself proof of undercuring, but neither is it proof that the full layer cured correctly.
This troubleshooting page owns the visual symptoms and correction sequence. The separate guide to curing gel nails owns the complete photopolymerisation method, while the UV/LED lamp guide owns device selection and maintenance. Substantively reviewed on 5 September 2026, this guide is technical education, not medical advice. It uses ‘not curing’ because people search that phrase; the process is photopolymerisation rather than ordinary drying.
First classify the defect: tacky, soft, wrinkled or pulled back
Four appearances start four different investigations
Do not call every sticky or moving surface ‘uncured’
Tacky
May be the intended inhibition layer
Soft
Check cure depth and system
Wrinkled
Surface stabilised over movement
Pulled back
Time the edge change
Appearance | Possible pattern | First decision |
|---|---|---|
Thin, even surface tack | Expected inhibition layer | Check the instructions; do not judge depth from surface alone |
Gel moves, dents or remains jelly-like | Insufficient cure, excessive layer or incompatible system | Do not seal; remove instability and investigate |
Waves, folds or puckering | Surface stabilised while the layer beneath moved | Remove and repeat only through the documented protocol |
Product recedes from an edge | Wetting, contamination, timing, shrinkage or later lifting | Identify whether it happened before, during or after cure |
Observe before wiping or pressing. Record which layer, shade, finger, edge and moment were involved. Photograph a controlled training tip when appropriate and note brand, line, batch, lamp and programme. ‘It did not dry’ loses the evidence required to distinguish a surface property from a failed process.
Oxygen-inhibition layer or genuinely undercured gel?
Many radical-cured gels retain a tacky outer film because oxygen interferes with polymerisation at the air interface. Manufacturers may design that inhibition layer to receive another coat. The product below can be stable while the surface remains sticky, so wiping, poking or adding time cannot measure internal conversion reliably.
Expected tack is normally thin and consistent with the product instructions. A no-wipe top should produce its declared finish. A layer that shifts, strings, wrinkles, collapses under gentle service handling or reveals fluid material beneath must not be dismissed as normal dispersion. Do not touch it with bare skin or a reusable tool that then returns to a clean zone.
Surface tack does not prove the whole layer is uncured, and a hard-feeling surface does not prove the depth is adequately cured. Product instructions, layer limit, compatible lamp, position and complete cycle must agree.
Why gel stays soft after the lamp
Excessive thickness: light reaching deeper material can be reduced by the layer and its pigments.
Incompatible lamp: wattage cannot prove that spectrum, irradiance and geometry activate the formula as assessed.
Interrupted exposure or poor hand position: tilted thumbs and overlapping or curled fingers can sit outside even illumination.
Dense pigment or particles: opaque dark, white, neon and glitter shades may need shade-specific layers and cycles.
Undocumented mixing: base, builder, colour, top and lamp from different systems are not automatically interoperable.
Equipment condition: blocked or failed diodes, incorrect supply, sensor faults, contamination and ageing can change delivery.
Product condition: light exposure, heat, contamination, poor closure or use beyond the stated period can alter behaviour.
Do not compensate for an unidentified cause with unlimited extra lamp time. If the emission spectrum is unsuitable or the layer blocks light, extra minutes cannot be assumed to deliver an adequate cure. The guide to gel heat spikes explains how arbitrary exposure can add discomfort without validating conversion.
Why gel polish wrinkles or puckers
Wrinkling can hide a mobile layer below
Opaque colour, excess thickness and ineffective exposure deserve separate checks
Surface
A film begins to stabilise
Depth
Material remains mobile
Movement
Contraction forms folds
Correction
Remove, thin and recure correctly
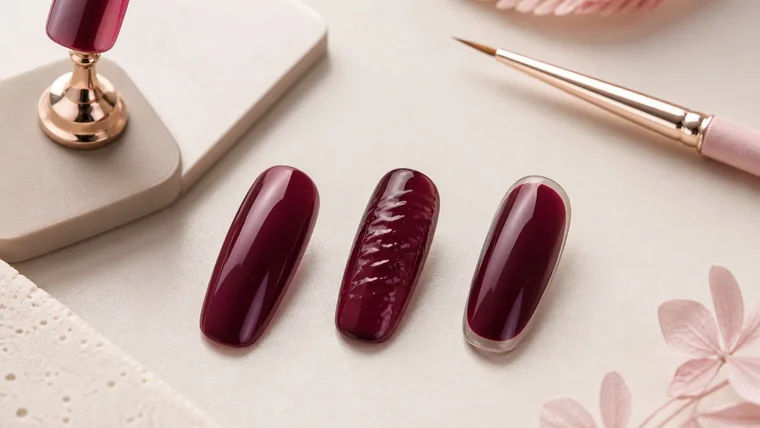
Wrinkling often appears when the upper surface develops structure before the material below can form a stable network. Movement and cure shrinkage are then distributed unevenly, so the surface skin folds into waves or small craters. This is a useful process model, not a diagnosis that identifies one chemical cause for every product.
A common combination is a thick opaque colour and insufficient effective exposure through its depth. A bottle not mixed as instructed can also distribute pigment unevenly. When only thumbs wrinkle, inspect their angle and location. When one shade fails across correctly positioned nails, compare shade-specific instructions, layer thickness, bottle condition and batch rather than changing the complete service at once.
Stop and remove the wrinkled layer without spreading uncured material onto skin.
Check whether the layer beneath is stable, intact and permitted to receive a new coat.
Mix the shade only as instructed and apply a thin, even layer without pools.
Place the whole hand and thumb in the intended lamp zone and complete the documented cycle.
If the fault repeats, quarantine the combination and contact technical support with batch, lamp and photographs.
Why gel pulls away or shrinks from the edges
The moment the gap appears changes the diagnosis
Application pull-back, cure movement and later lifting are not synonyms
Apply
Residue, wetting and compatibility
Wait
Viscosity, amount and delay
Cure
Layer, contraction and position
Wear
Lifting, impact and structure
‘Shrinking’ is used for several different events. Before the lamp, a gel may bead away from proximal, lateral or free edges because the surface is contaminated, insufficiently prepared for the system, too smooth, or incompatible with the layer below. While waiting, a low-viscosity product may continue moving. During cure, the film can contract. Several days later, an apparent gap is more likely wear or lifting and needs a different investigation.
When it appears | Priority checks | Avoid |
|---|---|---|
Immediately after application | Dust, oil, moisture, residue, preparation, compatibility | Chasing the edge with more product |
While waiting for the lamp | Viscosity, amount, temperature and delay | Leaving all fingers uncured for too long |
During cure | Layer, film contraction, exposure and edge method | Hiding the gap with thick top coat |
After days of wear | Adhesion, wear, impact, architecture and maintenance | Calling all later gaps cure shrinkage |
Use the natural-nail preparation guide to remove product-incompatible residue without over-filing. When a gap appears after wear, diagnose it with the nail-lifting guide rather than repeating a thicker colour application.
Check the lamp without stopping at wattage
The electrical wattage printed on a lamp does not tell you which wavelengths reach the gel, the irradiance at each nail or the distribution created by diode geometry. Two devices carrying the same number can expose the thumb and centre fingers differently. Use the lamp validated or documented by the product system rather than the largest marketplace specification.
Inspect the authorised power supply, cable, sensor, timer, diodes and interior. Clean only through the device instructions; product residue or unauthorised solvent can damage components. If the lamp begins producing repeated faults across shades or clients, remove it from service until checked. A hard training tip is not laboratory proof of conversion and a client’s skin is never a test instrument.
Pigment, glitter and opacity change the layer decision
Pigments and particles can absorb, scatter or reflect part of the incident light. An opaque black, dense white, neon or glitter-rich gel may not behave like a translucent nude from the same brand. Follow the exact shade instructions and use thin, regular coats rather than one heavy layer designed to achieve immediate coverage. For structural formulas, compare viscosity and intended behaviour in the builder-gel family guide without treating any family name as a cure specification.
Mix or roll the bottle only as the manufacturer directs, without introducing avoidable air. Keep it closed and away from windows, lamps and curing devices that can reach the brush or bottle neck. A thickened neck and partially exposed brush can alter application even when the product inside has not reached its stated period after opening.
Flash curing and one-nail-at-a-time application need a defined purpose
Curing one nail at a time can reduce the delay in which a runny product pulls away or floods, but only if the system permits the resulting sequence. A short flash may hold a design or prevent movement; it is not automatically the complete cure. The full hand or each nail must still receive the manufacturer’s stated final exposure in the correct lamp position.
Do not create a chain of unrecorded five-second flashes and assume their sum equals one uninterrupted cycle. Lamp output may ramp, pulse or depend on a selected mode, and the product protocol may distinguish flash setting from final cure. If the shade repeatedly moves before the normal cycle, reduce product amount, improve timing and ask technical support whether a supported flash step exists.
When testing on a training tip, reproduce the same base, colour thickness, curvature, lamp location and full cycle planned for the service. A thin flat tip at the centre of the lamp cannot clear a thick curved thumb application. Training tests are process checks rather than certification that every client layer is fully converted.
Product mixing can create an invisible compatibility failure
Base from one system, colour from another, top from a third and a convenient lamp may look glossy at first. That appearance does not prove cure depth, intercoat adhesion or stable wear. Review the cross-brand nail-product compatibility guide and use a supported combination. The words UV, LED, soak-off or universal are not a compatibility certificate.
When technical support confirms a combination, record the exact products and lamp rather than only the broad family. Read batch, warnings and responsible-person details through the guide to professional nail-product labels. If support cannot supply a layer and cure protocol, do not experiment on a paying client. A single successful nail does not establish repeatable safety or durability.
A safe correction sequence
Correct the defect without spreading uncured gel
Containment comes before a new colour layer
Stop
No top over unstable gel
Contain
Keep reactive material off skin
Correct
Remove and isolate one cause
Verify
Complete cure and record
Stop: do not add top, colour or builder over a mobile, wrinkled or jelly-like area.
Contain: prevent uncured product contacting skin, controls, bottles, clean tools or the technician’s clothing.
Remove: follow the product procedure without dragging reactive residue across the surrounding folds.
Inspect: confirm whether the lower layer and natural nail are intact, stable and free from lifting or contamination.
Isolate: correct one supported variable such as layer, position or shade protocol rather than changing everything.
Repeat: use a compatible product–lamp system and complete its full stated cycle.
Record: capture batch, lamp, programme, finger, layer and result; quarantine a recurring fault.
Replace wipes, gloves or other disposable items contaminated with uncured product. Reprocess compatible reusable tools according to their instructions and salon hygiene plan. If skin exposure is followed by itching, redness, swelling or blistering, stop further use and recommend healthcare assessment. The gel-allergy guide explains why re-exposure is not a salon patch test.
What not to do
Apply a thick top coat to conceal wrinkles or soft product.
Add minutes indefinitely without confirming lamp–photoinitiator compatibility.
Use one opaque coat when the system calls for multiple thin layers.
Press the surface with a fingernail or unclean stick to test it.
Keep using a wrinkling shade without recording its batch and conditions.
Aggressively wipe every inhibition layer when the next layer requires it.
File the natural nail more deeply to prevent product pull-back.
Mix gels and lamps solely because each is labelled UV/LED.
A root-cause checklist before restarting
Is the product within its use period, correctly stored, closed and uncontaminated?
Are base, builder, colour, top and lamp compatible through verifiable instructions?
Is the surface clean and prepared without oil, dust, moisture or over-filing?
Is the layer uniform and within the limit for that product and shade?
Is the hand centred with the thumb in its intended exposure zone?
Do lamp, power supply, timer, sensor and diodes operate without anomaly?
Has every unstable area been removed rather than sealed?
Will the full product-specific cure be completed without invented shortcuts?
For guided practice, compare the Gel Polish Course, the Beginner Gel Nails Course — Level 1 and the Complete Nail Technician Course. English courses and instructors are separate market records; closed enrolment is a preview and does not make the Italian programme or price applicable.
Frequently asked questions about tacky, wrinkled or shrinking gel
Why is gel sticky after curing?
Many formulas leave a thin oxygen-inhibition layer at the surface and are designed to receive the next coat. Check the product instructions. A no-wipe top, moving mass, wrinkles or jelly-like material below the surface are different findings and require a cure investigation.
How can I tell inhibition layer from uncured gel?
Expected inhibition is a thin uniform tack described by the system. Undercured gel may shift, dent, wrinkle or remain fluid through the layer. Do not touch-test it on skin. Compare product instructions, layer, lamp, position and the stability of the complete film.
Why does gel polish wrinkle in the lamp?
A frequent pattern is an opaque or thick layer whose upper surface stabilises while material below remains mobile. Pigment distribution, hand position, lamp compatibility, bottle condition and an incomplete cycle can contribute. Remove the layer instead of hiding it under top coat.
Can I put top coat over wrinkled gel polish?
No. Top coat can conceal part of the texture but cannot correct an unstable or inadequately cured colour layer. It may trap reactive material. Remove the defective coat, verify the base, then repeat a thin layer through the supported lamp and cure protocol.
Will extra minutes cure soft gel?
Not reliably. Extra time cannot be assumed to overcome an unsuitable spectrum, excessive thickness, degraded product or dense pigment. It can add heat without validating conversion. Identify the cause and use the documented product–lamp cycle or discontinue the combination.
Why does gel shrink before it reaches the lamp?
It may not wet a surface contaminated by dust, oil, moisture or residue; it may conflict with the layer below or remain uncured too long while moving. Correct preparation, product amount, timing and compatibility instead of repeatedly adding more gel to the edge.
Why does gel wrinkle only on the thumbs?
Thumbs are often tilted or sit outside the intended diode zone. Follow the device method for thumb position, which may require a separate exposure. Do not copy a random extra time; retain the stated layer and complete product-specific curing cycle.
Will a higher-wattage lamp fix wrinkling?
Wattage alone does not identify wavelengths, irradiance at the nail, diode layout or compatibility with the gel’s photoinitiators. Use the lamp documented for the product, keep it maintained and inspect the layer and shade before assuming more electrical power is the answer.
Can gel and lamp brands be mixed?
Only when compatibility and a cure protocol are verifiable. UV/LED or universal claims do not prove that the combination reaches the assessed cure. A glossy surface is weak evidence. Without technical support, keep the base, gel, top and lamp within the validated system.
What if uncured gel touches the skin?
Stop the contact and remove the material according to its safety instructions; do not cure it on the skin. Replace contaminated disposables. If itching, redness, swelling, blisters or persistent symptoms develop, stop using the product and recommend healthcare assessment.
When should the bottle or batch be quarantined?
Quarantine it when the fault repeats despite the correct documented layer and lamp, the product shows contamination or light damage, the batch behaves abnormally, or technical support cannot confirm a compatible cure. Preserve the label and batch for investigation.
Is gel shrinkage the same as lifting?
Not necessarily. Pull-back before or during curing is a product-application event; a gap appearing days later is more likely wear, adhesion loss or lifting. Record when the edge changed and diagnose later failure by zone instead of calling every gap polymerisation shrinkage.
Scientific sources and editorial limits
Polymers — The Chemistry Behind the UV-Curable Nail Polishes
Cosmetics — Test methods for extractables in no-wipe topcoat gel polish
The sources support oxygen inhibition, formulation-dependent photopolymerisation and the limits of surface appearance; they do not create one universal salon test for every commercial gel. No competing academy, salon or product retailer is linked. Verify the precise label, batch, layer, lamp and manufacturer instructions, and use the complete English nail guide library for adjacent decisions.