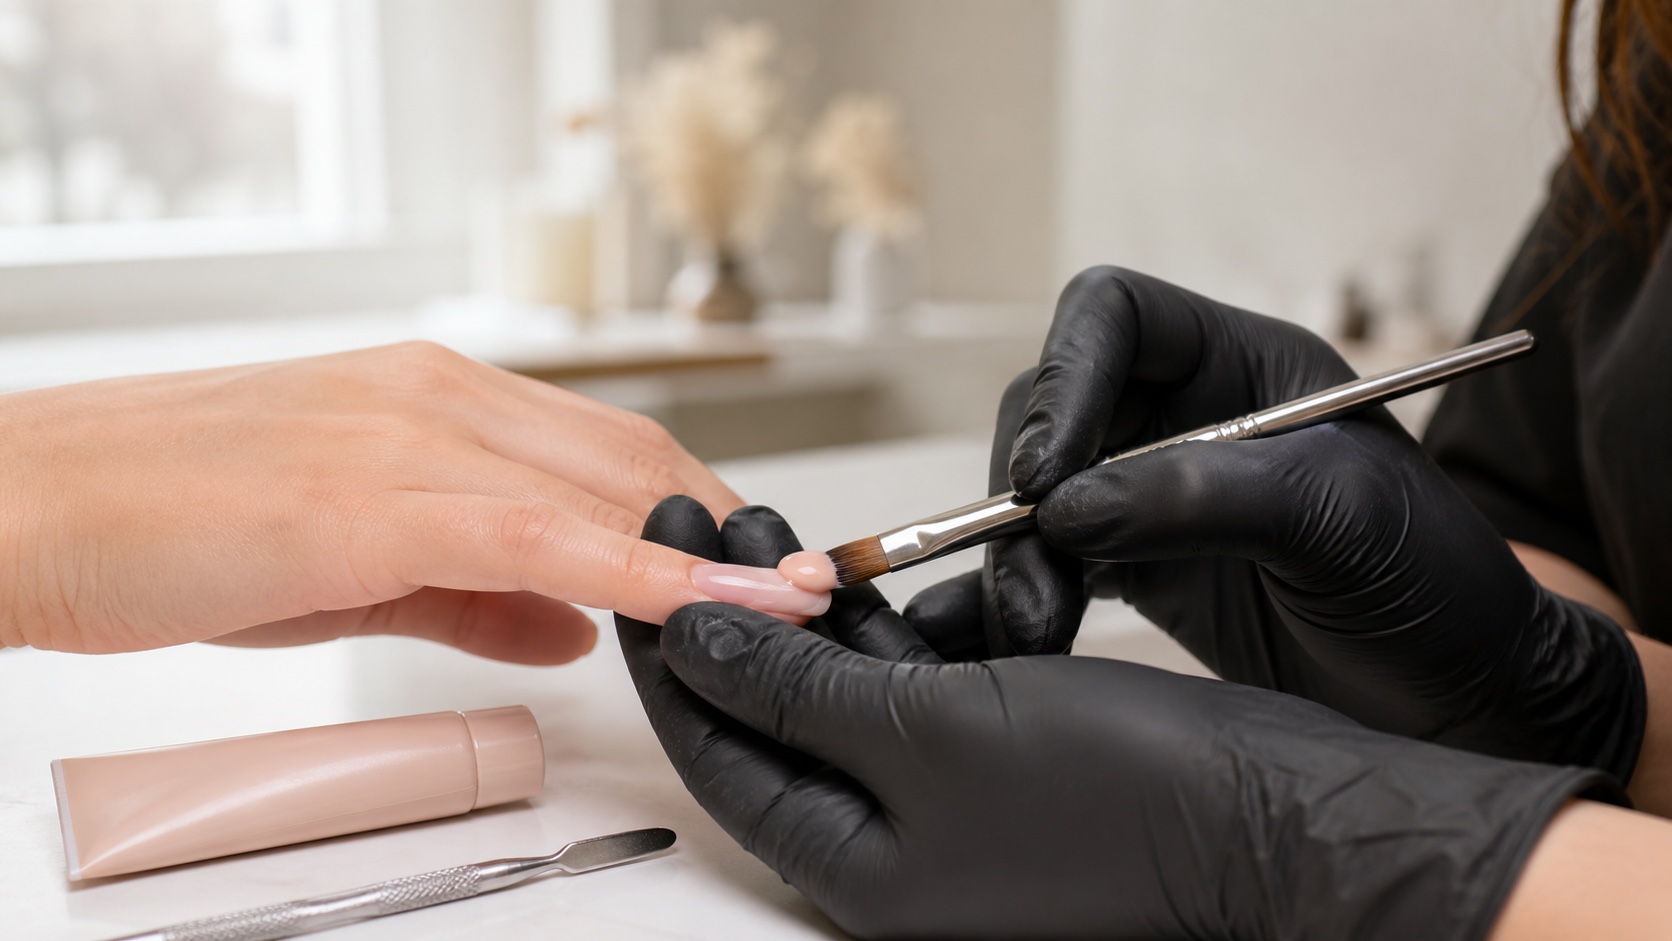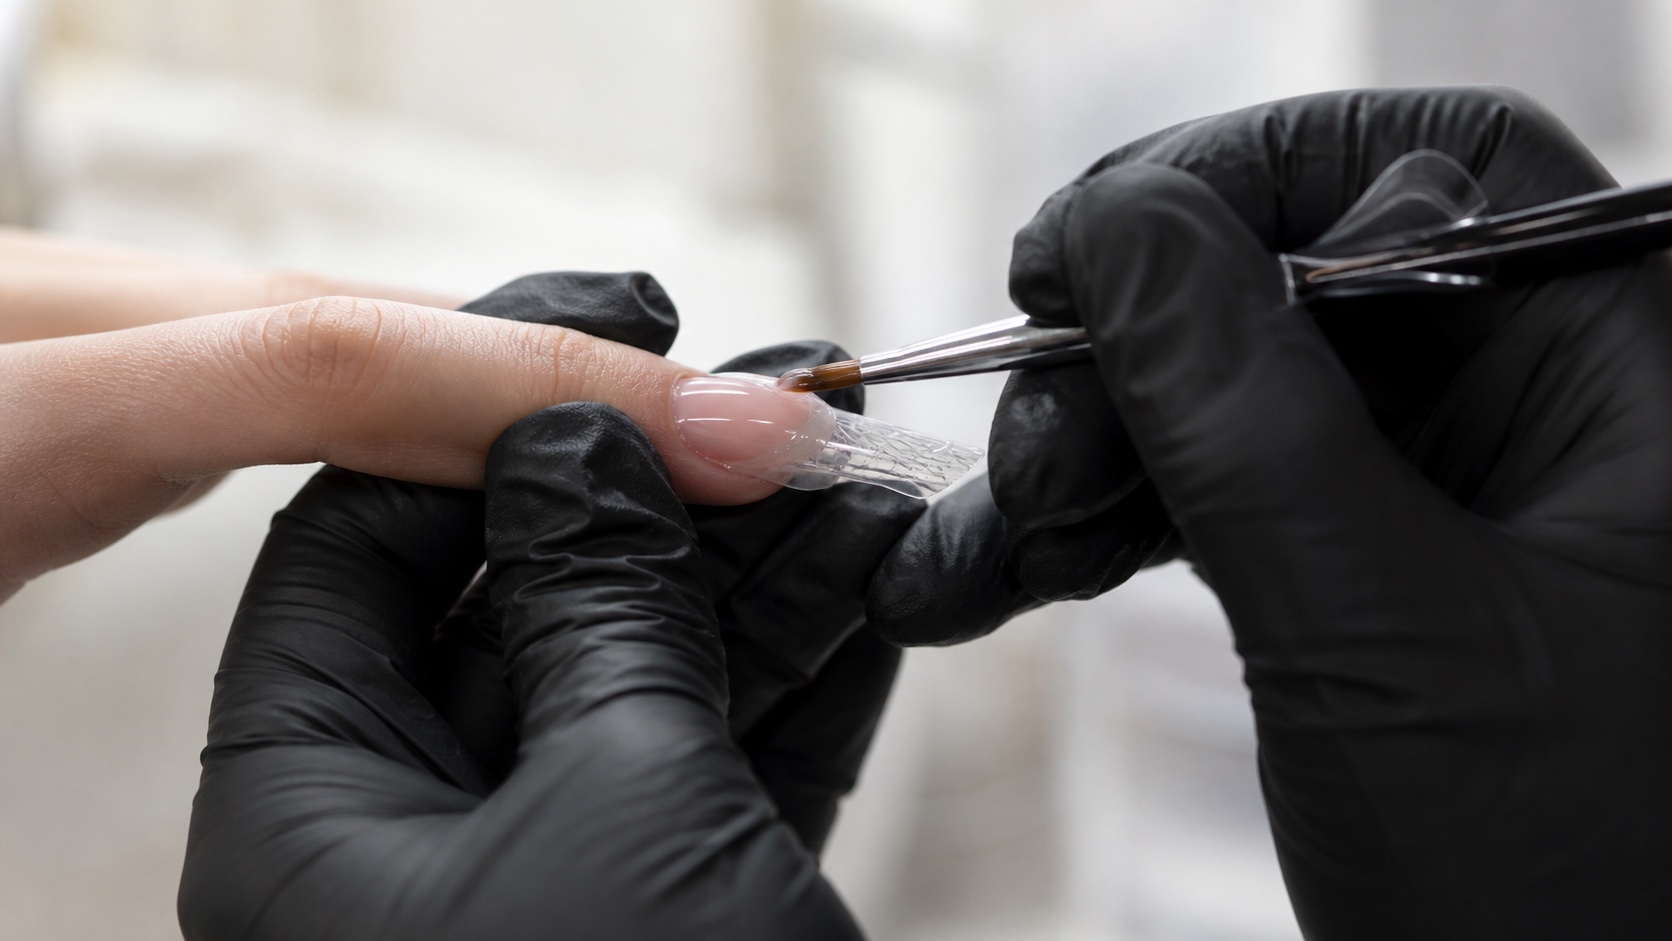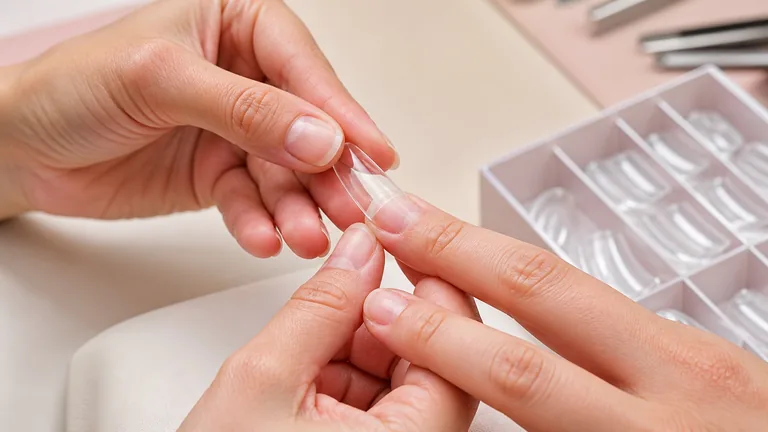
Full-cover gel tips can create a repeatable extension shape efficiently, but they are not a shortcut around nail assessment, fit, product compatibility or complete curing. The preformed tip covers the nail from the proximal area to the free edge, while a compatible light-cured adhesive joins the two surfaces. A controlled service depends on matching width, transverse curve, longitudinal curve, cuticle line and axis before any product is cured.
A full-cover tip should fit the nail before adhesive is used. More gel cannot safely correct a tip that pinches the sidewalls, rocks over the centre, leaves unsupported gaps or points away from the finger axis.
This guide owns the complete full-cover application workflow. The comparison of tips, gel tips, nail forms and dual forms helps choose a support method; the dual-form guide covers a reusable mould removed after building. Full-cover tips stay on the nail as part of the enhancement until maintenance or removal.
Full-cover gel tip, soft-gel tip and Gel-X: use the terms precisely
A full-cover tip describes geometry: it covers the complete nail plate rather than only extending the free edge. A soft-gel tip describes a product category used in light-cured systems. Gel-X is a particular brand name that is often used casually for the whole category, much as a trade name can become shorthand in conversation. In technical records, identify the actual tip, adhesive and lamp system rather than writing a generic label that hides which instructions were followed.
Not every transparent full-cover tip has the same material, thickness, opacity, pre-etched surface or removal method. Some are intended for a compatible gel adhesive and full cure through the tip; others are press-on products used with air-curing glue or adhesive tabs. Do not infer chemistry from appearance. Read the product identification, intended use, safety information and instructions for every component.
System | What stays on the nail | Critical control |
|---|---|---|
Full-cover light-cured gel tip | Preformed tip plus cured adhesive layer | Fit, light transmission and complete cure |
Partial tip | Tip at the free-edge area plus overlay | Contact area, transition and overlay architecture |
Dual form | Only the cured builder material | Product quantity, underside and mould removal |
Press-on with air-curing glue | Preformed nail joined by separate adhesive | Adhesive instructions, fit and removal |
When full-cover gel tips are an appropriate choice
Full-cover tips may be efficient when a client wants a consistent salon length and the available shapes fit the natural nail without force. They can reduce freehand building and filing, but they do not eliminate architecture: the preformed apex, sidewalls and lower arch still have to suit the length, growth direction and intended use. A beautiful tip on the display card can be structurally unsuitable for the person in front of you.
Consider another method when every available size leaves large side gaps, the curve creates pressure, the proximal edge cannot sit flush, the nail is extremely hooked or ski-jump, or significant correction is needed. Very short bitten nails can also leave little controlled bonding area and exposed skin near the free edge. The nail morphology guide and guide to hooked and ski-jump growth help separate an aesthetic preference from a fit limitation.
Do not apply over pain, unexplained separation, green or dark colour, inflamed skin, open wounds, discharge or a suspected product reaction. A nail professional does not diagnose the cause or seal it under a tip. Stop, document what is visible without labelling a disease and direct the client to appropriate medical assessment when indicated.
Fit the full-cover tip across four zones
Dry fit across four connected zones
Width alone cannot prove a tip is suitable
Width
Sidewall-to-sidewall without pressure
Curve
No central rocking or lateral voids
Proximal line
Even and clear of living skin
Axis
Balanced with finger and intended shape
Assess fit on a clean, dry nail before primer or adhesive. First check width: the tip should cover from sidewall to sidewall without being pressed flat. Next check the transverse curve: a highly curved tip on a flat nail may touch centrally and leave lateral voids; a flat tip on a curved nail may contact the sides and rock. Then evaluate the proximal line and longitudinal curve. Finally align the tip with the finger and intended extension axis rather than automatically following one uneven edge.
If the ideal size falls between two tips, the larger size may sometimes be refined at the side edges according to the system instructions. Filing a small amount is different from removing so much material that the wall becomes thin, uneven or distorted. A smaller tip that must be forced into place is not a solution: pressure can remain uncomfortable and the edge may spring away as soon as the holding force is removed.
Width: both lateral edges are covered without pressure or exposed nail.
Curve: the underside follows the nail rather than bridging a large cavity or rocking.
Proximal line: the edge can sit close and even without touching living skin.
Axis: the extension reads straight from the finger and has balanced sidewalls.
Use a compatible tip, adhesive and lamp system
A clear tip does not make every gel adhesive compatible with every lamp. Photoinitiators respond to defined wavelength bands, while lamp output, geometry, distance, reflector condition, tip opacity, pigmentation and product thickness affect the energy reaching the adhesive. Follow the current instructions for the complete system, including preparation, adhesive amount, flash setting, full cure and any stated restrictions. Do not replace those instructions with a wattage number or a viral timing chart.
The UV/LED nail lamp guide separates wavelength, irradiance and maintenance; the guide to curing gel nails explains why a hard or glossy surface does not prove complete polymerisation. Never cure gel touching the skin, and do not file uncured or questionably cured material as if it were finished product.
If the system allows colour or design before attachment, confirm that the decorated tip still permits the specified curing route. Dense pigment, metallic foil, chrome or opaque art can reduce transmitted light. A predesigned tip may need another approved attachment method. When the instructions do not address the planned combination, ask the manufacturer’s technical service rather than improvising on a client.
Prepare the natural nail and the inside of the tip
Preparation creates a clean, controlled substrate; it should not thin or injure the nail. Complete consultation and observation first. Remove surface debris and non-living tissue from the plate with the method and tools permitted by the service, refine shape where necessary and manage dust. Avoid aggressive filing, repeated dehydrator, flooding primer or cutting living tissue to chase retention.
Follow the natural-nail preparation guide for the difference between visible cleanliness, controlled surface refinement and over-filing. If the chosen tip requires manual etching, chemical etching or a pre-etched interior, use only the stated zone and method. Etching too close to the free edge or proximal margin can create visible scratches and weak irregular edges; failing to prepare the bonding zone can reduce adhesion.
Arrange all ten fitted tips in order before dispensing adhesive. The inside surfaces must remain clean after preparation. Touching them with fingers, mixing sizes during application or repeatedly trying a prepared tip over dusty skin adds avoidable contamination and slows a stage in which control matters.
Apply a full-cover gel tip step by step
Fit first, then control product and light
A repeatable sequence keeps correction out of the curing stage
Assess, dry-fit and organise
Prepare nail and bonding zone
Seat, align and flash-stabilise
Inspect and complete the full cure
Complete consultation, inspect nails and skin, and stop for contraindicating signs.
Dry-fit all ten tips for width, curve, proximal line and axis; refine only as allowed.
Prepare the natural nail and tip interior according to the chosen system.
Apply the stated bonding products sparingly and keep every uncured product off skin.
Place the specified amount of adhesive inside the bonding area of the tip.
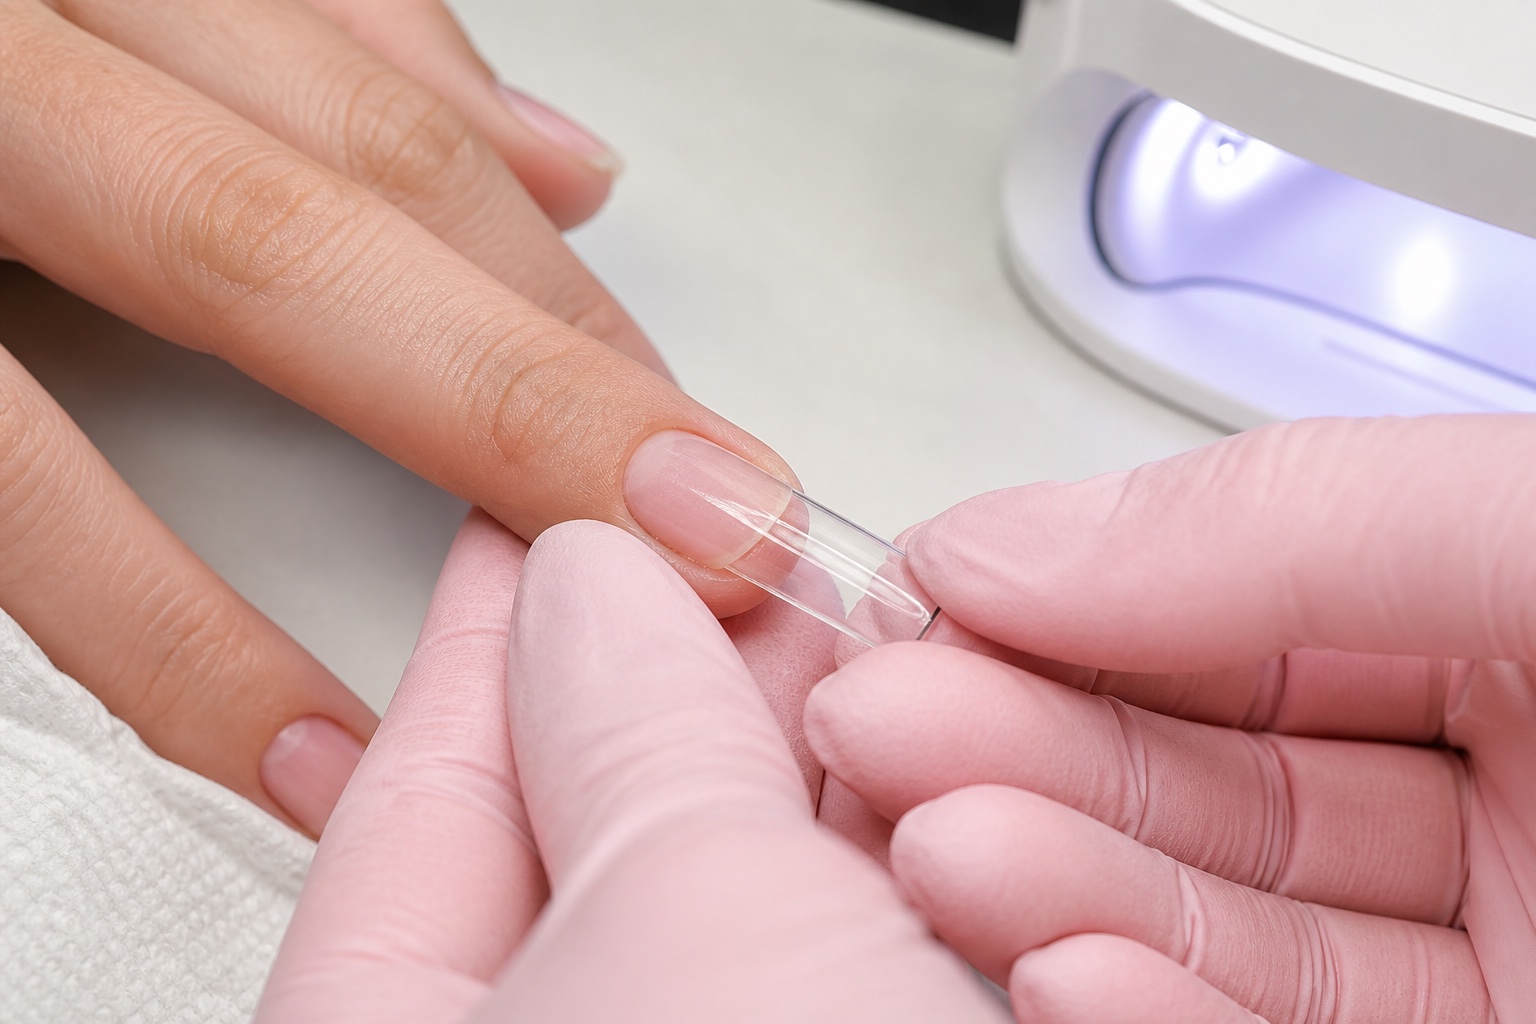
Seat the tip with the system’s prescribed angle and controlled pressure so the gel advances without trapping air or flooding.
Hold alignment and complete the stated flash cure without moving the tip or exposing skin to product.
Inspect perimeter, underside, bubble pattern and axis before the complete cure.
Perform the full cure in the compatible lamp and exact hand position defined by the manufacturer.
Finish only after cure control, then document products, lamp, timing and any adaptation.
Practise the movement without gel before a live service. The holding hand, lamp access and viewing angle must let you maintain the axis while seeing whether adhesive advances cleanly. A flash lamp that is convenient but placed at an angle not approved for the system may stabilise the tip while leaving a poorly exposed bonding zone. Ergonomics must support the curing instructions, not rewrite them.
Control adhesive quantity, pressure and bubbles
Too little adhesive can leave incomplete contact or dry voids. Too much can flood the proximal and lateral folds or create an unnecessarily thick layer that receives less energy. The correct amount depends on tip volume, natural-nail curve and system viscosity. Build a repeatable visual reference during supervised practice instead of copying one drop size across every nail.
Seat the tip in the direction specified for the system so the contact front progresses continuously. Dropping it flat can trap a central bubble; rocking after contact can pull air back into the adhesive; releasing before stabilisation can shift the axis. If a substantial bubble remains in the bonding zone before cure, remove the uncured assembly safely, clean as instructed and restart. Do not chase it with pressure until gel reaches skin.
A small visual irregularity is not automatically the cause of every later lift, while a clear dry gap should not be ignored. Record where defects occur. Repeated bubbles at the same side suggest fit, seating direction or viewing-angle problems; random flooding may point to quantity and pressure control. Use the gel defect troubleshooting guide to classify the symptom before changing several variables.
Flash cure and complete cure are two different stages
Flash holds position; full cure completes the system cycle
Firm placement is not proof of complete polymerisation
Flash
Temporary placement stability
Inspect
Perimeter, bubbles, underside and axis
Full cycle
Specified lamp, time and hand position
Finish
Only after cure control
Flash curing holds the tip in position so the finger can move to the main lamp. It is not evidence that the full adhesive layer has received the complete validated exposure. After flash placement, inspect every edge and the underside, then run the full cycle required for the system with the hand positioned correctly. Avoid stacking unapproved short exposures and assuming their seconds add up to the prescribed cure.
Do not apply pressure after a partial cure to close a visible gap, because the material has already changed and the fit problem remains. Do not perform a final cure through opaque colour or decoration unless that route is explicitly supported. Keep lamps clean, testable and free from blocked diodes or damaged cables. If output or compatibility is uncertain, stop using the setup until it can be verified.
Uncured methacrylate exposure matters. Published dermatology literature documents allergic contact dermatitis from nail acrylates and occupational exposure among nail professionals. Prevention does not rest on a single ‘free-from’ label: avoid skin contact, use compatible systems and complete curing, manage spills and dust, wear suitable protective equipment where the product safety information requires it, and seek dermatological assessment for suspected allergy rather than re-exposing to test a theory.
Troubleshoot by symptom, location and timing
Map the failure before changing the system
Location and timing narrow the variables worth checking
Observe
What, where and when
Trace
Fit, quantity, movement or cure
Control
Change one variable
Stop
Symptoms or uncertain polymerisation
Observed problem | Check first | Do not assume |
|---|---|---|
Proximal pocket or early lift | Curve, seating, contamination and skin contact | That stronger primer is always the answer |
Lateral lift | Width, sidewall pressure and adhesive coverage | That the nail is simply oily |
Central bubble | Tip curve, contact angle and pressure path | That more gel can fill it after cure |
Crooked extension | Dry-fit axis, finger position and movement during flash | That filing can correct every misalignment |
Soft or uncertain adhesive | System compatibility, opacity, thickness and lamp cycle | That a hard surface proves full cure |
Pain, itch, swelling or rash | Stop exposure and follow safety and medical referral steps | That symptoms are a normal heat spike |
Change one controlled variable during practice and keep the remaining system stable. Replacing tip, adhesive, primer and lamp together hides the cause and creates an unvalidated combination. The guide to nail lifting by area provides a wider diagnostic framework for preparation, structure and client factors.
Length, shape and finishing still need structural judgement
A full-cover tip arrives with a designed apex and lower arch, but shortening or reshaping changes its proportions. Removing substantial length can leave an apex too far forward or a free edge too thick. Narrowing a shape can weaken lateral support. Before altering a tip, ask whether the available preformed size and shape already match the intended result; extensive correction may make a built extension more controlled.
Blend or seal the proximal appearance only according to the system, keeping abrasives and gel away from living skin. Do not file a deep trench into the natural nail to hide the edge. Check underside smoothness, free-edge thickness, sidewall continuity and alignment before colour. Document the final length and planned return window so later growth can be compared with the original structure.
Maintenance: infill, rebalance or a new full-cover set
Some systems and service models permit a controlled infill or rebalance over retained full-cover material; others instruct complete removal and replacement. The decision depends on product identity, adhesion, tip condition, growth, architecture and the manufacturer’s process. Do not promise a refill before inspecting the returned set. A stable-looking surface can hide a lateral gap, crack or poorly balanced length.
At the return, inspect all perimeters, underside, stress area and symptoms. Remove every non-adherent zone; do not seal a pocket. If a safe stable structure remains and the system supports maintenance, rebalance volume and length rather than merely covering the growth gap. The infill and rebalance guide explains the decision, while the nail service wear guide separates adhesion from ongoing structural suitability.
Remove full-cover gel tips without peeling
Identify the material and removal instructions before beginning. A soak-off system may be shortened, reduced and wrapped with the specified solvent and contact time; a file-off layer needs controlled mechanical reduction. Product names such as ‘soft gel’ do not authorise an improvised soak. Finishing gel, nail art and thickness may change solvent access.
Never lift, prise or peel the tip from the natural nail. Force can remove superficial nail layers and turn a routine service into thinning and tenderness. Work gradually, reassess resistance and leave a controlled residual layer if the method calls for it. Stop for pain, heat, bleeding, unexpected colour or uncertain product identity. The full gel, acrylic and acrygel removal guide explains product identification and safe endpoints.
After removal, observe the nail without diagnosing. Surface dryness and transient appearance do not justify immediately buffing until glossy. If there is persistent pain, significant thinning, separation, inflammation or unusual colour, pause cosmetic reapplication and recommend appropriate healthcare assessment.
Professional full-cover tip checklist
Client consultation, nail and skin observation and stop criteria completed.
All ten tips dry-fitted for width, curve, proximal line and axis.
Tip, adhesive, preparation products and lamp confirmed as an instructed system.
Natural nail and interior bonding zone prepared without over-filing or contamination.
Adhesive seated without skin contact, substantial bubbles, dry gaps or axis movement.
Flash placement followed by the complete prescribed cure and lamp position.
Perimeters, underside, structure, length and comfort checked before finishing.
Products, batches, lamp, cure, sizes, adaptations and aftercare recorded.
Learn full-cover gel tips without skipping the foundations
Practise fit separately from application. Sort tips over varied nail models, photograph the four zones and explain why each choice fits or fails. Then rehearse adhesive movement on training surfaces and progress to supervised models only when product control, lamp access and skin avoidance are consistent. Record repeated faults by finger and location rather than celebrating speed.
A course should teach nail anatomy, preparation, system compatibility, fit, application, complete curing, finishing, troubleshooting, maintenance, removal, allergy prevention and client records. Browse online nail courses and compare the curriculum with the guide to beginner nail-course progression. A demonstration of perfect nails alone does not show how the method handles real fit variation and failure.
Frequently asked questions about full-cover gel tips
Are full-cover gel tips and Gel-X the same thing?
Gel-X is a brand name for a particular full-cover soft-gel system. Full-cover gel tip is the wider product category. Record and follow the actual system rather than treating the brand term as a universal protocol.
Are full-cover gel tips the same as dual forms?
No. A full-cover tip remains as part of the enhancement. A dual form acts as a temporary mould for builder product and is removed after curing. Fit and product control differ.
How should a full-cover tip fit?
It should cover sidewall to sidewall without pressure, follow the transverse and longitudinal curves, sit evenly near the proximal area without touching skin and align with the intended extension axis.
Can extra gel fill a gap under a full-cover tip?
Adhesive accommodates the controlled space designed by a fitting system; it should not compensate for a visibly incompatible curve or rocking tip. Excess increases flooding and curing uncertainty. Choose another size, shape or method.
Why do bubbles form under full-cover gel tips?
Common variables include incompatible curve, insufficient or poorly placed adhesive, dropping the tip flat, rocking, changing pressure or moving during flash cure. Classify bubble location before correcting one variable.
Can any rubber base attach full-cover gel tips?
Do not assume so. Use only a product and curing route instructed for the tip system. Viscosity, bonding, thickness, photoinitiators and lamp compatibility cannot be inferred from the label ‘rubber base’.
Is flash curing enough for gel tip adhesive?
No. Flash curing stabilises placement. The complete curing cycle and hand position stated for the compatible system must still follow. A firm tip does not prove complete polymerisation.
How long do full-cover gel tips last?
There is no guaranteed duration. Fit, preparation, system compatibility, curing, length, growth, use and aftercare matter. Plan a review window and inspect adhesion and structure rather than promising a fixed number of weeks.
Can full-cover gel tips be infilled?
Some systems permit maintenance when retained material is stable and the structure can be rebalanced; others specify removal and replacement. Inspect first and follow the system rather than promising an infill at the initial booking.
How are full-cover gel tips removed safely?
Identify whether the system is soak-off or file-off, shorten and reduce as instructed, and remove gradually to a controlled endpoint. Never peel or prise the tip from the natural nail.
Do full-cover tips work on very flat nails?
Only if an available tip curve fits without central rocking, large lateral gaps or pressure. Extra adhesive is not a universal correction. A flatter range or another extension method may be more controlled.
Can full-cover gel tips be reused?
A tip bonded and worn as part of a light-cured enhancement should not be treated as a reusable mould. Removal, filing, product residue and wear change its geometry and cleanliness. Follow the product’s stated single-use or reuse status.
Sources and safety boundary
PubMed — Contact sensitization to allergens in nail cosmetics: methacrylate, acrylate and cyanoacrylate contact-allergy context.
PubMed — allergic contact dermatitis caused by 2-HEMA and ethyl cyanoacrylate: systematic review relevant to beauty professionals.
American Academy of Dermatology — gel manicure nail-health guidance: nail changes, removal caution and dermatologist referral.
Substantively reviewed on 5 September 2026. Product-specific preparation, application, curing, maintenance and removal must follow the current manufacturer instructions for the exact system. This guide supports professional education; it does not diagnose nail disease, validate an untested product combination or replace supervised practical training and medical assessment.