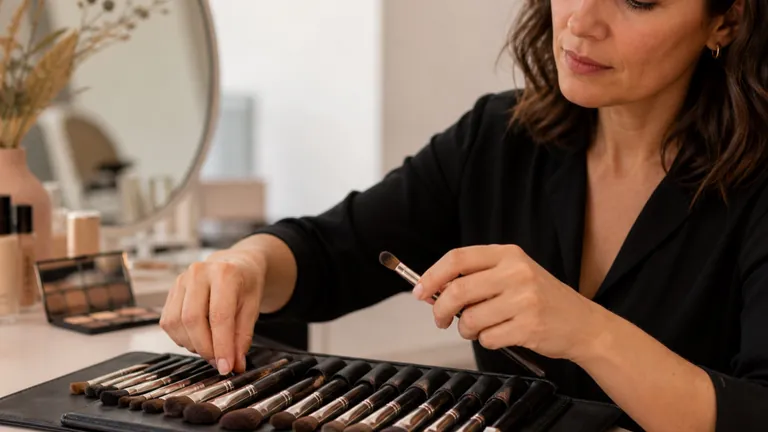
A makeup brush cannot be chosen reliably from the number printed on its handle or a universal top-ten list. Head shape, fibre length and density, spring, cross-section, cut and real size determine how it picks up product, where the first deposit lands and which movement it permits. One brush may diffuse powder beautifully and streak a fast-setting cream; two brushes both sold as blending brushes may leave completely different marks.
Quick answer: define the product, zone, desired edge and movement first; inspect the brush from the front, side and under light pressure; compare size, density, fibre length, shape and spring; load only the useful part of the head; place the first contact where intensity belongs; then change pressure, grip and angle before deciding that another brush is required.
This guide owns technical brush selection and use. The beginner makeup kit guide owns purchase order and a starter inventory; the makeup hygiene guide owns cleaning and client turnover. Here the focus is the mark a tool produces. Practise those decisions through the professional makeup tools course and connect formula behaviour through the professional makeup products course.
Brush anatomy: tip, belly, ferrule and handle
Four parts create one coordinated tool
The visible outline is not enough: inspect the head under pressure
Tip
Precision and edge
Belly
Load and contact area
Ferrule
Section, density and spread
Handle
Distance, angle and pressure
The tip meets skin or product first and controls precision and edge softness. The belly contains the main fibre mass: more volume may increase capacity or diffusion, but only in combination with density and spring. The ferrule holds the bundle and establishes its compression and cross-section. Handle length influences distance, angle and leverage but does not determine absolute quality.
Inspect the dry brush from the front and side, then press it lightly on a clean surface. A head that appears round may open widely; a flat paddle can become precise on its edge; a tapered head can carry a soft belly beneath a fine point. Before assigning a use, see the mark made with a very small amount of the relevant product on a palette and then the intended area.
Five variables that change the result
Read the brush before naming its use
Size and density do not explain behaviour alone
Size
Proportion to the working zone
Density
Deposit or diffusion
Length
Resistance or flexibility
Shape
Edge, direction and area
Spring
Recovery after pressure
Size: relate the real contact area to the zone and detail, not to the commercial name.
Density: a compact bundle often loads and deposits more; an airy one may diffuse more gently when fibre and movement suit the formula.
Fibre length: shorter fibres usually offer more resistance; longer fibres flex farther and can create lighter transitions.
Shape and cross-section: round, flat, angled, tapered and paddle forms change direction, edge and contact area.
Spring and return: how far fibres bend and recover changes useful pressure, precision and product release.
Synthetic and natural fibres without simplistic rules
Synthetic and natural do not describe two fixed quality levels. Synthetic fibres vary in diameter, surface, taper, wave and tip treatment. Natural hair varies with source, grade and processing. Performance, feel and lifespan belong to the actual brush, not the category alone. There are highly soft and precise synthetic heads and natural-hair heads unsuitable for a particular formula, person or cleaning workflow.
Many synthetic bundles work effectively with creams and liquids and can be practical in frequent professional cleaning. Some natural-hair heads pick up and diffuse powder effectively. Neither statement is universal. Test product absorption, deposit, friction, shedding and how the head responds to its permitted cleanser and drying process. Respect client sensitivity, material disclosure, sourcing preferences and manufacturer care instructions.
Do not treat hypoallergenic, vegan and cruelty-free as synonyms. Fibre composition, ferrule adhesive, handle coating, cosmetic residue and the cosmetic itself are separate variables. If a client reports sensitivity, use correctly processed tools, minimise friction and stop if burning, itching, swelling or another unexpected response develops. A brush label cannot diagnose or guarantee individual tolerance.
Face brushes for powder, complexion and dimension
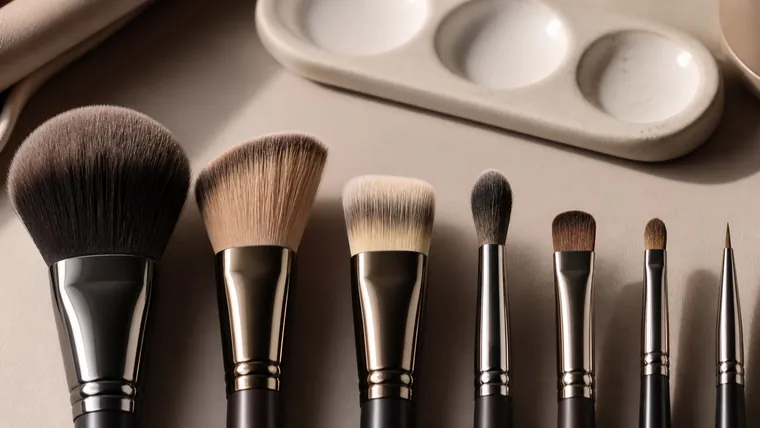
A large airy powder brush distributes a light veil over a broad area; a smaller compact head can press powder onto one zone. A medium rounded cheek brush creates a diffused boundary. An angled head can follow cheek direction, but does not decide placement by itself. Separate the warmth of bronzer from the depth of contour: they may need different precision, density and contact areas.
A flat complexion brush spreads product with directional precision but may leave strokes when overloaded or pressed. A dense flat-top or rounded head can stipple and polish; a less compact head can create a light veil. Match the head to product open time, pigment and desired surface. The foundation texture, coverage and finish guide owns formula choice, while this page explains how tool behaviour changes its deposit.
Concealer and precision brushes
A small flat paddle can deposit concealer locally and feather an edge with its side. A short dense head presses pigment over one mark; a small tapered head can soften an eye-area boundary with limited pressure. Size must match the task. An oversized head spreads concealer beyond the target, while a tiny head can create thickness through repeated passes.
Decant product onto a clean palette and load only part of the bundle, keeping another side relatively clean to merge the edge. On mature-skin makeup this control helps avoid dragging a mobile surface and repeatedly filling lines. The tool does not remove texture; it controls where product begins and ends.
Eye brushes for deposit, transition and detail
A flat shader deposits eyeshadow and uses its broad faces and edge. A short compact head increases control and intensity; a softer one can leave a veil. A pencil brush concentrates colour and diffuses small lines. Tapered brushes build transitions: a fine point enters a defined crease area while a larger belly covers more surface. Fine liner and angled heads draw or stamp controlled segments.
Do not ask a brush saturated with deep colour to create the cleanest transition. Separate deposit, blending and final refinement. The eyeshadow blending guide owns pressure and edge sequence; the eyeliner guide and corrective eye makeup guide connect the mark to morphology.
Brow and lip brushes
A thin compact angled brush can draw short brow marks and precise borders; a thicker one deposits a fuller band. Its stiffness must move the formula without scratching. A clean spoolie separates, lightens and redirects, but a wand that has touched a client must not return to shared packaging. The eyebrow mapping guide shows when measurement and transparency matter.
A flat or pointed lip brush distributes a small amount, follows a moving border and mixes colour on a palette. A retractable head protects fibres in transit only when it has been correctly cleaned and fully dried. Decant lipstick for client service rather than returning the same brush to the bullet. Use the corrective lip makeup guide for proportional mapping and wear layers.
Load the brush: pick up, distribute and offload
Load is not simply the visible product sitting on the tip. It is how formula is distributed through the useful part of the bundle. With powders, pick up a small amount, work it across appropriate fibres and remove excess onto a clean palette or tissue. With creams and liquids, spread a controlled quantity on a palette and load evenly instead of submerging the head.
The first contact normally deposits the greatest concentration. Place it where intensity belongs, then move towards the softer boundary. If first contact lands beside an edge intended to stay clean, correction requires more blending and can enlarge the shape. Before touching the face, identify deposit point, exit direction and which side of the head remains cleaner.
Pressure, grip and working angle
Holding close to the ferrule increases control and can increase pressure; moving the hand back often creates broader, lighter motion. Neither position is always correct. Use stable control for a precise border, then relax the grip for a transition. If the head collapses fully or visibly moves the skin, pressure is probably greater than the task requires.
Use the point, side or belly according to the desired mark. A flat head held perpendicular can print a narrow line; the same head almost parallel creates broader contact. An angled head can follow its diagonal or rotate to stamp small sections. Learn this behaviour on paper, a palette and real practice faces rather than memorising brand-specific names.
A practical formula-to-brush matrix
Formula, tool and movement work together
Keep product quantity stable when comparing brushes
Define formula and finish
Choose density and contact
Control load and first touch
Review edge, texture and time
Product | Useful head behaviour | What to check |
Loose powder | Distributes without retaining clumps | Offload, fallout and evenness |
Pressed powder | Density suited to pigment and pan hardness | Pickup on the first pass |
Cream | Elastic fibres and controlled surface | Streaks, absorption and thickness |
Liquid | Compact or flexible for the desired film | Setting speed and boundary |
Gel or pomade | Stable fine point or edge | Precision before set |
Build a compact kit around functions
A functional starting set may include a broad soft face head, medium cheek brush, one chosen complexion brush, small concealer brush, flat eye applicator, two transition sizes, pencil brush, angled brush, fine liner, lip brush and disposable spoolies. The exact set follows services and products. Bridal, corrective, photography and body work do not require identical duplicates.
Buy one missing function at a time. Before adding a brush, name the mark or movement the current kit cannot produce. Use the beginner makeup kit guide to plan buying order and the professional makeup tools course to test those functions in a structured learning path.
Evaluate a brush before buying
Define the product, zone, movement and finish missing from the kit.
Compare the real head size with the faces and zones you work on.
Inspect profile, symmetry, density and tip without relying on its model number.
Flex the clean bundle gently and assess spring, softness and recovery.
Check material information, care directions, availability and intended use.
Test with the real formula and record load, mark, edge and time.
Cleaning and maintenance remain part of professional use
A technically suitable brush is not usable unless it is clean, dry and correctly managed. Separate clean, in-use and awaiting-processing tools. Do not place fibres on unprotected surfaces or share personal brushes. Eye-area work requires particular caution, and a professional service needs enough processed duplicates to avoid shortcuts between people.
During washing, avoid leaving water in the ferrule and dry according to the manufacturer. Never close a damp head inside a case. Use the complete brush, sponge and workstation hygiene guide for turnover frequency, dirty-to-clean flow and product handling; this article does not duplicate those procedures.
Replace a brush when performance or safety changes
There is no universal replacement date. Remove a brush from service when it persistently sheds, the head no longer recovers, the ferrule moves, the handle breaks, an odour or residue cannot be removed, the surface becomes rough or its mark is no longer repeatable. A damaged precision or eye brush should not stay in rotation simply because it was expensive.
Record entry date and working allocation in a professional kit. Inspect after washing and drying, not only immediately before a service. Separating some heads for creams, powders, deep pigments or effects may reduce colour contamination and make wear easier to recognise. Replacement is a performance and hygiene decision, not a trend cycle.
Common brush-selection and handling mistakes
More brushes do not guarantee more control
Correct function, load and pressure before buying a duplicate
Duplicates
Same function, no new solution
Pressure
Splayed fibres widen the mark
Saturation
A loaded head cannot refine
Maintenance
Moisture and damage change the mark
Technical mistakes include buying large sets of duplicates, using a head too large for the zone, pressing until fibres splay, picking up excess product directly, trying to refine with the same saturated brush, expecting a different tool to repair an incompatible formula and assuming natural or synthetic fibre guarantees quality.
Professional-flow mistakes include superficial cleaning between clients, storing damp heads, blowing on fibres, using the hand as a palette, sharing spoolies, ignoring a loose ferrule and keeping a deformed point in eye service. Competence is the complete system: selection, movement, sanitation, maintenance and a record of what the tool actually did.
A seven-session brush practice plan
Classify brushes by shape, density, length and function without reading their names.
Compare three pressures using the same brush and powder.
Apply one formula with flat, dense and airy heads using equal amounts.
Create one eye transition with separate deposit, blend and refinement tools.
Draw controlled marks with the point, side and belly of an angled or liner head.
Time cleaning, drying and kit preparation without omitting a step.
Complete one look with the minimum set and name the only truly missing function.
Frequently asked questions about makeup brushes
Which makeup brushes are genuinely useful for a beginner?
Choose functions rather than a fixed count: a broad face brush, medium cheek brush, complexion or concealer option, flat eye applicator, two blending sizes, precision brush, angled or liner head and lip brush cover many exercises. Add only when a technique reveals a real gap.
Are synthetic or natural makeup brushes better?
Neither category is automatically better. Compare softness, spring, density, shape, formula and cleanser compatibility, person sensitivity, material information and real performance. Judge the individual brush after use and washing.
Does an expensive brush apply makeup better?
Not necessarily. Price may reflect construction, materials, quality control or distribution, but cannot make the head appropriate for your task. Compare its mark, durability through washing, repeatability and cost per real use.
How many brushes does a professional makeup artist need?
It depends on consecutive clients, service range and processing capacity. Duplicates protect clean workflow, not collection size. Define a minimum set per service, a processed rotation and replacements for critical precision tools.
What is a flat paddle brush used for?
Its flat rounded form can spread cream, foundation or concealer, deposit eyeshadow and refine edges with its tip and sides. Use changes with size, thickness and spring. Load evenly and reduce pressure to limit streaking.
Which brush should blend eyeshadow?
Use a tapered head proportionate to the eye, with enough flexibility for the desired transition. A smaller one controls folds and details; a larger one diffuses a broad edge. Keep the refinement brush lightly loaded.
Which brush should apply foundation?
It depends on formula and finish. A flat head spreads, a dense head stipples and a less compact one can veil. Compare equal product amounts for streaks, coverage, texture and time; choose the tool that reaches the intended result with fewer corrections.
Can the same brush be used for cream and powder?
Yes when fully clean, dry and structurally suitable, but residue during one look may create paste, spotting or colour contamination. Professional work is usually easier to control with separate heads or complete processing between textures.
How can brush streaks in foundation be prevented?
Reduce the amount, distribute it on a palette, load evenly and use short controlled movements. Feather with the cleaner side or press with a suitable clean head or sponge. Work in smaller zones when the formula sets quickly.
How often should makeup brushes be cleaned?
In professional use, a brush that has touched one person must not move to another without the required processing. Personal-use frequency depends on product and use; AAD offers seven to ten days as general consumer guidance, not a professional turnover rule.
How should brushes be dried without damaging them?
Remove excess water without twisting, reshape the head and position it so water does not remain in the ferrule, following the manufacturer. Do not close damp tools in cases or use intense heat. Check the centre is dry before storage.
When should a makeup brush be discarded?
Remove it when shedding persists, shape or spring is lost, it scratches, the ferrule is unstable, residue or odour remains, there is physical damage or the mark is no longer controllable. Replace damaged eye tools immediately.
Are makeup-brush numbers universal?
No. Names and numbers are manufacturer systems and do not guarantee the same size or form across ranges. Document your own tools by dimensions, shape, density, formula and mark so they can be taught and replaced without dependence on a code.
Sources and next steps
For consumer cleaning guidance, review the American Academy of Dermatology resource on cleaning makeup brushes. For contamination and eye-area precautions, consult FDA Eye Cosmetic Safety. A 2025 open-access study reports bacterial contamination found in used cosmetic brushes; review its PMC record and methods without converting one study into a universal frequency rule.
Continue through the English makeup guide library or compare the current online makeup courses. Editorial review: 5 September 2026. This guide does not certify a brush as hypoallergenic, prescribe one cleaning method for every material or replace manufacturer care instructions. It deliberately owns brush shape, fibre, loading, pressure and application; purchasing order and sanitation retain separate search intents.
To test how skincare, sunscreen, primer and foundation behave as one film, continue with the primer and foundation compatibility guide. It replaces water-versus-silicone myths with measured layering and A/B wear tests.
For a controlled comparison of depth, warmth and cheek colour, continue with the contour, bronzer and blush guide. It covers colour, film order, anatomical placement and troubleshooting without one-size-fits-all maps.
Brush roles in a smokey-eye sequence
Connect deposition, detail and transition using the professional smokey-eye guide.
Choose tools for selective setting
Connect brush or puff deposit to a complete wear plan in the long-wear makeup guide.
Place brush functions inside the full kit architecture
After choosing heads by behaviour, organise them through the professional kit and workstation workflow.
Size brushes to the cut-crease map
Use the tools within the professional cut crease protocol.