Clean eyeshadow blending does not come from moving a fluffy brush for longer. It comes from controlling a sequence: prepare an even lid, place a small amount of colour where its maximum intensity belongs, soften only the edge, and check the shape with the eyes open. When load, pressure, brush size, base or direction changes unexpectedly, the result becomes patchy, muddy, hollow or much larger than planned.
Quick answer: use a thin, compatible eye base; load less shadow than you think you need; tap off loose excess; deposit colour before blending it; and keep the brush movement inside the intended transition zone. Build depth in light layers, alternate between both eyes and review the result looking straight ahead. A soft edge should not erase the focal point.
This guide owns the core eyeshadow-blending intent in the BeautyLearn makeup guide library. It teaches load, placement, pressure, transitions and error correction. Smokey-eye design, cut crease, corrective eye placement and colour selection remain separate topics so each can be treated properly. If you are building your first practice plan, begin with learning makeup from scratch and organise only the tools you need with the beginner makeup kit guide.
What a well-blended eyeshadow actually looks like
Three zones, three separate checks
A clean blend preserves intensity, transition and open-eye direction
Intensity
Even colour at the focal point
Transition
Contrast decreases gradually
Direction
Shape reads with the eye open
Boundary
Deliberate space below the brow
Blending is an intentional transition between areas of different depth, saturation or finish. A successful result has a recognisable point of maximum intensity, a controlled direction and an edge whose contrast decreases gradually. It is not one uniform haze. If every colour is mixed into the same value, the look loses dimension; if the transition expands every time the brush moves, the shape loses its boundary.
Assess three things separately. First, is the filled area even, or can you see gaps? Second, does the perimeter soften in a narrow and predictable band? Third, does the overall direction make sense when the eye is open, the brow is relaxed and the face is viewed at conversation distance? A beautifully soft border cannot repair a hollow centre. An even colour is not enough if the outer corner drops or the blend reaches the brow.
Light and photography can disguise or exaggerate faults. Ring lights flatten small changes in texture, while a close phone camera can make an edge appear harsher than it is in person. Review under even neutral light, then in the lighting for which the makeup is intended. Use a photograph as supporting evidence, not as the only definition of a good blend.
Why eyeshadow goes patchy
A patch is a symptom, not a diagnosis
Identify the uncontrolled variable before adding more product
Base
Thin, even and compatible
Load
Small amount in each layer
Pressure
Bristle tips barely flex
Brush
Sized to the working zone
Patchiness is a symptom, not one single mistake. The first brush contact may carry too much pigment. The base may be uneven, very wet or already disturbed. A large brush can touch several zones at once; heavy pressure can spread the bristles and move the layer underneath. Two formulas may grip or slide differently, and repeatedly polishing the same area can lift product rather than smooth it.
A dark stamp at the first contact usually means excessive load, no tap-off or placement in the visible edge rather than the focal zone.
A bare gap may come from skincare residue, creasing base, moisture, watering eyes or friction that has removed the underlying layer.
A grey or muddy transition often reflects too many mixed pigments, a contaminated brush or the loss of a clear light-to-dark hierarchy.
A blend that climbs too high usually combines an oversized brush, an upward-angled handle and movements that widen on every pass.
Unequal eyes often result from finishing one side before beginning the other, using different loads or checking only with lids closed.
Before adding more shadow, name the visible problem and identify the most likely variable. More dark colour cannot fix an oversized shape. A clean brush cannot restore a base that has lifted. Correcting the cause first prevents a small fault from becoming a thick, difficult-to-remove layer.
Prepare the eyelid without building unnecessary thickness
The lid should be clean, comfortable and evenly prepared, not necessarily powder-dry. Remove excess rich skincare from the mobile lid and allow compatible products to settle. Apply a small amount of eye primer or complexion base only where needed and thin it towards every edge. Product collected in the crease, a thick concealer layer or irregular powder becomes topography to which shadow attaches unevenly.
Setting the whole base is not a universal rule. A slightly tacky surface can increase saturation but demands tiny loads and precise placement. A light, even powder veil may make blending easier but can reduce grip or intensity. Test the chosen primer and shadow together on a small area. If colour locks instantly, reduce tack or brush load before assuming the shadow itself is unusable.
Natural folds, texture and movement remain visible under makeup. On mature or textured lids, thin preparation, soft pressure and controlled reflection usually look more coherent than a thick attempt to create a perfectly smooth surface. Stop if there is pain, unexpected redness, swelling, active irritation or suspected infection. Makeup technique must not conceal a reason to avoid application.
Choose brush size by the zone, not by the label
A flat or compact brush places colour. A small tapered brush controls depth. A softer brush refines the transition. These jobs can overlap, but one very large blending brush cannot create every scale of detail. Match the diameter and free length of the bristles to the space between lash line, crease and brow. On a small lid, a brush marketed for blending may cross the entire intended boundary in one touch.
Density changes behaviour. A dense brush picks up and deposits more colour; an airy brush generally creates a softer veil but can still spread pigment too far. Shape also matters: a rounded tip diffuses a point, a tapered tip reaches a narrow crease, and a flatter side can pull an edge in one direction. Test each clean brush with one familiar matte shadow before assigning it a role.
Cleanliness is part of colour control. A brush saturated with deep plum cannot soften a pale transition; it continues depositing pigment even when it looks almost clean. Keep at least one tool for the light transition, one for controlled depth and one genuinely clean brush for finishing. Between personal practice sessions, clean and dry tools according to material and manufacturer guidance. In professional work, use hygienic procedures appropriate to the setting and never move a used applicator back into a shared product.
Build a three-value transition before using complex colour stories
For a clear exercise, choose a transition shade, a midtone and a depth shade within a coherent family. They must be visibly different without creating an impossible jump. Two browns that are almost identical do not teach gradient control; beige and pure black with no intermediate value make the same lesson unnecessarily difficult. Value structure matters before the glamour of a palette.
Consider undertone and finish, but do not turn blending into a full colour-analysis exercise. Combining many near-complementary pigments can create a visually neutral or dull area even when every pan is high quality. Start with compatible mattes so pressure and edge remain easy to see. Add satin or shimmer only after the matte structure is stable. For complexion colour, use the separate skin undertone and foundation matching guide; eye-colour harmonies deserve their own method.
Eyeshadow blending step by step
Deposit, connect, check
Place the intensity before softening its perimeter
Prepare and observe open eyes
Place the transition
Build depth in its zone
Connect the edge and compare
Observe the open eye. Identify the visible crease, fixed lid, outer direction and highest acceptable point of the transition.
Prepare a thin, even base. Let cream products settle and remove any accumulation from folds before colour.
Load a small amount of transition shade, tap off loose excess and place it where it should remain most visible—not at its final outer edge.
Use short movements to soften the border while keeping the bristles inside the same narrow band. Do not widen the gesture automatically.
Place the midtone with a slightly more compact brush. Overlap only part of the transition and connect the meeting point.
Add depth with the point or side of a smaller brush. Build two or three thin layers instead of seeking maximum darkness immediately.
Repeat the equivalent stage on the other eye. Compare height, direction and visual weight before the next load.
Look forward with brows relaxed. Refine only the necessary perimeter using a nearly clean brush and a trace of transition colour.
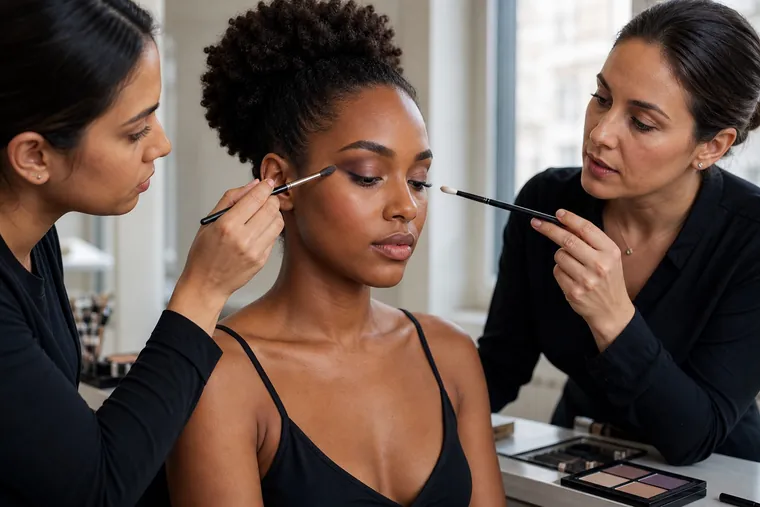
The order is more important than speed. If the intended dark area is not yet even, do not polish its border for several minutes. Deposit, connect, check and only then refine. This makes each decision visible and gives you a point to return to when diagnosing the result.
Pressure, movement and handle angle
Pressing changes both deposition and surface area. Correct finishing pressure bends the tips only slightly. If the bristles fan widely, more fibres touch the skin, pigment travels farther and the base may shift. Hold the brush farther from the ferrule while refining an edge if that helps you reduce force; move closer only when controlled placement requires stability.
Different movements have different jobs. Tapping deposits. A short pull establishes direction. Small circles soften a local point. A short windscreen-wiper motion connects a narrow horizontal band. No movement is inherently professional. Large circles used with dark colour distribute it before its position is defined; tapping alone leaves a hard edge.
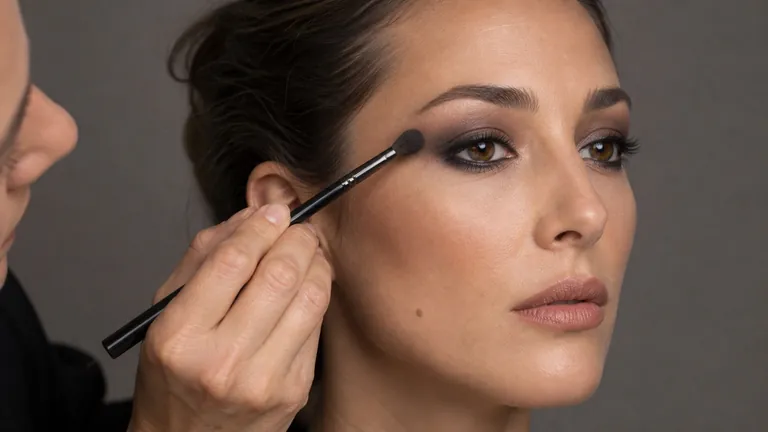
The handle predicts where the bristles travel. A more perpendicular handle uses the tip in a confined zone; a lower angle lets the side contact a broader surface. Keep the handle directed away from the eye itself and never work so close that the ferrule or handle can contact the eyeball. Stabilise your hand safely without pulling delicate eyelid skin into a shape that disappears when released.
Matte, shimmer, cream and liquid shadows need different handling
Matte shadows expose changes in load and pressure, which makes them useful for training. Satin and shimmer reflect light and may appear smoother from one angle while revealing an uneven base from another. Place reflective textures with a flat brush or clean fingertip when the product is designed for that method, then connect the perimeter with the residue already present or a small amount of matte transition.
Cream, pencil and liquid formulas have working times. Place and soften one controlled area before the film sets. Layering a lot of powder over a mobile cream does not necessarily cover a patch; it can create thickness that breaks or creases later. Check whether the product is approved for the eye area, follow its directions and treat glitter, pigments and mixing media according to their intended use rather than social-media convention.
Fallout is not proof that a product is poor. It can reflect loose texture, excessive load, vigorous movement or the wrong applicator. Tap excess away from the eye, press rather than sweep high-shine particles, and consider completing eye makeup before complexion when using dark or friable shades. Never blow on a brush or palette in professional work.
Adapt the blend to the open eye instead of copying a rigid map
The crease drawn on a face chart does not always match the colour visible when a person looks forward. On hooded lids, map the transition with the eye open and place some colour above the anatomical fold while keeping deliberate space under the brow. On deep-set eyes, darkening the entire natural hollow can make the eye recede further. On prominent or rounded eyes, placement depends on the agreed direction, not on a rule that the form must be corrected.
Texture, asymmetry, brow position, glasses and expression all change the visible area. Alternate between a close view for edges and a normal-distance view for balance. The separate corrective makeup and visagism guide explains how eye direction interacts with the whole face without imposing one ideal shape. This page stays focused on controlling shadow once the placement has been chosen.
How to keep a smokey blend from becoming one dark cloud
A smokey eye is a controlled gradient, not black pigment spread without boundaries. Establish a transition, define the intended silhouette with a midtone and place the deepest value close to the lash line or chosen focal zone. Add black only if the design needs it, late and in tiny quantities. Every layer should leave part of the previous value visible.
If the centre turns grey, do not automatically add more black. Check for a dirty brush, excessive mixing, a pale transition dragged through the depth or complementary tones neutralising each other. Restore the midtone with a clean compact tool, connect its outer edge and reassess. A future dedicated smokey-eye guide can own shape, intensity and occasion; this section only demonstrates how the same blending controls prevent collapse.
Troubleshooting: fault, likely cause and first correction
Correct the cause instead of covering the mark
Each fault suggests a check before the next load
Dark stamp
Reduce load and move first contact
Bare gap
Stop friction and press product
High edge
Reduce movement and brush size
Muddy colour
Restore the midtone cleanly
Visible fault | Likely cause | First correction |
|---|---|---|
Dark stamp | Heavy first contact | Unload and place new pigment inside the focal area |
Bare gap | Lifted or moist base | Stop rubbing, restore a thin compatible layer, then press colour |
Blend too high | Large brush or widening movement | Reduce brush size, radius and upward handle angle |
Muddy colour | Mixed pigments or contaminated tool | Re-establish the midtone with a clean brush |
Heavy fallout | Excess load, pressure or loose texture | Tap off excess, press product and adjust application order |
If a correction would require repeated friction, stop and decide whether removing a small area is cleaner than adding layers. On another person, explain before changing direction or intensity. Comfort and consent are more important than completing a planned look.
Create visual symmetry without copying millimetres
Work in alternating stages: transition on both eyes, midtone on both, depth on both. Repeat loads consciously and use equivalent brush surfaces. Compare the eyes open from a normal distance because crease height, brow position and lid exposure are often naturally different. Professional balance means coherent visual weight, not drawing identical shapes over different anatomy.
Correct variables in a consistent order. First compare direction and highest point, then width, then edge softness and finally saturation. If you intensify one eye to match its partner before checking shape, the darker side can make the geometric difference harder to see. A front photograph can reveal an angle, but camera tilt, close lenses and raised brows also manufacture asymmetry.
A three-session practice drill that reveals progress
One colour: create an even focal area and one gradual edge. Compare two brush sizes while keeping base, shade and light unchanged.
Two values: place the midtone, add depth over one third of the shape and work only their intersection. Preserve both colours.
Three values: build transition, midtone and depth, then photograph the open eyes from a repeatable distance and annotate one change for next time.
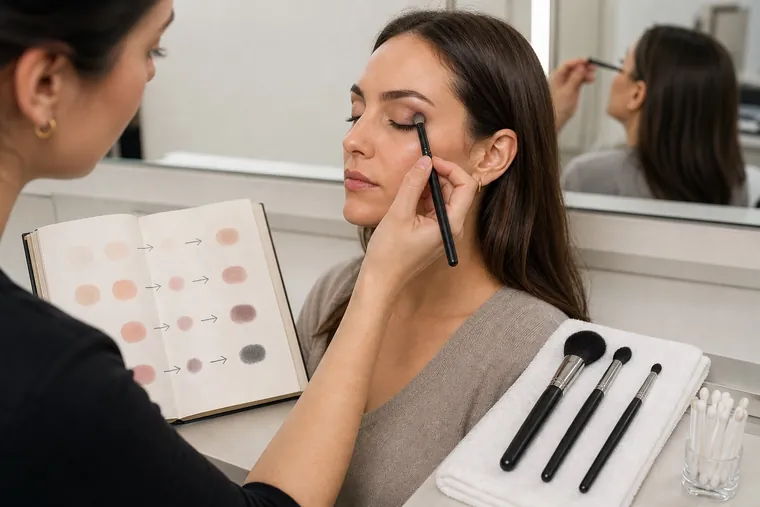
Keep the same palette, primer, brushes, light and side for three sessions. Record load, pressure, working time and where the first contact landed. Change only one variable in the next attempt. Repeating a modest exercise creates usable evidence; completing a different elaborate look every time makes it difficult to know why one result improved.
When comparing training, look for demonstrations on varied adult eyes, clear camera angles, supervised or structured practice, hygienic product handling and feedback that names the cause of an error. The BeautyLearn guide to choosing a makeup course helps you assess those features. You can then explore the current online makeup courses or the dedicated corrective eye makeup course before enrolment reopens.
Eye-area hygiene and safety boundaries
Wash hands, use clean tools and avoid sharing products or applicators that cannot be hygienically dispensed. Do not use eye cosmetics when the eye area is inflamed, infected or unexpectedly irritated. Stop when a product causes pain, burning, swelling or persistent watering; remove it safely and seek appropriate medical advice when symptoms warrant it. Technique is not a treatment for an eye or skin condition.
Only use colour cosmetics, adhesives, glitters and pigments according to their label and intended area. A material marketed for cosmetic creativity is not automatically authorised for use close to the eye in every country. Never apply makeup in a moving vehicle, and keep brush handles, ferrules and fingernails away from the eyeball. FDA eye cosmetic safety guidance provides practical consumer boundaries; the European Commission’s CosIng database supports ingredient and cosmetic-function verification in the EU.
For professional services, use local infection-control requirements, single-use items where appropriate and a documented procedure for decanting products. Do not rely on spraying a dirty brush with a quick cleaner as a complete reset between clients. Product labels and current local rules take precedence over a technique demonstrated online.
Frequently asked questions about eyeshadow blending
Why does my eyeshadow look patchy?
Common causes include an uneven or moving base, too much pigment at first contact, heavy pressure and a brush that is too large for the area. Diagnose the variable before adding colour.
Should I powder my eyelids before eyeshadow?
Not automatically. Even powder can increase slip, while a slightly tacky base can intensify colour. Test primer and shadow together and choose according to the formula, lid and required finish.
What is the best brush for blending eyeshadow?
A brush proportionate to the zone, soft enough to refine an edge and controlled enough not to cross it. Transition and depth normally need different sizes.
Can I blend eyeshadow with one brush?
Yes for a simple one-colour drill if you remove residue. For several values, separate placement, depth and finishing brushes reduce contamination and preserve the gradient.
How do I stop eyeshadow going too high?
Set the limit with the eye open, use a smaller brush, shorten the movement and keep new pigment inside the focal area rather than loading the outer edge.
How should black eyeshadow be blended?
Build transition and midtone first. Add tiny amounts of black only to the deepest zone and connect the boundary; do not begin by dragging black across the whole lid.
Why does my blend turn grey or muddy?
Too many mixed pigments, complementary colours, a dirty brush or excessive polishing can neutralise the structure. Re-establish the midtone with a clean tool.
How do I blend eyeshadow on hooded eyes?
Map the visible transition looking straight ahead and place part of it above the anatomical fold. Preserve deliberate space below the brow and recheck after every layer.
Do shimmer and glitter blend like matte shadow?
Usually no. Reflective textures are generally placed precisely and their perimeter is connected. Large sweeping movements may increase fallout and scatter the intended reflection.
How can I repair a bare patch without restarting?
Stop rubbing, check the base and press a small amount of the missing value into the gap. Blend only its perimeter. Remove and rebuild locally if the base has broken.
Should eye makeup come before foundation?
It can be useful for dark, loose or unfamiliar shadows because fallout is easier to remove. For controlled light looks, either order can work if the complexion is protected.
How long does it take to learn clean blending?
There is no reliable fixed duration. Short, repeated drills with the same variables, photographs and specific feedback normally teach more than unrelated complete looks.
Can concealer fix an eyeshadow edge?
It can sharpen a planned graphic boundary, but a thick concealer stripe does not teach gradient control and may create texture. First correct brush load, pressure and placement.
Why do both eyes look different even with the same colours?
Anatomy, brow height, lid exposure, load and hand direction may differ. Alternate stages and match visual weight with eyes open rather than copying closed-eye millimetres.
Can I practise blending on a face chart?
A chart can teach value order and direction, but paper does not reproduce curved moving skin, primer behaviour or eye safety. Combine it with supervised or carefully structured live practice.
Continue your makeup learning path
Use the beginner makeup kit to assign each brush a clear role, then place this drill inside the progression for learning makeup from scratch. If you want formal teaching, compare demonstrations and feedback with how to choose a makeup course. Browse all English makeup guides or continue to the makeup course catalogue without crossing into the Italian content graph.
Sources and editorial scope
Safety boundaries are based on FDA eye cosmetic safety guidance and the European Commission’s public CosIng cosmetic ingredient database. Product-specific directions and the rules applicable where the service is performed remain decisive.
Editorial review: 5 September 2026. This is an educational makeup-technique guide, not medical or ophthalmic advice. It does not rank products, promote a competitor, prescribe one eye shape or replace supervised practice. The article deliberately owns blending mechanics; smokey eye, cut crease, corrective-eye design and colour harmony remain distinct search intents.
Turn technique into a repeatable event service with the professional bridal makeup guide. It connects the brief, trial record, wear test, wedding-day timing and personal touch-up handover without replacing detailed technique or career pages.
To adapt eyeshadow, liner and lash weight to visible anatomy, continue with the corrective eye makeup guide: it maps hooded, small, close-set and prominent eyes while keeping blending mechanics and whole-face visagism distinct.
For a focused method on lash-line thickness, wing direction and open-eye balance, use the eyeliner guide for different eye shapes. It keeps line mechanics distinct from full eye morphology and eyeshadow blending.
To separate hue, value, saturation, contrast and controlled neutralisation, continue with the makeup colour theory guide. It treats colour as a testable design decision rather than an automatic pairing.
To combine complexion, brows, eyes, cheeks and lips into one efficient service, continue with the professional day-makeup guide. It connects product decisions to intensity, natural-light checks and realistic wear.
To turn colour, blending and correction into a complete look for changed light, continue with the professional evening-makeup guide. It organises focal hierarchy, reflection, flash checks and realistic long wear.
To choose head shape, density and fibre from the mark you need, continue with the professional makeup-brush guide. It connects product loading, first contact, pressure and angle to a repeatable result.
Do not hide the shadow structure beneath the lash
Compare density and length with the eye open before completing the look with false eyelashes.
Apply blending control to a complete smokey eye
After controlling load, pressure and edge, build the full professional smokey eye.
Keep transitions visible through the lens
Adapt placement with the makeup-with-glasses guide.
Apply blending control to a designed crease
Continue with professional cut crease shape and transition.
Blend the palette without changing its colour objective
Continue with the eye makeup by iris-colour guide.