False eyelashes complete eye makeup when shape, weight, length and density suit the real eye and the intended wear. A band that is too long lifts at the corners; a rigid fibre can feel obvious and uncomfortable; extra adhesive does not create a better fit. Professional control begins with selection, continues through dry fitting and trimming, and ends with an open-eye comfort and symmetry check.
Quick answer: dry-fit the lash before opening the glue, trim small sections from the outer end when the design allows, apply a thin continuous film of temporary false-lash adhesive and wait for the manufacturer’s stated time. Place the centre first, then outer and inner ends, close to the natural lashes but never on the wet inner rim. Soften the adhesive before removal and never pull the natural lashes.
This guide covers temporary makeup lashes—full strips, half strips, individual flares and temporary clusters—used and removed according to their label. It does not teach semi-permanent eyelash extensions, lash lifts or treatment of the natural lash. Plan the surrounding eye makeup with the corrective eye-makeup guide and connect the band to the eyeliner shape and symmetry method. Temporary lash fitting remains its own technical search intent.
Full strip, half lash, individual flare or cluster
Choose a format by control, not by drama
Weight, flexibility and direction matter more than the package name
Full strip
Complete design; exact fit required
Half lash
Outer definition with less band
Flares
Local density and direction
Clusters
Faster, but less adaptable
Format | Control | Useful for | Common mistake |
|---|---|---|---|
Full strip | Complete design and fast placement; exact fit required | Complete looks, evening, bridal and photography | Band too long, heavy or far from the lash roots |
Half lash | Emphasis through the outer half with easier fitting | Soft elongation and restrained daytime definition | A visible step between natural and false fibres |
Individual flare | Local control of density, height and direction | Small adjustments and very discreet results | Irregular gaps, load or angle |
Temporary cluster | Faster than individual fibres but less adaptable | Filling selected zones and building gradual density | Visible knots or adhesive build-up on the lid |
Format alone does not decide the effect. A fine full strip can be lighter than three dense clusters, while a very long half lash can close a small visible lid rather than elongate it. Examine band thickness, fibre distribution, flexibility, weight, curl and direction. Confirm whether the product is intended for same-day temporary wear; do not infer duration from its appearance.
Choose length, density, curl and band
Length should remain proportional to visible eye space and avoid touching the brow or lid as the eye moves.
Density can strengthen the lash roots, but an opaque wall of fibres may cover shadow, iris and the eye design.
Curl should relate to the prepared natural lashes. Two very different curves create separate levels that are difficult to integrate.
A transparent band can look discreet and flexible, but it still requires accurate length and placement.
A black band can reinforce eyeliner, while also making gaps, glue and misalignment more visible.
Do not choose from the package image alone. Rest the dry band near the upper lash roots, open the eye and compare both sides. A shorter, airier fibre may preserve limited lid space; evening or camera work may support greater definition without hiding the shadow structure. Use the eyeshadow blending guide to make sure the lash supports rather than erases the transitions already built.
Measure and trim a strip lash safely
Dry-fit before adhesive
Preserve the tear duct, outer corner and lash design
Remove by the band
Fit without glue
Trim away from the face
Fit again and compare
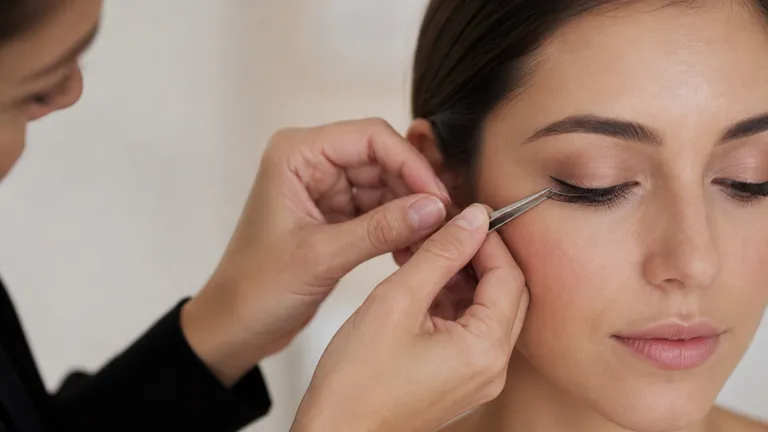
Lift the lash from its tray by the band, not the fibre tips, following the tray curve with clean tweezers.
Flex the band gently between clean fingers to reduce packaging memory without twisting the knots.
Dry-fit it above the upper lash roots, leaving the tear-duct area free and not extending beyond the outer corner.
Remove it, identify the excess and trim a very small segment from the outer end when that preserves the design.
Repeat the open-eye fit. Two small cuts are safer than shortening the band too far in one attempt.
Where to trim depends on the lash design. Graduated bands are normally shortened at the outer edge to retain shorter inner fibres; a symmetrical band still needs a clean end after cutting. Never cut while the lash is on the eye. Use dedicated clean scissors with the band away from the face, then compare the paired lashes before adhesive is applied.
Read the false-lash glue label before application
Temporary lash adhesive has strict boundaries
The intended product, placement, wear and removal are not interchangeable
Use
Temporary false-lash adhesive only
Label
Ingredients, storage and timing
Hygiene
Clean hands, tools and no sharing
Stop
Unexpected ocular or skin symptoms
Use only an adhesive explicitly intended for temporary false eyelashes and follow its label, warnings, period after opening, storage and directions. Never substitute nail glue, household adhesive or professional extension adhesive. Their intended use, exposure, application and removal are not interchangeable. Recheck the ingredient list when opening a new package because formulations can change.
Apply a thin continuous line along the band, with only a restrained extra amount at the ends if the manufacturer’s method supports it. Wait for the stated interval. Glue that is too fluid lets the strip slide; glue beyond its useful open time may not bond evenly. Do not blow on the band. In professional services, decant where appropriate and never touch a tube applicator directly to multiple clients’ skin.
The eyelid and ocular surface require caution. The US FDA groups false lashes and their adhesives with eye cosmetics and advises clean hands and tools, checking ingredients, not sharing products and stopping use when irritation develops. Its separate latex guidance notes that some cosmetic adhesives may contain natural rubber latex and that consumers with a concern should read labels and obtain medical advice rather than relying on appearance or the word clear.
A casual skin test cannot guarantee safety beside the eye and does not diagnose allergy. Published case reports describe allergic contact dermatitis from false-eyelash adhesive, including cyanoacrylate exposure. If a client reports a previous swollen eyelid or a known reaction to latex, acrylates or lash glue, do not improvise a same-day trial. Defer and recommend appropriate medical or dermatological guidance.
Prepare the eye and workstation
Wash hands, organise clean tools and use stable lighting. Do not apply temporary lashes when the eye is red, painful, unusually watery, producing discharge or when the lid skin is inflamed or broken. Do not move a worn lash between people. Shared mascara, contaminated adhesive and inadequately processed tools increase avoidable contamination risk.
Finish shadow and most of the liner before the band. Comb natural lashes and, if suitable, curl them before adhesive—never clamp a newly glued band. A small amount of mascara may integrate colour and direction when the product and brief require it; a heavy layer makes removal harder and reduces any permitted reuse. Review the wider process in makeup hygiene for brushes, sponges and workstations.
Apply a strip lash step by step
Place the band, not the fibre tips
Centre, outer end, inner end, then open-eye review
Centre
Reference near natural roots
Outer
Follow the planned direction
Inner
Keep the tear duct clear
Review
Comfort, corners and symmetry
Measure, trim and compare right and left before opening the adhesive.
Apply a continuous thin film of glue to the band and wait for the manufacturer’s stated time.
Ask the person to look slightly down while keeping the head stable rather than squeezing the eye shut.
Approach from above and place the centre close to the natural lash roots, never on the inner wet rim.
Secure the outer end in the planned direction, then the inner end with room around the tear duct.
Press the band—not the fibre tips—with a clean applicator. Do not pinch lid skin and lashes together.
Let the adhesive stabilise without continuous repositioning, then check corners, symmetry and comfort with eyes open.
Refine the join only after the glue is stable, using minimal compatible eyeliner where needed.
Stop immediately for burning, pain, swelling, marked watering or vision change. Do not cover the response with more makeup. If adhesive or a tool enters the eye, do not force the lids apart or put cosmetic solvent onto the ocular surface. Follow the product’s first-aid directions, rinse when indicated and obtain prompt medical or poison-centre advice.
Place temporary clusters without gaps or visible knots
Plan a simple progression using two or three lengths rather than copying a rigid map from another eye. Begin with a few clusters, align them with natural lash direction and use the smallest effective amount of temporary adhesive. Alternate eyes to compare height, spacing and density. Remove a crooked piece while adjustment is still safe instead of hiding it beneath more fibres.
Do not turn makeup clusters into homemade extensions by attaching them underneath the natural lashes or keeping them for days unless the exact product explicitly supports that placement and duration. An invisible-looking method is not automatically suitable when it brings adhesive close to mucosa or bonds several natural lashes together. Temporary product directions remain the boundary.
Adapt false lashes to eye shape without a universal map
Observe the eye axis, crease, visible lid, brow distance and natural lash direction. A gradual outer increase can elongate, but long downward fibres may make the outer corner appear lower. Central density can open the eye visually, while excessive height can hide a small lid or iris. Dry-fit and review with the eye open in the context of the whole face.
False lashes cannot rescue conflicting design. If liner, shadow and band travel in opposing directions, the result looks heavy or disconnected. Revisit whole-face corrective makeup and visagism and use makeup colour theory when eyes, brows, cheeks and lips need a shared hierarchy.
Troubleshoot lifted corners, visible glue and heavy results
Problem | Check first | Controlled response |
|---|---|---|
Inner end lifts | Band length, tear-duct distance, rigidity and glue timing | Remove, shorten and reapply away from the wet rim |
Band pricks or hurts | Rigid end, poor fit or incorrect placement | Remove immediately and change fit or lash style |
Gap above natural lashes | Outer-first placement without a centre reference | Start at centre and keep the band parallel to the roots |
Glue remains visible | Heavy line, early placement or premature liner | Use less and respect the stated open and set time |
Sides look different | Unequal trim, height or direction | Alternate sides and check frontally with eyes open |
Look feels heavy | Long fibre, thick band or excessive density | Choose an airier strip, half lash or fewer flares |
Remove false eyelashes without pulling
Wash hands and remove surrounding makeup with controlled movement.
Soften adhesive using the remover or method specified for that product, with the eye closed.
Support the skin and lift the band slowly from outer to inner end without tugging natural lashes.
If it resists, stop and soften again. Never compensate with force.
Remove lid residue with a product intended for the eye area, without scrubbing the wet rim.
Inspect the skin and natural lashes; persistent irritation needs healthcare assessment.
Never peel off a dry band or use acetone, nail-product remover or solvents not intended for eyes. Clinical reports of nail and false-lash glue exposure describe potentially significant skin and ocular symptoms. That does not mean every false-lash application is dangerous; it means intended use, product type and accident management cannot be exchanged.
Reuse only when the product and hygiene plan allow it
Reuse only if the manufacturer permits it, the same person wore the pair, the band remains intact and residue can be removed without deformation. Never pass a used lash between clients. Store an eligible pair in a clean labelled container, dry and protected from dust. Replace it when makeup, adhesive, odour, damage, contamination or fibre loss cannot be resolved.
Improvised disinfection may damage fibre and band without establishing safe processing. In professional work, treating lashes as personal or single-client material is often the clearest protocol. Record the product where traceability matters, particularly for bridal or photographic services, and do not promise a fixed number of wears independent of condition.
Plan false lashes for bridal, day, evening and photography
For bridal makeup, test both lash and adhesive before the event, review comfort over several hours and photograph with flash, video and profile. Do not introduce an unfamiliar glue on the service day. Day makeup needs weight and density that remain credible at conversation distance. Evening makeup can increase definition without covering the eye structure or replacing a stable complexion.
Integrate the decision with the professional bridal makeup protocol, professional day makeup and professional evening makeup. Practise the full sequence in the corrective eye makeup course or connect it to client service through the bridal makeup course.
A progressive false-lash practice plan
Remove, dry-fit and return five bands to their trays without glue, recording where each needs trimming.
On a dedicated surface, practise five uniform adhesive lines and observe the manufacturer’s stated working interval.
Apply one fine band on each side, alternating centre, outer and inner placement and recording the time.
Compare a full strip, half lash and a small number of flares within the same photographed design.
Photograph front, profile and open eye; review root distance, comfort, direction, weight and symmetry.
Practise removal by timing softening and observation, never the force used.
Change one variable per session: lash style, length, adhesive amount, tool or placement. If everything changes together, the source of improved comfort or stability remains unknown. Build wider technique through the complete makeup artist course and review the full online makeup course catalogue.
Frequently asked questions about false eyelashes
Do false eyelashes go on before or after eyeliner?
Usually shadow and the main line come first. Apply the strip afterwards and refine only when the adhesive is stable. Product and design may alter the sequence, but never cover mobile glue.
Which end of a strip lash should be trimmed?
Graduated strips are normally shortened from the outer end to preserve their shorter inner fibres. Check the specific design and remove only a small amount after a dry fit.
How long should the band be compared with the eye?
It should leave the tear duct free and not extend beyond the outer corner. The correct fit remains stable and comfortable while the eye is open and moving.
How much false-lash glue should I use?
Use a thin continuous layer on the band, following the product directions. Drops and heavy build-up increase slipping, visibility and unintended contact.
How long should glue dry before placement?
Follow the interval printed for that adhesive. Different systems reach their useful working state at different times, so one universal number is unreliable.
Is clear glue safer than black glue?
Colour does not establish safety or tolerance. Check intended use, ingredients, integrity, label and directions, and stop immediately if a reaction occurs.
Can temporary lashes be attached underneath natural lashes?
Only when the exact temporary product explicitly supports that placement and its distance from mucosa can be respected. Do not improvise under-lash placement with a traditional strip.
Should mascara go before or after false lashes?
A restrained amount before can align colour and direction; a light touch afterwards may integrate fibres if permitted. Heavy mascara complicates removal and any allowed reuse.
Why does the inner corner keep lifting?
The band may be too long, too close to the tear duct, too rigid or placed while adhesive is fluid. Remove it and correct fit; do not add glue beside the eye.
Is it normal to feel a false lash?
A new weight may be perceptible, but pricking, burning, pain or marked discomfort should not be ignored. Remove the product and assess the area.
Can I sleep in strip lashes?
Temporary makeup strips are normally removed after use. Follow the labelled wear period and never extend it in an attempt to imitate eyelash extensions.
How do I remove a strongly bonded strip?
Soften with the method specified for that glue, wait and repeat. Never pull, use nail solvent or force the eyelid.
How many times can false eyelashes be reused?
There is no universal count. Reuse only when permitted, on the same person and while the band is intact, cleanable and correctly stored. Replace it when condition is uncertain.
When should false eyelashes not be applied?
Do not proceed with inflamed eye or lid skin, suspected infection, pain, discharge, broken skin or an unresolved previous reaction. Defer and obtain healthcare advice when needed.
Sources, safety limits and next steps
Review the FDA guidance on eye cosmetic safety and latex in cosmetics, the published report of allergic contact dermatitis from false-eyelash adhesive and the case series on nail and false-lash glue exposures. This guide does not diagnose allergy, infection or ocular disease. Pain, marked swelling, discharge, light sensitivity, vision change, trauma or persistent symptoms require healthcare assessment.
Continue through the English makeup guide library. Editorial review: 5 September 2026. Temporary false-lash fitting remains separate from the eyelash extension guide library and its professional treatments. No temporary adhesive instruction should be transferred to extension or lash-lift systems.
Keep lashes from hiding the gradient
Before choosing band density and direction, review the completed professional smokey eye.
Adhesive and unexpected eye-area symptoms
Before changing glue or attempting reapplication after discomfort, read when to stop for a suspected cosmetic reaction.
Read adhesive area and precautions
Temporary lash adhesive requires exact product instructions; use the makeup label and warning guide.
Ask whether lashes are included
Compare service inclusions through the Italy makeup cost guide.
Check lash clearance from spectacle lenses
Before finalising length and curl, use the glasses-wearer checklist.
Complete the natural lash fringe before choosing a band
Separate the intents with the professional mascara guide.
Soften adhesive instead of pulling the strip
Use the eye-and-lip makeup-removal guide.
Keep lashes from hiding the optical crease
Coordinate density and direction with the cut crease design guide.